Losing water pressure is a major disruption.
Suddenly, you have no water for daily tasks, causing frustration and confusion.
What if the fix is as simple as flipping a switch?
Yes, many well pumps have a reset mechanism, but it's often not a simple red button.
It's typically a small lever on the pressure switch, which is a component of the pump's control system.
Some modern pumps, however, have no manual reset at all.

Understanding how your specific pump system works is crucial.
While some issues require a manual reset, others point to deeper problems with electrical components or the pump itself.
This guide will walk you through identifying your pump's reset function, performing basic troubleshooting, and knowing when a simple reset isn't enough.
We'll explore everything from traditional manual resets to the advanced electronic controls found in today's high-efficiency systems.
First Steps: Basic Troubleshooting When You Have No Water
Your water suddenly stops, and panic sets in.
You imagine costly repairs and days without water.
But often, the solution is simple and takes only a few minutes to find.
Before assuming your pump is broken, always start with the most common culprits: the power supply and basic system checks.
A tripped circuit breaker is responsible for a surprising number of "broken" pumps.
Many well pump problems are not with the pump at all.
They are related to the electrical or plumbing systems that support it.
By following a logical troubleshooting sequence, you can quickly rule out simple issues.
This saves you time and prevents you from calling a professional for a problem you could solve yourself.
A systematic check is the fastest way to restore your water or confirm that you need expert help.
Initial Electrical Checks
Your well pump is completely dependent on electricity.
Therefore, your first diagnostic step should always be to confirm it has power.
Start at your home's main circuit breaker panel.
Find the breaker labeled "well," "pump," or a similar term.
If the breaker is in the middle or "tripped" position, it has cut power to the pump.
To reset it, first flip it completely to the "off" position.
Wait for about 10-15 seconds.
Then, push it firmly back to the "on" position.
If the breaker trips again immediately, do not reset it again.
This indicates a serious electrical fault, such as a short circuit in the pump's motor or wiring.
Repeatedly resetting it poses a significant fire hazard and could cause over 50% more damage to the motor windings.
Older homes may have a fuse box instead of a breaker panel.
In this case, check for a blown fuse, which you can identify by a broken wire filament inside the glass.
Always replace a blown fuse with a new one of the exact same amperage.
Finally, locate your well's shut-off switch.
This is often a separate switch in a box near your pressure tank or at the wellhead.
Ensure it is in the "on" position, as it can be knocked off accidentally.
Checking for Simple System Issues
If the electrical checks don't reveal a problem, the issue may lie within the plumbing system.
A clogged sediment filter is a common and often overlooked cause of water stoppage.
These filters remove sand and debris, but they can become 100% blocked over time.
If the filter housing looks dirty or you notice a significant pressure drop, try bypassing, cleaning, or replacing the filter cartridge.
Water treatment systems, like water softeners or iron filters, can also cause a blockage.
Most of these systems have a bypass valve.
Engage the bypass to see if water flow is restored to your home.
If it is, the problem is with your treatment unit, not the well pump.
During winter, frozen pipes are a major concern.
While the well itself is too deep to freeze, the pipe connecting the well to your house can freeze if it's not buried deep enough or properly insulated.
Check any exposed sections of pipe for ice.
A final, simple test is to check every faucet in your home.
If only one faucet or a single bathroom has no water, the problem is likely localized to that specific plumbing line, not your entire well system.
| Quick Diagnosis Checklist | Potential Cause | Action to Take |
|---|---|---|
| No Water Anywhere | Power Outage | Check circuit breaker, fuses, and shut-off switch. |
| Pump Not Running | Tripped Breaker | Reset breaker once. If it trips again, call a professional. |
| Low Water Pressure | Clogged Filter | Clean or replace the sediment filter. |
| Water Stops After Bypass | Treatment System Issue | Service your water softener or iron filter. |
| No Water in Winter | Frozen Pipes | Inspect and thaw exposed plumbing lines. |
Locating and Using a Manual Reset Lever
You've confirmed the power is on, but the pump still won't start.
This can be frustrating, especially when you hear no sound from the system.
The issue might be a safety feature that needs a manual override.
Many pumps are protected by a low-water cutoff pressure switch, which has a small manual reset lever.
This safety device is designed to prevent your pump from running dry and burning out.
This manual reset process is a common fix after a power outage or if the well's water level has temporarily dropped.
Knowing how to perform this sequence can quickly restore your water without needing a service call.
However, it's important to understand that this is a specific procedure for a specific type of switch.
Not all pumps have this feature, especially newer models with more sophisticated electronic controls.
Step-by-Step Guide to Resetting a Low Water Cut-Off Switch
The reset procedure is straightforward but must be done correctly.
This process applies to pumps equipped with a standard low-water cutoff pressure switch.
-
Locate the Pressure Switch: Find the small grey box, typically about 3.5" x 2.5" in size. It is usually mounted on the piping near your pressure tank.
-
Find the Reset Lever: On the side of the switch, you will see a small, silver-colored metal lever, approximately 1 inch long. This is the manual override.
-
Identify the Positions: The side of the switch is labeled with "AUTO," "START," and "OFF." Under normal operation, the lever should be in the "AUTO" (down) position.
-
Check the Pressure Gauge: Find the round pressure gauge nearby. If the system has lost pressure, it should read at or near zero PSI.
-
Perform the Reset: Move the reset lever up to the "START" position and hold it there. You should hear the pump kick on and the sound of water filling the pressure tank.
-
Hold and Monitor: Continue holding the lever in the "START" position. Watch the pressure gauge. Hold the lever until the pressure builds to over 40 PSI. This can take anywhere from 30 seconds to a few minutes.
-
Return to AUTO: Once the gauge reads above 40 PSI, release the lever. It should spring back to the "AUTO" position on its own. The pump should now continue to run automatically.
-
Confirm Operation: The pump will run until the pressure reaches the cut-out setting, which is usually between 50 and 60 PSI, and then it will shut off. Your system is now reset.
Understanding the Components
To perform the reset confidently, it helps to know what each part does.
-
Pressure Switch: This is the brain of the operation. It senses the water pressure in the tank and tells the pump when to turn on (at the cut-in pressure, e.g., 40 PSI) and when to turn off (at the cut-out pressure, e.g., 60 PSI).
-
Reset Lever: This is your manual override. It forces the electrical contacts inside the switch to close, sending power to the pump even when the pressure is below the normal cut-in setting.
-
Low Water Cut-Off Function: The switch's primary safety role is to shut the pump off if it runs for too long without building pressure. This event suggests the well is out of water, and running a pump dry can destroy it in minutes. The reset is required after such a protective shutdown.
If the pump fails to start or build pressure while holding the lever, it means there's another problem.
This could be a lack of water in the well, a major leak, or a failure in the pump or motor itself.
Do not force the system.
If one reset attempt fails, it is time to investigate deeper or call a professional.
| Component | Function | What to Look For |
|---|---|---|
| Pressure Switch | Controls pump based on pressure | Small grey box on the piping. |
| Reset Lever | Manually starts the pump | Small 1" silver lever on the side of the switch. |
| Pressure Gauge | Displays system water pressure | Round dial, should read 0 PSI before reset. |
| Switch Labels | Indicate lever positions | "AUTO" (normal), "START" (manual override). |
When the Problem Isn't a Simple Reset
You tried the reset lever, but the pump won't start or trips the breaker again.
This is a clear sign that the issue is more complex than a simple pressure loss.
Continuing to force it could cause more damage.
If a manual reset fails, the problem likely lies within the electrical control components or the pump motor itself.
A faulty capacitor, for instance, is the culprit in an estimated 90% of submersible pump failures.
Diagnosing these deeper issues requires a closer inspection of the system's electrical heart: the pressure switch and the control box.
While some visual checks are straightforward, working with these components involves high voltage and requires caution.
Always turn off all power at the circuit breaker before opening any covers.
Understanding these components will help you identify the problem and decide if it's a DIY fix or a job for an expert.
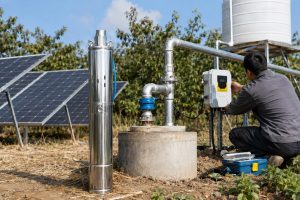
The Role of the Pressure Switch and Control Box
The pressure switch and control box work together to operate your pump.
A failure in either one will leave you without water.
With the power OFF, you can perform a visual inspection.
-
Inspecting the Pressure Switch: Carefully remove the cover of the pressure switch. Look at the electrical contacts. If they appear burned, pitted, or severely corroded, the switch cannot make a clean electrical connection. Sometimes, tapping the tube below the switch can jiggle burned contacts enough to briefly start the pump, confirming the switch is bad. Also, check the small tube or nipple that connects the switch to the water pipe. If this tube becomes clogged with sediment, the switch can't sense the pressure correctly and will fail to operate.
-
Checking the Control Box: The control box is a separate unit that houses the starting components for most submersible pumps. Open the box and look for obvious signs of failure. The most common is a bad capacitor. A healthy capacitor is a cylinder with a flat top. A failed capacitor will often be bulging, leaking an oily substance, or show burn marks. This accounts for 9 out of 10 pump failures and is a relatively inexpensive part to replace for a professional. Also, look for any melted wire insulation or dark scorch marks, which indicate severe overheating and a definite need for professional service.
Diagnosing Other Common Failures
If the electrical controls appear fine, other mechanical issues could be the cause.
-
Waterlogged Pressure Tank: A pump that cycles on and off very rapidly (every few seconds) often points to a waterlogged pressure tank. The tank has an internal air bladder that maintains pressure. To test it, press the air valve on top of the tank (it looks like a tire valve). If water sprays out instead of air, the bladder has ruptured. The tank has lost its air cushion and needs to be replaced.
-
Faulty Check Valve: If your pump runs for a few minutes, shuts off, then kicks back on again a minute later without any water being used, you may have a faulty check valve. This valve prevents water from flowing back down into the well after the pump shuts off. If it fails, the pressure drops, causing the pump to cycle constantly to maintain pressure.
| Symptom | Common Electrical Cause | Recommended Action (Power Off) |
|---|---|---|
| Pump won't start | Burned contacts in pressure switch | Visually inspect contacts; replace switch if pitted/burned. |
| Pump hums, won't start | Failed start capacitor in control box | Visually inspect capacitor for bulging or leaking; replace if faulty. |
| Breaker trips immediately | Short circuit in wiring or motor | Look for melted wires or scorch marks; call a professional immediately. |
| Pump won't shut off | Clogged sensor tube on pressure switch | Disconnect and clear the tube of any sediment or mineral buildup. |
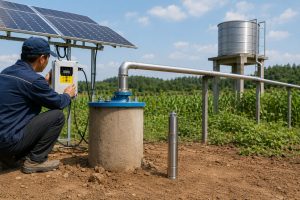
Modern Pumps: Beyond the Manual Reset Button
You're looking for a reset lever but can't find one on your new pump system.
This isn't a defect; it's a sign of technological evolution.
Relying on old mechanical switches is becoming a thing of the past.
Modern solar and variable frequency pumps often use sophisticated electronic controllers instead of manual reset switches.
These intelligent systems offer automatic fault protection, higher efficiency, and greater reliability, making manual intervention obsolete.
These advanced systems represent a significant leap forward from traditional pump controls.
They don't just turn the pump on and off; they optimize its performance, protect it from damage, and provide detailed diagnostics.
Understanding this technology is key for anyone involved in the distribution or installation of modern water systems.
It’s a shift from purely mechanical solutions to smart, integrated electronic systems that offer superior performance and a longer lifespan.
The Power of Brushless DC (BLDC) Motors
At the core of many modern high-efficiency pumps is the Brushless DC (BLDC) motor.
Unlike traditional AC motors, these motors use permanent magnets and electronic commutation, leading to dramatic performance gains.
A key advantage is their efficiency, which often exceeds 90%.
This is a substantial improvement over the 60-70% efficiency typical of older AC motors.
This high efficiency is crucial for solar-powered applications, as it means the pump can produce more water with fewer solar panels, reducing the initial system cost by up to 25%.
The design of BLDC motors also makes them more compact and durable.
For example, a modern BLDC motor can be 47% smaller and 39% lighter than a traditional motor of equivalent power.
They generate less heat, run quieter, and have a longer service life because there are no brushes to wear out.
This technology is the driving force behind the next generation of solar deep-well pumps.
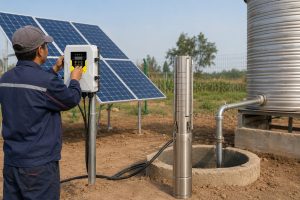
Intelligent Controllers: The New "Reset Button"
Instead of a simple pressure switch, modern pumps are paired with an intelligent controller.
This controller acts as the brain of the entire system.
-
MPPT Functionality: Most solar pump controllers include Maximum Power Point Tracking (MPPT). This technology constantly adjusts the electrical load to maximize the power drawn from the solar panels, increasing water output by as much as 30% over the course of a day.
-
Automatic Protection: The controller provides comprehensive protection that makes a manual reset unnecessary. It automatically shuts down the pump for conditions like a dry well, low voltage, or motor overload. Once the fault condition clears (e.g., the water level in the well recovers), the controller automatically restarts the pump.
-
Hybrid Power Solutions: Advanced controllers can manage multiple power sources. For example, AC/DC hybrid controllers can draw power from solar panels during the day. When sunlight is insufficient, they can automatically blend in or switch entirely to an AC power source like the grid or a generator. This ensures a reliable 24/7 water supply.
How Different Pump Types Leverage Modern Controls
The combination of a BLDC motor and an intelligent controller allows for a diverse portfolio of specialized pumps.
-
Solar Screw Pumps: These are ideal for deep wells requiring high head but low flow. The high torque of a BLDC motor is perfect for driving the screw mechanism, providing reliable water for homes and livestock even from great depths.
-
Solar Plastic Impeller Pumps: For applications needing high flow rates, like farm irrigation, multi-stage centrifugal pumps with wear-resistant plastic impellers are used. The controller's soft-start feature reduces mechanical stress on the impellers, extending their life.
-
Solar Stainless Steel Impeller Pumps: In areas with corrosive water, pumps with stainless steel impellers offer superior durability. The precise speed control afforded by the BLDC motor and controller ensures the pump operates at its most efficient point, minimizing wear and maximizing lifespan.
| Feature | Traditional AC Pump System | Modern BLDC Pump System |
|---|---|---|
| Motor Efficiency | 60-70% | >90% |
| Reset Mechanism | Manual lever on pressure switch | Automatic reset via electronic controller |
| Protection | Low water cutoff (mechanical) | Dry run, overload, voltage protection (electronic) |
| Solar Optimization | None | MPPT (up to 30% more power) |
| Power Source | Single (AC Grid) | Hybrid (Solar + AC/Generator) |
| Lifespan | Shorter (brush wear, heat) | Longer (brushless, less heat) |
Repair or Replace? Making the Right Decision
Your pump is old and failing again.
You're facing another repair bill and wondering if it's worth it.
Pouring money into an aging system feels like a losing battle.
Deciding whether to repair or replace your well pump depends on its age, the cost of the repair, and the frequency of breakdowns.
A strategic replacement can be a better long-term investment than repeated, costly repairs.
Making the right choice can save you money, improve your water system's reliability, and even lower your energy bills.
An aging pump is not just unreliable; it's also inefficient.
While a simple repair might seem cheaper upfront, a full replacement with a modern, high-efficiency unit often provides better value over the pump's lifespan.
This section will help you analyze the key factors to make an informed and cost-effective decision.
What is the Typical Lifespan of a Well Pump?
The lifespan of a well pump is not infinite.
Knowing the expected service life of your model is critical when deciding between repair and replacement.
-
Submersible Pumps: These pumps are located down in the well, protected from the elements. A standard submersible pump typically lasts between 8 and 15 years. However, high-quality models installed in favorable conditions can last 15 to 25 years. Most homeowners can realistically expect a lifespan in the 12 to 18-year range.
-
Jet Pumps: These pumps are located above ground, usually in a basement or well house. Their exposure to environmental factors and greater mechanical complexity gives them a shorter lifespan, typically around 8 to 10 years.
Several factors heavily influence longevity.
Water with high levels of sand, silt, or minerals will wear out a pump's components much faster.
An improperly sized pump—either too small for the demand or too large for the well's yield—will also fail prematurely.
Cost-Benefit Analysis: Repair vs. Replace
Use these guidelines to determine the most financially sound option.
A good rule of thumb is the "50% rule."
If a repair costs 50% or more of the price of a new pump, replacement is almost always the better choice.
-
Consider the Pump's Age: If your submersible pump is over 10 years old (or your jet pump is over 8), replacement often makes more sense than a major repair. Investing a large sum in a pump that is already near the end of its expected life is a poor financial decision.
-
Analyze the Repair Cost: Minor repairs like replacing a pressure switch (under $100) or a capacitor (under $200) are cost-effective fixes. However, if the pump motor has failed or the pump itself needs to be pulled from a deep well for service, the labor and parts costs can easily exceed $1,000. This often approaches the cost of a full replacement.
-
Factor in Frequency of Breakdowns: If this is the first problem you've had in many years, a repair is logical. If you are experiencing recurring issues every year, the pump has become unreliable. The cumulative cost of these frequent repairs, along with the inconvenience of water outages, makes replacement a much more attractive option.
The Value of Upgrading to High-Efficiency Systems
When considering replacement, don't just think about a direct one-for-one swap.
Think about an upgrade.
Modern high-efficiency pumps, particularly those with BLDC motors, can significantly reduce electricity consumption.
While the initial cost may be 15-20% higher than a standard model, the energy savings can pay for that difference within a few years.
These systems also offer enhanced reliability and smart features like dry-run protection, which can prevent the most common cause of catastrophic pump failure.
An upgrade is not just a replacement; it's an investment in efficiency, reliability, and peace of mind.
| Factor | Repair is a Good Option | Replace is a Better Option |
|---|---|---|
| Pump Age | Less than 8-10 years old. | Over 10-15 years old. |
| Repair Cost | Less than 30% of replacement cost. | More than 50% of replacement cost. |
| Breakdown Frequency | First significant issue. | Recurring problems every 1-2 years. |
| Problem Type | Minor electrical (pressure switch, capacitor). | Major mechanical (failed motor, seized pump). |
| Efficiency | N/A | Opportunity to upgrade to a high-efficiency model for long-term savings. |
Conclusion
A water pump's "reset button" can be a simple lever or a complex electronic function.
Understanding your system is key to solving problems quickly, from basic resets to diagnosing deeper electrical faults.
FAQs
Why does my well pump breaker keep tripping?
A tripping breaker signals a serious electrical issue like a shorted motor or damaged wiring.
Do not repeatedly reset it; this is a fire hazard and requires professional diagnosis immediately.
How much does it cost to replace a well pump?
Replacement costs typically range from $975 to $2,750.
The price depends on the pump type, well depth, and labor, with deeper wells costing more.
Can I have water from my well without electricity?
No, most residential well pumps require electricity.
During a power outage, you will not have water unless you use a backup power source like a generator or a solar-plus-battery system.
How do I reset my water well pump?
For many pumps, locate the pressure switch near the tank and hold the small reset lever up until pressure builds past 40 PSI, then release it to the "AUTO" position.
What are the signs of a failing well pump?
Signs include fluctuating water pressure, sputtering faucets (air in lines), dirty or sandy water, strange noises from the pump, and a pump that runs constantly or cycles too frequently.
Why is my well pump constantly running?
A constantly running pump usually indicates a leak somewhere in your plumbing system, a faulty check valve, or a malfunctioning pressure switch that is not telling the pump to shut off.
What is a waterlogged pressure tank?
A waterlogged tank has a failed internal air bladder, causing the pump to cycle rapidly.
You can test for this by pressing the air valve; if water comes out, the tank is waterlogged.
Why is my pump pulling up air?
This often means the water level in your well has dropped below the pump's intake.
It can also be caused by a crack or leak in the drop pipe leading up from the pump.