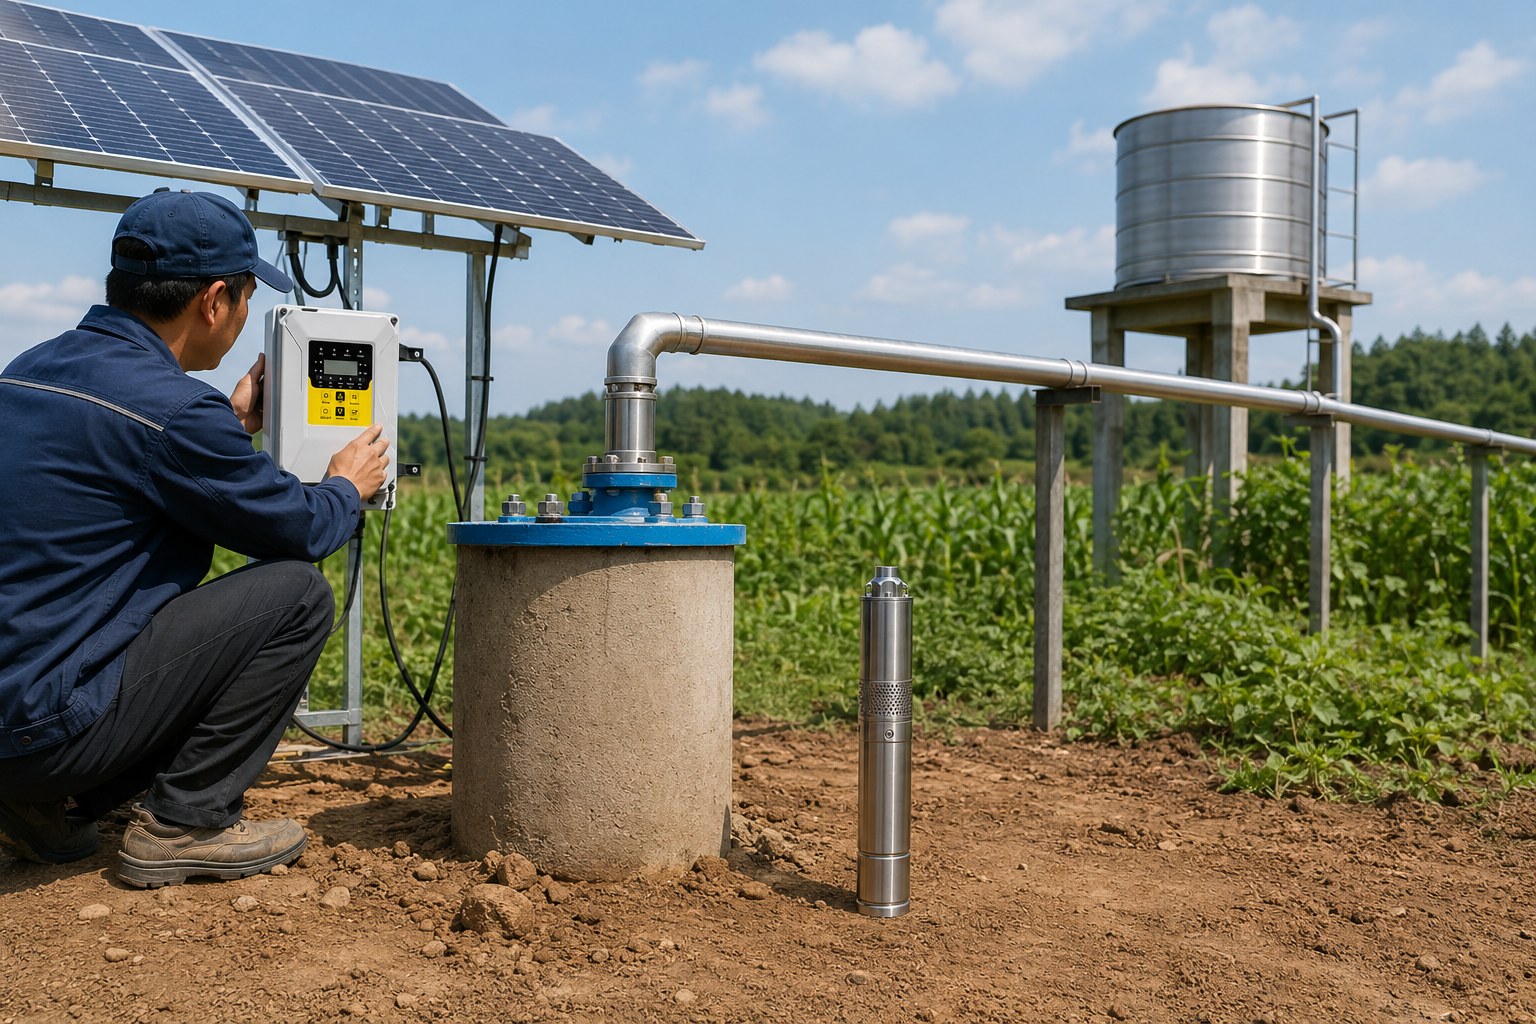
Struggling with an unreliable water source?
The right pump setup provides consistent, clean water, but choosing and installing it can be complex.
This guide simplifies pump selection and installation for you.
We cover everything from choosing the right solar pump for your needs to detailed, step-by-step installation instructions for well and sump pumps.
This ensures you have a reliable water system.
The Core Decision: Solar Screw vs. Impeller Pumps?
Your farm or home needs water, but which solar pump is the right investment?
Making the wrong choice leads to poor performance and wasted money.
Choosing the right solar deep-well pump involves matching the pump's design to your well's depth, your water volume needs, and water quality.
This ensures maximum efficiency and longevity for your system.
Selecting the ideal solar pump is the most critical first step.
The global demand for off-grid water solutions has led to highly specialized pump designs.
Your choice directly impacts daily water availability, long-term costs, and system reliability.
Let's break down the three most popular solar pump types to find your perfect match.
Solar Screw Pump: High Head Specialist
The solar screw pump is a progressing cavity pump.
It uses a single helical stainless steel screw (rotor) that rotates inside a rubber stator.
This action creates sealed cavities that move water upward.
This design is perfect for low-flow, high-head applications.
It excels at lifting water from very deep wells where centrifugal pumps may struggle.
Its ability to handle sandy water makes it a durable choice for challenging well conditions, particularly in regions like Africa and Latin America with developing water infrastructure.
- Best For: Deep wells (over 100 meters), domestic water, and livestock watering.
- Sand Resistance: Excellent. Can handle water with up to 3% sand content by volume without significant wear.
- Limitations: The flow rate is inherently lower, typically ranging from 1 to 10 gallons per minute (GPM), making it unsuitable for large-scale irrigation.
Solar Plastic Impeller Pump: High Flow Workhorse
This pump is a multi-stage centrifugal pump.
It uses a series of plastic impellers to build pressure and move a high volume of water.
It's the go-to solution for high-flow, medium-head applications.
Think farm irrigation, filling large livestock troughs, or residential water systems with high demand.
The use of wear-resistant polyoxymethylene (POM) plastic for the impellers provides excellent durability against fine sand.
This makes it a cost-effective and lightweight choice, popular in the Americas and Africa for agricultural use.
- Best For: Farm irrigation, pasture water supply, and high-demand homes.
- Flow Rate: Can achieve flow rates from 10 to over 50 GPM.
- Limitations: While sand-resistant, it is less suited for highly corrosive water or extreme well depths where higher pressures are required.
Solar Stainless Steel Impeller Pump: The Premium Choice
This model represents the top tier in durability and performance.
Both the pump body and the impellers are constructed from SS304 or SS316 stainless steel.
This provides superior resistance to corrosion from acidic, alkaline, or saline water.
It is designed for high-flow and medium-to-high head applications where water quality is a concern.
This pump is ideal for coastal regions, areas with alkaline soil like Australia, and high-end residential or commercial properties demanding the longest possible service life and reliability.
- Best For: Corrosive water conditions, high-end homes, and critical water supply systems.
- Durability: Offers over 50% more corrosion resistance than standard pumps, with an expected lifespan up to 30% longer in harsh environments.
- Limitations: The higher material cost and increased weight make it a premium investment.
| Pump Type | Flow Rate | Head/Pressure | Sand Resistance | Best Application | Relative Cost |
|---|---|---|---|---|---|
| Solar Screw Pump | Low (1-10 GPM) | Very High | Excellent | Deep wells, domestic use | $$ |
| Plastic Impeller | High (10-50+ GPM) | Medium | Good (fine sand) | Farm irrigation, pasture | $ |
| SS Impeller Pump | High (10-50+ GPM) | Medium-High | Good | Corrosive water, premium homes | $$$ |
The Engine Room: Understanding BLDC Motor Technology
A great pump is useless without an efficient motor.
Older pump motors are inefficient, noisy, and require frequent maintenance, driving up your energy and repair costs.
Modern pumps use Brushless DC (BLDC) permanent magnet motors with efficiencies exceeding 90%.
These motors provide more power in a smaller, lighter package, drastically reducing solar panel requirements and simplifying installation.
The motor is the heart of your solar pump system.
Its efficiency determines how much water you get for every watt of solar power.
The transition to BLDC permanent magnet motor technology has revolutionized the industry.
These motors are not just an upgrade; they are a fundamental shift in pump design, offering unparalleled performance and value.
Let's explore why this technology is so important.
The Power of Permanent Magnets
Traditional DC motors use brushes to transmit power, which wear out and create energy losses.
BLDC motors are brushless.
They use powerful permanent magnets on the rotor, typically made of 40SH neodymium iron boron.
An electronic controller energizes the stator windings in a sequence that creates a rotating magnetic field.
This field pulls the rotor along with it.
This design eliminates the friction and energy loss of brushes, leading to a massive jump in efficiency.
- Efficiency: BLDC motors consistently achieve over 90% electrical-to-mechanical energy conversion, compared to 60-75% for older brushed motors.
- Power & Torque: They deliver higher torque across a wider range of speeds, allowing the pump to start reliably even in low sunlight.
Compact Design, Big Impact
The high power density of BLDC motors allows for a much smaller and lighter design.
A typical BLDC pump motor can be up to 47% smaller and 39% lighter than a traditional motor with the same power output.
This has significant practical benefits.
- Easier Installation: A lighter pump is easier and safer to lower into a deep well, often reducing the need for heavy machinery.
- Lower Shipping Costs: The reduced size and weight translate directly to lower shipping and handling costs for distributors.
- Reduced Material Usage: A more compact design is also a more sustainable design, using fewer raw materials.
The AC/DC Hybrid Advantage
The most advanced systems integrate intelligent controllers that can manage multiple power sources.
This is a game-changer for ensuring a 24/7 water supply.
When sunlight is abundant, the system runs exclusively on solar power.
If clouds appear or during nighttime, the controller can automatically switch to or blend in AC grid power or a generator.
This hybrid function prioritizes solar energy first, only drawing from the AC source when needed.
This maximizes savings while guaranteeing you are never without water.
Essential Tools and Materials for Your Pump Installation
You're ready to install, but a missing tool can halt the entire project.
Scrambling for parts wastes time and can lead to improper installation, causing leaks or electrical faults down the line.
Gathering all necessary tools and materials before you start is crucial.
A complete checklist ensures a smooth, safe, and successful installation without frustrating delays or return trips to the hardware store.
A successful pump installation relies on more than just the pump itself.
Having the right equipment on hand is non-negotiable.
It ensures every connection is tight, every wire is secure, and the entire system operates safely and efficiently.
Before you begin, lay out and inspect every item on this list.
Core Tools
You will need a basic set of hand tools for assembly and wiring.
These tools will handle the mechanical and electrical connections.
- Wire Stripper/Crimper: Essential for making secure, waterproof wire splices.
- Screwdrivers: You will need both flat-head and Phillips-head screwdrivers for terminal connections in the control box and other components.
- Adjustable Wrenches (x2): Two wrenches are needed to tighten pipe fittings without stressing the pump housing. One holds the pump or fitting steady while the other tightens.
- Heat Gun or Torch: Required to shrink the waterproof heat-shrink sleeves over your wire splices. A lighter can work, but a heat gun provides more even heat and is safer.
- Hacksaw or PVC Cutter: For cutting your drop pipe (poly pipe or PVC) to the correct length.
- Utility Knife: Useful for cleaning up the cut edges of plastic pipe (deburring) to ensure a perfect seal.
Essential Materials
These materials connect your pump to the surface and are determined by your well's depth.
Using high-quality materials is critical for a long-lasting installation.
- Submersible Pump Wire: Use 10-3+G (3 conductors plus a ground) wire for depths up to 550 feet. For deeper installations, use heavier 8-3+G wire to reduce voltage drop, which can lower pump performance by 3-5%.
- Drop Pipe: This carries the water to the surface. 1-inch or 1.25-inch 160 psi-rated poly pipe is the most common choice for its flexibility and ease of use in wells up to 300 feet deep.
- Safety Rope: A polypropylene rope is essential. It does not decay in water and bears the pump's weight, reducing stress on the pipe and wire. It should be rated for at least three times the weight of the pump, pipe, and water column.
- Teflon Tape: Wrap this around all threaded pipe connections to ensure a watertight, leak-proof seal.
- Waterproof Electrical Tape: Use this to secure the pump wire to the drop pipe every 10-20 feet, keeping the "umbilical cord" neat and preventing snags.
Wellhead and Safety Components
These parts are installed at the top of the well to seal it and protect the system.
- Well Seal or Pitless Adapter: In non-freezing climates, a well seal provides a sanitary cap. In freezing climates, a pitless adapter is essential. It creates a connection below the frost line to prevent pipes from freezing and bursting.
- Torque Arrestors: These rubber devices clamp onto the drop pipe. They brace against the well casing to prevent the pump from twisting violently on startup, which can damage the wire or pipe over time.
How to DIY Install a Submersible Well Pump in 5 Steps
You have your pump, but the thought of installing it deep in a well is daunting.
Mistakes can be costly, potentially damaging the pump or contaminating your well, leading to expensive professional repairs.
By following a clear, step-by-step process, you can confidently install your submersible well pump yourself.
This saves you thousands on installation costs and gives you control over your water system.
Installing a submersible pump used to be a job reserved for expensive contractors.
Thanks to modern materials like flexible poly pipe and all-in-one kits, it's now a manageable DIY project.
This process involves plumbing, wiring, and careful placement.
Following these five steps ensures your pump is installed correctly for years of reliable service.
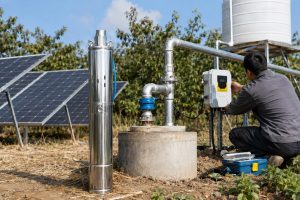
Step 1: Connect Plumbing and Pipe
This step creates the pathway for water to leave the pump.
Start by threading a male adapter into the pump's female threaded outlet.
Use Teflon tape for a secure seal.
Next, attach an external check valve to this adapter.
A check valve is a one-way gate that prevents water in the pipe from flowing back down into the well and causing the pump to cycle unnecessarily.
Now, attach a barbed hose adapter to the check valve.
Heat the end of your poly pipe slightly with a heat gun to make it more pliable.
Push the softened pipe firmly over the barbed fitting.
Secure it with two stainless steel hose clamps for a connection that won't fail under pressure.
Finally, clamp one or two torque arrestors onto the riser pipe, starting about 3-4 feet above the pump.
Step 2: Make the Wire Splice
Your pump comes with a short wire pigtail, usually about 6 feet long.
You need to extend this wire to reach the control box above ground.
This connection must be 100% waterproof to last for decades underwater.
Use a wire stripper to expose about a half-inch of copper on each of the four wires (3 hot, 1 ground) from both the pump and your extension cable.
Slide the heat-shrink tubing onto the wire first.
Then, insert one wire from the pump and one from the extension cable into a crimp connector.
Crimp it tightly.
Tug on the wires to ensure the connection is solid.
Repeat for all four wires, matching the colors.
Once all wires are crimped, slide the heat-shrink sleeves over the connections.
Use a heat gun to shrink them until they seal tightly, and you see a small amount of sealant ooze from the ends.
Step 3: Attach the Safety Rope and Bundle
The safety rope is your primary means of supporting and retrieving the pump.
Never rely on the pipe or wire alone.
Tie the polypropylene rope securely to the stainless steel eyelet on top of the pump using a reliable knot like a bowline.
Now, lay the drop pipe, the electrical wire, and the safety rope out straight on the ground.
Starting a few feet from the pump, begin taping them together into a neat bundle.
Use good quality waterproof electrical tape every 10 to 20 feet.
This prevents the lines from tangling or snagging on the well casing as you lower the pump.
Step 4: Lower the Pump Down the Well
This is the most critical physical step.
It often requires two people: one to feed the pump assembly into the well and another to manage the slack.
Carefully guide the pump into the top of the well casing.
Lower the assembly hand-over-hand, using the safety rope to bear the weight.
Do not let the pipe or wire take the strain.
Lower it slowly to avoid catching on any imperfections inside the casing.
Once you reach your desired depth (typically 10-20 feet off the bottom of the well), you can secure the top.
If using a well seal, thread the pipe, wire, and rope through their respective openings and connect the plumbing.
If using a pitless adapter, you will engage the adapter at the frost line and then make your final connections above ground.
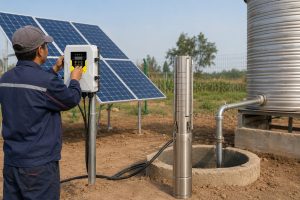
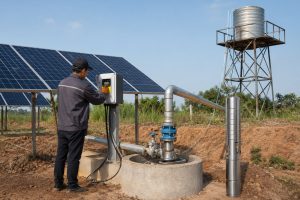
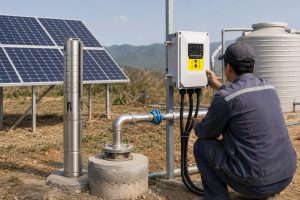
Step 5: Wire the Control Box and Pressure Switch
The final step is making the above-ground electrical connections.
The starter or control box is the brain of the system.
Mount the waterproof box on a post near the wellhead.
Connect the four wires coming from the well pump to the designated terminals inside the box (labeled "PUMP").
Next, run power from your main breaker panel to the control box.
If you are using a pressure tank to maintain household water pressure, you must install a pressure switch.
The pressure switch gets wired between the breaker panel and the control box.
It senses the pressure in the tank, turning the pump on when pressure is low and shutting it off when the tank is full.
This prevents the pump from running constantly, saving energy and extending its life.
Setting Up a Sump Pump for Basement Protection
A damp basement signals trouble, with potential for mold and property damage.
Ignoring it can lead to thousands in repairs and an unhealthy living environment.
A sump pump is your first line of defense, but installation seems complicated.
Installing a sump pump is a straightforward project you can complete in about an hour.
It actively protects your home's foundation and keeps your basement dry and healthy.
Unlike a well pump that supplies water, a sump pump removes it.
It's an essential appliance for any home with a basement in a region with high rainfall or a high water table.
Proper installation is key to its effectiveness.
This guide focuses on replacing an old unit or installing a new one in an existing sump pit.
Step 1: Preparation and Safety First
Safety is paramount when working with water and electricity.
Before you do anything else, unplug the old pump.
If there is standing water, remove it with a shop-vac.
Verify the electrical outlet is a GFCI (Ground Fault Circuit Interrupter) outlet for safety.
It should be on a dedicated circuit and at least 4 feet off the floor.
Never use an extension cord.
A cord can cause a voltage drop of 5-10%, which can overheat and damage the pump motor, creating a fire hazard.
It's also best practice to replace the check valve when you replace the pump, as they wear out and can fail.
Step 2: Remove the Old Pump and Clean the Pit
Start by loosening the clamps or unions on the check valve.
This will disconnect the pump from the main discharge pipe.
Have a bucket ready.
Lift the old pump out of the pit and place it directly into the bucket to catch any remaining water and grime.
With the pit empty, use a shop-vac to remove all water, mud, and debris.
The bottom of the pit must be a hard, level surface.
A sump pump should never sit directly on gravel or dirt, as debris can be sucked in and jam the impeller.
A flat brick or paver provides a perfect base.
The pit should be at least 18 inches in diameter and 22 inches deep to allow the float switch to move freely without getting stuck.
Step 3: Install the New Pump and Discharge Pipe
Begin by attaching a male threaded PVC adapter to the new PVC discharge pipe using PVC primer and cement.
Thread this assembly into the discharge port on your new pump.
Hand-tighten, then give it a final quarter-turn with a wrench.
Now, drill a 3/16-inch "weep hole" in the discharge pipe, about 2 inches above the pump outlet.
Drill it at a 45-degree downward angle.
This crucial hole prevents "air lock," a condition where trapped air keeps the pump from moving water, causing it to run dry and burn out.
Next, attach your new check valve to the existing upper discharge pipe.
Lower the pump into the pit and measure the length needed for the connecting pipe section.
Cut the pipe, deburr the edges with a utility knife for a clean seal, and glue the final adapters in place.
Connect the sections using the check valve's unions, hand-tightening only.
Step 4: Final Test and Securing
Before you cover the pit, secure the electrical cords.
Use zip ties to attach the pump's power cord and the float switch cord to the discharge pipe.
Ensure the float can move up and down without any obstruction from the cords.
Crucially, the highest zip tie must be below the level of the electrical outlet.
This creates a "drip loop," preventing any water that might travel down the cord from reaching the outlet.
Plug the pump cord into the float switch's piggyback plug, and then plug the float switch into the GFCI outlet.
Pour a few buckets of water into the pit to test the system.
The pump should turn on, empty the pit, and shut off.
Listen for the check valve to "thump" closed, indicating it's working.
Once satisfied, place a sturdy cover over the pit.
Conclusion
Proper pump setup requires choosing the right type for your needs and following a precise installation process.
This ensures a reliable, efficient, and long-lasting water system for your home or farm.
Frequently Asked Questions
How deep should a well pump be?
A well pump should be set at least 10-20 feet below the lowest seasonal water level, but always 10-20 feet above the bottom of the well to avoid sucking up sediment.
Can I use an extension cord for a sump pump?
No. Never use an extension cord for a sump pump. It can cause a voltage drop that damages the motor and creates a serious fire hazard.
What is the purpose of a check valve?
A check valve is a one-way valve that prevents water in the discharge pipe from flowing back into the well or pit when the pump shuts off.
How often should a well pump be replaced?
A quality submersible well pump typically lasts 8 to 15 years, depending on water quality, usage, and motor quality. Regular monitoring can help predict failure.
What is the difference between a 2-wire and 3-wire well pump?
A 2-wire pump has its starting components inside the motor, while a 3-wire pump uses an external control box. 3-wire pumps are easier to service.
Why is my sump pump running constantly?
Constant running can be caused by a stuck float switch, a faulty or missing check valve, or an undersized pump that can't keep up with incoming water.
What happens if a well pump is too big?
An oversized pump will cycle on and off too frequently, causing premature wear on the motor and pressure switch, and can stir up sediment in the well.
Is a pitless adapter necessary?
In climates where the ground freezes, a pitless adapter is essential. It allows the water line to exit the well casing below the frost line to prevent freezing.