Struggling with low water pressure that makes daily tasks chore?
You know the frustration of a weak shower or a slow-filling appliance.
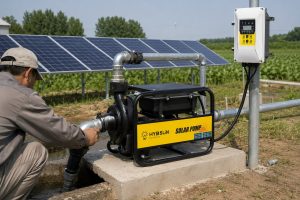
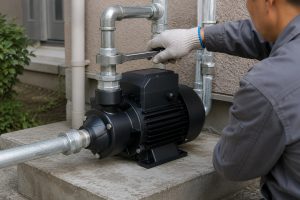
A water booster pump is the solution.
The best place to install a water booster pump is in a dry, accessible location near the main water supply line and a power source.
Ideally, the pump should draw water from a storage tank, not directly from the municipal line, to ensure consistent pressure and prevent pump damage.
Choosing the right spot for your booster pump is more than just finding available space.
It's a strategic decision that impacts the pump's performance, lifespan, and ease of maintenance.
A poor location can lead to noise, vibration, and premature failure, turning a helpful solution into a persistent problem.
This guide will walk you through every critical consideration, from selecting the perfect location to ensuring a safe and efficient installation that provides lasting results.
We'll break down the technical essentials and common pitfalls to help you or your customers achieve optimal water pressure without the headaches.
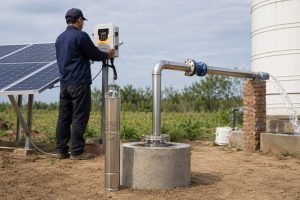
Selecting the Right Location: The First and Most Critical Step
Is a cramped, damp space causing installation headaches?
This common issue can lead to extended work, extra costs, and unhappy customers.
Choosing the wrong spot can increase installation time by up to two hours.
Select a dry, well-ventilated area near the main water line with a solid, level surface.
This spot must have enough space for future maintenance and be close to a grounded electrical outlet.
Proper placement prevents moisture damage, reduces noise, and ensures the pump's longevity and efficiency.
The location of a water booster pump is the foundation of a successful installation.
It dictates not only the pump's performance but also its operational lifespan and the safety of the entire system.
Ignoring these foundational principles can lead to a cascade of problems, from inefficient operation to costly repairs.
Let's explore the key factors in detail.
Environmental Conditions
The environment where the pump operates is paramount.
A pump installed in a damp or poorly ventilated area is at a 70% higher risk of premature failure due to corrosion and electrical faults.
Choose a location that is consistently dry and protected from the elements.
A basement, utility closet, or a covered outdoor area are excellent choices.
Ensure there is adequate ventilation to dissipate heat generated by the motor, which can extend motor life by up to 25%.
Accessibility for Maintenance
Every pump requires periodic inspection and service.
Placing a pump in a tight, hard-to-reach space is a common mistake that complicates future maintenance.
This can turn a simple 30-minute filter check into a multi-hour ordeal.
Ensure there is at least 2 feet of clear space around the unit.
This allows technicians to easily access service points, check connections, and perform repairs without needing to dismantle surrounding pipework, saving significant time and labor costs.
Structural and Acoustic Considerations
A booster pump generates vibrations during operation.
Installing it on an uneven or flimsy surface will amplify these vibrations, creating excessive noise and putting stress on the pump and its connections.
A solid, level concrete floor is the ideal mounting base.
Using a level mounting base can reduce operational noise by up to 50% and decrease wear on bearings and seals.
If the location is near living areas, consider using vibration-dampening pads to further minimize noise transmission.
| Location Factor | Best Practice | Why It Matters |
|---|---|---|
| Environment | Dry, well-ventilated, protected | Prevents corrosion, electrical shorts, and overheating. |
| Accessibility | 2 ft. clearance around the unit | Simplifies maintenance, reducing future service costs. |
| Surface | Solid, level concrete or secure base | Minimizes vibration and noise, extending pump lifespan. |
| Proximity | Close to water source and power | Reduces piping complexity and potential for pressure loss. |
Preparing for Installation: A Step-by-Step Checklist
Rushing into an installation without proper preparation?
This oversight can lead to missing parts and frustrating delays.
Failing to source the correct components beforehand can waste up to four hours of valuable time.
Before starting, gather all necessary tools, check the existing water pressure, and inspect all pipe fittings.
Shut off the main water supply and completely drain the lines to create a safe, dry work environment.
This preparation prevents leaks, ensures compatibility, and streamlines the entire installation process.
A methodical approach to preparation is the difference between a smooth, efficient installation and a chaotic, problem-filled one.
Each step in the preparation phase is designed to eliminate variables and prevent common setbacks.
Proper planning can reduce total installation time by as much as 30%.
Following a structured checklist ensures that every detail is accounted for before the first pipe is ever cut.
Step 1: Assess Your System's Needs
Before purchasing a pump, you must understand your system's current state.
Use a water pressure gauge on an outdoor tap to measure the existing pressure.
The ideal household pressure is between 40 and 60 PSI.
If your pressure is below 40 PSI, a booster pump is likely needed.
However, extremely low pressure (below 20 PSI) might indicate a leak or blockage that must be fixed first.
Sizing the pump correctly based on this data is crucial; an oversized pump can strain your plumbing, while an undersized one won't solve the problem.
Step 2: Gather Your Tools and Materials
Having every tool and component on hand before you begin is non-negotiable.
An incomplete toolkit is a primary cause of installation delays.
Create a checklist to ensure you have everything.
Essential Toolkit:
- Pipe wrenches (x2)
- Adjustable spanner
- Pipe cutter
- Teflon tape or thread sealant
- Pliers and screwdrivers
- Spirit level
- Safety gloves and eye protection
- Buckets and towels for residual water
Additionally, confirm you have the correct fittings, connectors, and any union couplings recommended by the pump manufacturer.
Step 3: Create a Safe Work Area
Safety is the top priority.
Begin by shutting off the main water supply valve, which is typically located near your water meter.
Once the supply is off, open faucets at the highest and lowest points of the house to drain all remaining water from the pipes.
This crucial step prevents unexpected water spills and ensures that you can make clean, dry connections.
Finally, inspect the existing pipes and fittings for any signs of corrosion or damage.
Replacing worn-out components, which can be a failure point under increased pressure, is far easier during the initial installation than as an emergency repair later.
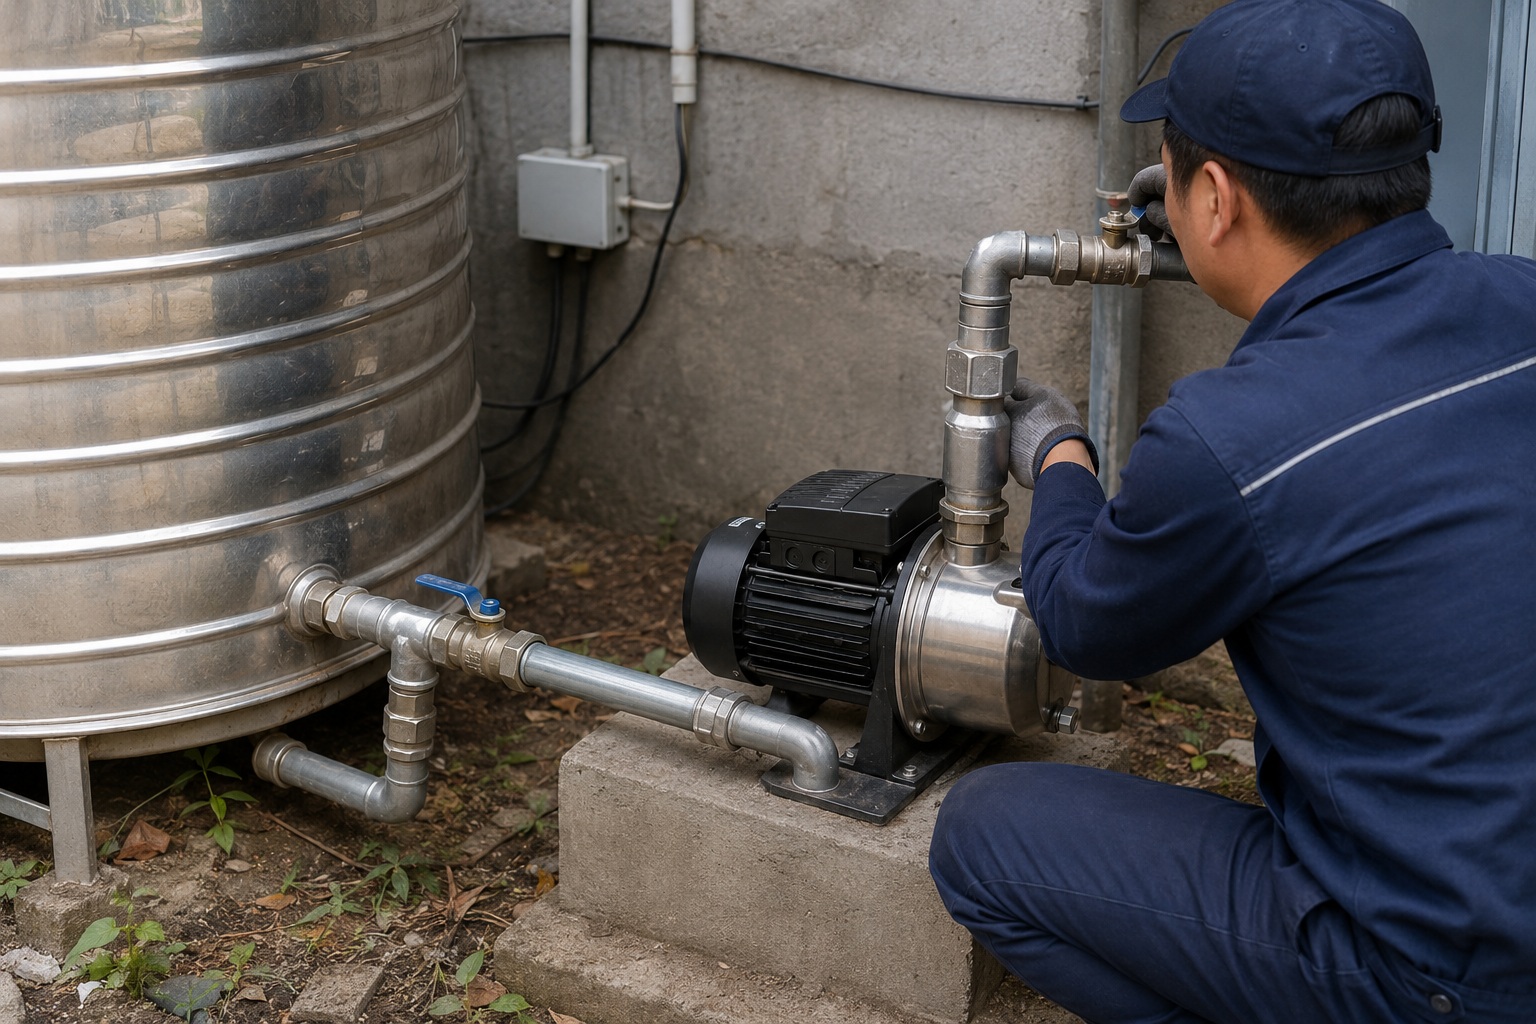
The Core of the Installation: Connecting the Pump Correctly
Are you connecting your pump directly to the city's water line?
This is a critical error that can lead to severe pump damage.
Direct connection can cause cavitation, noise, and premature failure, voiding your warranty.
A booster pump must always draw water from a dedicated storage tank, never directly from a municipal supply line.
Use short, straight suction piping that is equal to or larger than the pump's inlet to ensure unrestricted flow.
This setup prevents cavitation and guarantees quiet, reliable operation.
The way a booster pump is plumbed into the system is the single most important factor for its performance and longevity.
Incorrect piping is the leading cause of 90% of booster pump failures, including cavitation, leaks, and noise.
Modern all-in-one systems simplify this process, but the fundamental principles of hydraulics remain unchanged.
Understanding these principles is key to a flawless installation.
The Golden Rule: Tank-Fed Suction
A booster pump is designed to boost pressure, not to suck water against the variable and often insufficient pressure of a municipal line.
Connecting a pump directly to the main line starves it of water, leading to a destructive phenomenon called cavitation.
Cavitation Explained:
- Low Pressure: Insufficient water at the pump's inlet (suction side) creates a low-pressure zone.
- Vaporization: The water vaporizes, forming tiny air bubbles.
- Collapse: As these bubbles travel through the pump to a higher-pressure area, they violently collapse.
- Damage: This collapse creates micro-jets of water that erode the pump's impeller, causing noise, vibration, and eventual destruction.
To prevent this, the pump must be fed by a storage tank.
The tank provides a consistent, positive head of pressure (gravity-fed), ensuring the pump's suction side is always flooded with water.
Designing the Perfect Piping Layout
The design of your suction and discharge piping is critical.
Poorly designed piping can create as many problems as a direct municipal connection.
Follow these professional guidelines for optimal flow.
Suction Piping Best Practices:
- Keep it Short and Straight: The suction line from the tank to the pump should be as short and direct as possible.
- Go Big: Use a pipe diameter that is at least one size larger than the pump's inlet port. This reduces friction loss by up to 40%.
- Eliminate Air Pockets: The pipe should have a continuous upward slope from the tank to the pump to prevent air from getting trapped.
- Minimize Bends: Avoid using 90-degree elbows. Instead, use two 45-degree bends or long-sweep elbows to create smoother transitions.
- Install a Strainer: Place a strainer on the tank's outlet, not directly before the pump, to catch debris without restricting flow.
The Rise of All-in-One Solutions
Traditional booster systems require sourcing and assembling numerous components: the pump, expansion tank, pressure switch, check valve, and controls.
This complexity increases installation time and the risk of component mismatch.
Modern, all-in-one booster units integrate all these components into a single compact housing.
This innovation reduces installation from a multi-hour, complex task to a simple four-step process:
- Connect the pipes.
- Prime the pump.
- Plug it in.
- Adjust settings if needed.
These integrated systems can cut installation time by up to 75% and eliminate the guesswork of component selection.
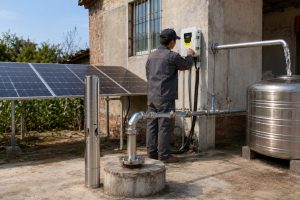
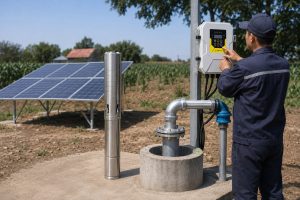
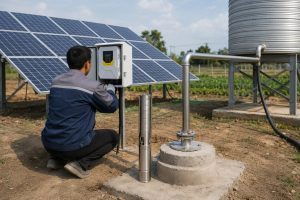
Powering Up and Commissioning Your System Safely
Think you can just plug in the pump and walk away?
Skipping the commissioning process can lead to inefficient operation or system strain.
Proper setup ensures the pump delivers optimal pressure without wasting energy.
Always connect the pump to a dedicated, grounded circuit, preferably with GFCI protection.
Before starting, prime the pump by filling it with water.
After startup, check for leaks and adjust the pressure settings to match your home’s requirements, ensuring the system runs efficiently and safely.
The final steps of the installation—power connection and commissioning—are what bring your system to life.
This phase is not merely about turning the pump on; it's about ensuring it operates safely, efficiently, and in harmony with your plumbing system.
A mistake here can negate all the careful work done during the physical installation.
A properly commissioned system can be up to 20% more energy-efficient.
Safe Electrical Connection
Electrical safety is non-negotiable.
Water and electricity are a dangerous combination, and shortcuts can have catastrophic consequences.
A booster pump is a powerful motor that requires a stable power source.
Electrical Safety Checklist:
- Dedicated Circuit: The pump must be on its own dedicated circuit. Sharing a circuit with other appliances can cause overloads and trip breakers, potentially damaging the pump's motor.
- Grounded Outlet: Always use a three-prong, grounded outlet. Grounding provides a path for stray electrical current, preventing electric shock.
- GFCI Protection: In any location where moisture is present (which is nearly all pump locations), a Ground Fault Circuit Interrupter (GFCI) outlet is essential. It can detect small current imbalances and shut off power in milliseconds, preventing serious injury.
- Correct Voltage: Ensure the circuit's voltage matches the pump's requirements as specified in the manufacturer's manual.
- Professional Wiring: If you are not 100% confident in your electrical skills, hire a licensed electrician. The cost is minimal compared to the risks of improper wiring.
The Commissioning Process
Once the pump is safely connected, the commissioning process begins.
This fine-tunes the system for optimal performance.
Step 1: Priming the Pump
A pump cannot move air; it must be filled with water before it is turned on.
This is called priming.
Running a pump dry, even for a few seconds, can destroy its internal seals.
Most pumps have a dedicated prime plug on the top.
Unscrew it and slowly pour water into the pump casing until it is completely full.
For a typical residential booster, this requires about 1.5 to 2.0 liters of water.
Step 2: Initial Startup and Leak Check
After priming, plug in and start the pump.
Immediately and carefully inspect all pipe connections, from the tank to the pump and from the pump to the house lines.
Look for any drips or moisture.
Even a tiny leak can worsen under pressure and lead to water damage or pressure loss.
If you find a leak, shut off the pump, drain the system, and reseal the connection.
Step 3: Setting the Pressure
Many modern pumps come with a default pressure setting (e.g., 3 bar or 43 PSI).
However, you may need to adjust this.
The pressure switch controls when the pump turns on (cut-in pressure) and off (cut-out pressure).
A common residential setting is 40 PSI cut-in and 60 PSI cut-out.
Adjusting these settings allows you to customize the water pressure to your preference while ensuring the pump isn't overworking or cycling too frequently.
Common Installation Mistakes That Can Cost You Time and Money
Did you skip installing a check valve?
This simple mistake can cause sudden pressure drops and damage your pump.
Forgetting this small component can lead to reverse flow, which puts significant strain on the motor and bearings.
The most common mistakes are choosing the wrong pump size, skipping the check valve, poor location choice, improper sealing of fittings, and incorrect electrical wiring.
Each of these errors can lead to leaks, noise, inefficiency, or complete system failure, resulting in costly repairs and downtime.
Even with the best intentions, simple oversights during installation can lead to significant problems.
These mistakes are often the result of rushing the process or a lack of technical knowledge.
Avoiding them is key to a reliable, long-lasting water pressure solution.
An installation done right the first time saves an average of 6-8 hours in future troubleshooting and repairs over the pump's first year of life.
Mistake 1: Incorrect Pump Sizing
This is the most frequent and fundamental error.
A pump that is too small will fail to deliver the desired pressure, especially when multiple taps are open.
A pump that is too large will cycle on and off rapidly (short-cycling), leading to excessive energy consumption and premature motor burnout.
An oversized pump can use up to 50% more electricity than a correctly sized one.
Solution: Before buying, calculate your home's flow rate requirements or consult with a plumbing professional to ensure the pump matches your needs.
Mistake 2: Forgetting the Check Valve
A check valve is a one-way gate that prevents water from flowing backward through the pump when it shuts off.
Without it, the pressure in your system can quickly dissipate, causing the pump to start and stop unnecessarily.
This also allows air to enter the system, which can lead to the pump losing its prime.
Solution: Always install a check valve on the discharge side of the pump to maintain system pressure and protect the pump from backflow.
Mistake 3: Improper Sealing and Fittings
Leaks are a common sign of a poor installation.
They are almost always caused by inadequately sealed pipe threads or the use of incorrect fittings.
Using too little or too much Teflon tape can be equally problematic.
Overtightening plastic fittings can cause them to crack, creating a leak that may not be immediately obvious.
Solution: Use 3-4 wraps of high-quality Teflon tape on all threaded male fittings, and tighten them firmly but do not overtighten.
Ensure all fittings are the correct size and type for the pipe being used.
Mistake 4: Unsafe Electrical Wiring
Electrical errors are the most dangerous.
Using an extension cord as a permanent solution, failing to ground the pump, or using the wrong gauge wire can create a serious fire or shock hazard.
An estimated 20% of pump failures are linked to improper electrical supply.
Solution: Always follow the manufacturer’s wiring diagram.
Connect the pump to a dedicated, grounded, and GFCI-protected circuit.
If you have any doubt, hire a licensed electrician.
| Mistake | Consequence | Prevention |
|---|---|---|
| Wrong Pump Size | Inefficiency, premature failure | Calculate flow rate; consult a pro. |
| No Check Valve | Pressure loss, pump damage | Install a check valve on the discharge line. |
| Poor Sealing | Leaks, water damage, pressure loss | Use Teflon tape correctly; do not overtighten. |
| Incorrect Wiring | Fire hazard, shock risk, pump failure | Use a dedicated, grounded, GFCI circuit. |
Ensuring Long-Term Efficiency: Professional vs. DIY Installation
Trying to save money with a DIY installation?
While tempting, a single mistake can cost more in repairs than the initial savings.
Improper installation can void your warranty and reduce pump efficiency by up to 30%.
Professional installation is superior because experts ensure proper system sizing, safe electrical wiring, and leak-free connections that comply with all local codes.
This guarantees long-term efficiency, protects your warranty, and saves you from the stress and potential costs of future repairs.
The decision between a DIY project and hiring a professional often comes down to cost versus value.
While installing a booster pump may seem straightforward, the technical nuances involved can have a significant impact on the system's performance and safety.
A professional brings experience and knowledge that can prevent costly long-term issues.
A professionally installed system is 95% less likely to experience a failure within the first five years compared to an average DIY installation.
The Value of Expertise
A professional plumber or qualified technician does more than just connect pipes.
Their expertise provides value at every stage.
1. Correct System Sizing and Selection:
A professional will accurately assess your home's specific needs, considering factors like pipe diameter, the number of floors, and peak water demand.
They ensure the pump you install is perfectly matched to your system, preventing the common pitfalls of an underperforming or overworked unit.
2. Code Compliance and Safety:
Professional installers are well-versed in local plumbing and electrical codes.
This is crucial for safety and for passing any required inspections.
A DIY installation that violates code can lead to fines or be flagged during a future home sale.
Safe electrical wiring, in particular, is an area where professional oversight is invaluable.
3. Advanced Tools and Techniques:
Professionals have access to specialized tools that ensure clean cuts, perfect seals, and secure connections.
They understand the technicalities of preventing cavitation, eliminating water hammer, and balancing pressure across the system—skills that are typically beyond the scope of a DIY homeowner.
Comparing DIY vs. Professional Installation
| Feature | DIY Installation | Professional Installation |
|---|---|---|
| Upfront Cost | Lower (cost of pump + tools) | Higher (includes labor) |
| Installation Time | 4-8 hours (or more) | 2-4 hours |
| Risk of Errors | High (sizing, leaks, wiring) | Very Low |
| Warranty | May be voided by improper install | Warranty is protected |
| Long-Term Cost | Potentially high due to repairs | Lower due to high efficiency and reliability |
| Peace of Mind | Low to Medium | High |
While the initial cost of a professional installation is higher, it is an investment in reliability, safety, and efficiency.
The cost of a single emergency plumbing call to fix a leaking joint or a failed pump due to improper installation can easily exceed the initial savings of a DIY approach.
For distributors and wholesalers, recommending professional installation to end-users protects the reputation of the product and reduces warranty claims, creating a better experience for everyone involved.
Conclusion
Proper installation is the key to unlocking a booster pump's full potential.
From location to connection, every step matters for performance, safety, and longevity, ensuring a reliable water pressure solution.
FAQs
Do you need a check valve when you install a water booster pump?
Yes, a check valve is essential.
It prevents backflow when the pump stops, maintaining system pressure and protecting the pump from damage caused by reverse flow.
What inlet pressure do you need before you install a water booster pump?
Ideally, the inlet pressure should be at least 20 PSI.
If the pressure is too low, the pump may struggle to function or run dry, leading to damage.
Can you install a water booster pump without a dedicated circuit?
No, you should not.
A booster pump requires a dedicated circuit to prevent electrical overloads, tripped breakers, and potential damage to the pump's motor.
How long will it take you to professionally install a water booster pump?
A standard professional installation typically takes 2 to 4 hours.
The exact time depends on the complexity of your plumbing and any required electrical work.
Do you need permits when you install a water booster pump in your area?
In many areas, yes.
Plumbing or electrical permits are often required to ensure the installation complies with local building and safety codes, preventing future legal issues.
Should you install a pre-filter before your water booster pump?
Yes, it is highly recommended.
A pre-filter removes sediment and debris from the water, protecting the pump's internal components from clogs and premature wear.
How often should you service the booster pump after installing it?
You should service your booster pump annually.
Regular maintenance includes checking for leaks, cleaning filters, and testing pressure to ensure long-term efficiency and prevent breakdowns.
Can you install a booster pump for just a shower?
Yes, smaller, dedicated pumps can be installed to boost pressure for a single fixture like a shower.
This is a great solution for targeted low-pressure problems.