Manually controlling your solar pump is tedious.
It risks wasting water through overflows or damaging your pump by running it dry.
A float switch automates the entire process, providing a simple and effective solution.
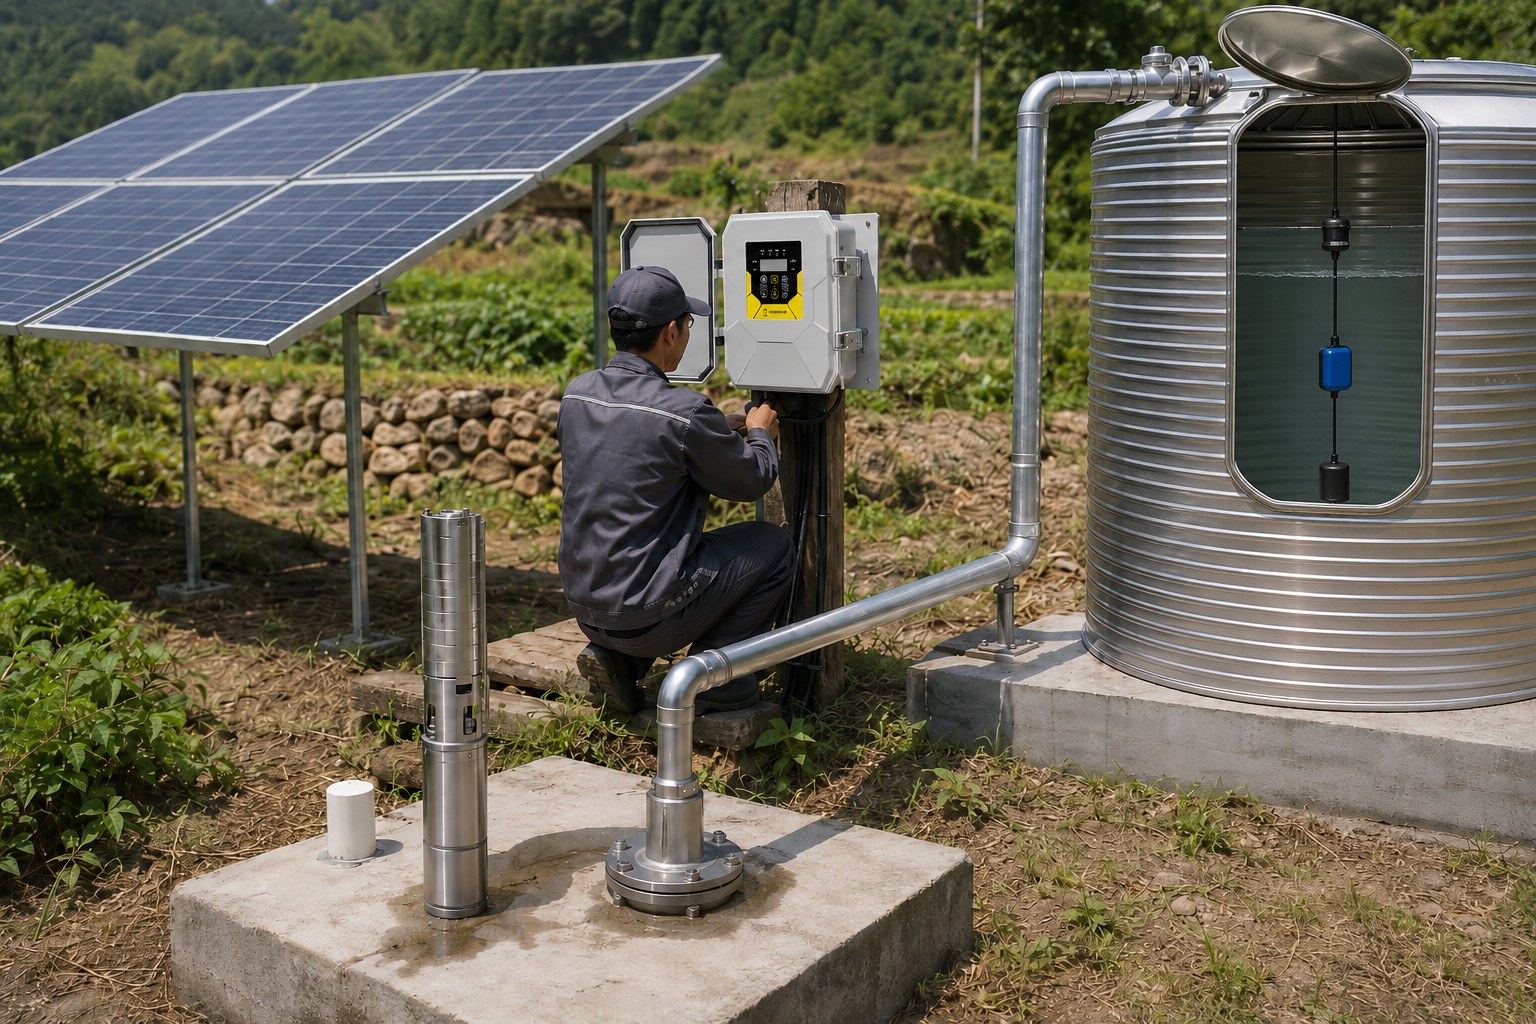
Connecting a float switch to a solar pump is straightforward. It involves positioning the float and a counterweight inside your tank to set the desired water levels. You then wire the float switch's cable into the designated terminals on your solar pump's controller, which automates the on/off cycle.
A float switch is a simple yet powerful tool for any solar water pumping system.
It acts as an automatic guard, ensuring your water tank never overflows or runs empty.
This automation not only provides convenience but also protects your valuable pump investment.
Understanding how to correctly install and configure it is key to unlocking these benefits.
Let's explore the components, the working principle, and the step-by-step connection process.
Understanding the Components of a Float Switch
Using a poorly made float switch can lead to system failure.
Knowing the essential parts helps you choose a reliable unit.
This ensures your water management system works flawlessly for years.
A standard float switch assembly consists of three primary parts: the sealed float body which houses the switch mechanism, an electrical cable to connect to the pump controller, and an external counterweight that sets the pivot point and operational range.
A float switch might seem like a single item, but it is a system of parts working together.
Each component plays a critical role in its function.
Failure in one part can compromise the entire automatic process.
A high-quality switch will have durable, well-designed components.
Let's break down each part to understand its function more deeply.
The Float Body: The Brain of the Operation
The float body is a hollow, sealed enclosure, typically made from non-toxic polypropylene.
This material choice ensures it is safe for drinking water and resistant to weathering.
Inside this sealed body is the actual switching mechanism.
This mechanism is what activates or deactivates the pump.
In many designs, it's a simple mechanical switch containing a small metal ball.
As the float tilts, the ball rolls by gravity, either making or breaking an electrical contact.
Other designs use a sealed magnet that moves to activate a reed switch.
The key is that the entire mechanism is protected from water, ensuring a service life that can exceed 100,000 switching cycles.
This robust design guarantees long-term reliability in submerged conditions.
The Electrical Cable: The Communication Line
The cable connects the float switch to the solar pump's controller.
It transmits the on or off signal from the switch mechanism.
These cables are specially designed for permanent submersion in water.
They typically have a durable outer jacket made of PVC or neoprene rubber.
This protects the internal wires from water ingress, chemical corrosion, and physical abrasion.
The length of the cable is also an important consideration.
Manufacturers provide a maximum recommended length to ensure there is no significant voltage drop, which could interfere with the signal reaching the controller.
A typical cable might have a length of 5 to 20 meters to suit various tank sizes and depths.
The Counterweight: The Anchor Point
The external weight is a crucial component for setting the pump's operating range.
It clamps onto the float switch cable at a specific point.
This point acts as a pivot, or tether point.
The length of the cable between the weight and the float is known as the tether length.
This length directly determines the water level difference between the pump turning on and turning off.
A shorter tether creates a smaller water level difference, causing the pump to cycle more frequently.
A longer tether creates a wider range, meaning the pump runs for longer periods but less often.
This adjustability allows you to customize the system for your specific tank size and water usage needs, preventing rapid cycling that can wear out the pump motor.
Internal Switching Mechanisms Compared
The internal design of the switch dictates its operation.
While the end result is the same—turning a pump on or off—the method can differ.
The two most common types are the rolling ball mechanical switch and the magnet-activated reed switch.
| Feature | Rolling Ball Switch | Magnet-Activated Reed Switch |
|---|---|---|
| Mechanism | A metal ball rolls to physically open or close a circuit. | A permanent magnet moves with the float's tilt, activating a sealed reed switch. |
| Reliability | Highly reliable, with over 100,000 cycles typical. | Very reliable, with millions of cycles possible as there are fewer moving parts. |
| Audible Cue | Often produces an audible "click" when it activates. | Usually silent in operation. |
| Best Use Case | General purpose water and sump pump applications. | Can be used in a wider variety of fluids and precision-sensitive applications. |
Both systems are extremely reliable and designed to provide years of maintenance-free service.
How Does a Float Switch Work with a Solar Pump?
Are you worried about your tank overflowing on a sunny day or your pump running dry?
This simple device prevents both scenarios automatically.
It provides peace of mind and protects your equipment.
A float switch operates based on buoyancy. As water fills a tank, the float rises. When it reaches a preset high point, it tilts and opens an electrical circuit, signaling the solar pump to turn off. As water is used, the float lowers, tilts again at a low point, and closes the circuit to turn the pump on.
The working principle of a float switch is elegant in its simplicity.
It uses the natural force of buoyancy to control a powerful electrical system.
This mechanical automation is far more reliable than complex electronic sensors in many harsh environments.
It's a direct-action device, meaning the physical position of the float dictates the state of the pump.
Let's examine the two key phases of its operation: the pump-on cycle and the pump-off cycle.
The Pumping Cycle: Turning the Pump ON
This cycle begins when the water level in your tank or well is low.
Imagine you are filling a storage tank for livestock.
As the animals drink, the water level gradually drops.
The float, resting on the water's surface, lowers with it.
The counterweight, fixed in place, acts as a pivot.
Once the float drops low enough, the angle of the tether becomes steep.
The float tilts downwards significantly.
This tilting action causes the internal mechanism—either a rolling ball or a magnet—to move.
The movement closes an electrical circuit inside the float body.
This completed circuit sends a signal through the cable to the solar pump's controller.
The controller interprets this signal and directs power from the solar panels to the pump's motor.
The pump then turns on and begins refilling the tank.
The Rest Cycle: Turning the Pump OFF
This cycle prevents water wastage and overflow.
As the solar pump runs, the water level in the tank begins to rise.
The float, now being pushed upwards by the rising water, moves towards its upper limit.
It rises until the cable becomes taut against the counterweight's pivot point.
As the water continues to rise, it lifts the float further, causing it to tilt upwards.
This upward tilt reverses the action of the internal mechanism.
The rolling ball or magnet moves to a new position.
This action opens or "breaks" the electrical circuit.
The signal to the pump controller is interrupted.
The controller then immediately cuts power to the pump motor.
The pump turns off, stopping the flow of water.
This simple, repeatable cycle ensures the water level is always maintained between the preset high and low points, with an efficiency rate of nearly 100% in signal accuracy.
Step-by-Step Guide: Connecting the Float Switch
Worried that installing a float switch requires a professional electrician?
The process is surprisingly simple and can be done safely.
Following these steps ensures a correct and reliable installation.
First, always disconnect all power sources. Next, determine your ideal high and low water levels and set the float's tether length accordingly. Mount the cable, wire the switch to the pump controller's dedicated terminals, and finally, test the system by adding water to the tank.
Proper installation is the key to a long-lasting, trouble-free automated water system.
Taking the time to set it up correctly will save you from future headaches like pump damage or water spills.
While the concept is simple, a few details are critical for optimal performance.
This guide breaks down the installation into five manageable steps.
Step 1: Safety First - Disconnect All Power
This is the most important step.
Never work on any electrical component of your pumping system with the power on.
For a solar pump system, this means disconnecting the solar panels from the controller.
If you have a hybrid system with AC or battery backup, ensure those sources are also disconnected.
Even low-voltage DC systems can deliver a dangerous shock, especially in wet environments.
Confirm that all power is off before proceeding.
Safety should always be your number one priority.
Step 2: Determine Your Water Levels and Tether Length
Decide where you want the pump to turn on (low level) and turn off (high level).
For a tank, a good practice is to set the high-level shut-off point at least 15 cm (6 inches) below the tank's overflow outlet.
This provides a safety buffer.
The low-level point should be high enough to always keep the pump's intake submerged, preventing it from sucking in air.
The distance between these two points is your "pumping range."
This range is controlled by the tether length—the amount of free cable between the counterweight and the float.
A longer tether gives a wider pumping range, while a shorter tether results in a narrower range and more frequent pump cycles.
Step 3: Mount the Float and Adjust the Weight
Secure the counterweight onto the cable at a position that allows the float to trigger at your desired high and low levels.
Most weights have a simple pass-through and clamp design.
You can slide it along the cable and lock it in place.
The cable itself should be secured to a fixed point, such as the pump's discharge pipe or the side of the tank.
Use a waterproof zip tie or a dedicated mounting bracket for this.
Ensure the float has a clear, unobstructed path to swing up and down as the water level changes.
It should not be able to get caught on pipes, the pump, or the tank walls.
Step 4: Wire the Connection to the Controller
Most modern solar pump controllers are designed with float switches in mind.
They will have specific terminals labeled for this purpose (e.g., "TH" and "COM" for Tank High, or similar).
Carefully strip the ends of the float switch cable wires.
Insert them into the correct terminals on the controller and tighten the screws to secure them.
Refer to your controller's manual to identify the correct terminals.
If your system requires connecting the switch directly into the pump's power line (less common for solar), you would use a waterproof splicing kit to make the connections.
However, wiring to the controller is the preferred and safer method.
Step 5: Test, Readjust, and Finalize
Once everything is connected, it's time to test the system.
Reconnect the power source.
Slowly fill the tank with water.
Watch the float switch.
The pump should remain off as the water level rises.
Observe the level at which the float tilts up and deactivates the pump (or prevents it from turning on).
This should match the high level you set.
Now, drain water from the tank to simulate use.
Note the water level at which the float drops and activates the pump.
This should match your desired low level.
It may take 2-3 attempts of adjusting the counterweight position or tether length to get the on/off points perfect.
Why is a Float Switch Essential for Your Solar Pump System?
Do you think a float switch is an optional accessory?
It's actually a critical component that protects your entire investment.
Neglecting it can lead to costly repairs and water waste.
A float switch is essential because it provides complete automation, saving time and effort. More importantly, it prevents the two most common causes of pump failure: running dry and excessive cycling. This can extend a pump's lifespan by over 50% and reduce water waste to zero.
Integrating a float switch into your solar pump setup is one of the highest-return investments you can make.
The benefits go far beyond simple convenience.
It enhances efficiency, improves reliability, and significantly extends the life of your equipment.
In off-grid applications where reliability is paramount, a float switch is not just beneficial—it's indispensable.
Let's explore the key advantages in detail.
Automation and Labor Savings
The most immediate benefit is the elimination of manual monitoring.
You no longer need to check water levels or physically turn the pump on and off.
The system manages itself 24/7.
For agricultural or remote domestic water systems, this can save hours of labor each week.
This "set it and forget it" functionality ensures a consistent and reliable water supply without any human intervention, freeing up your time for more important tasks.
The system works tirelessly, whether you are on-site or hundreds of miles away.
Critical Pump Protection
Dry running is the number one enemy of a submersible pump.
When a pump operates without water, the water that normally cools and lubricates it is absent.
This causes rapid overheating, which can melt internal components and seize the motor in minutes.
A float switch provides foolproof protection against this.
When the water level in the well or source tank drops too low, the switch simply cuts power, saving the pump from certain destruction.
This single feature can prevent a repair bill that is often 80-90% of the cost of a new pump.
Water and Energy Conservation
A solar pump running unchecked will overflow its tank.
This wastes both precious water and the solar energy used to pump it.
A float switch completely eliminates overflow.
It ensures the pump only runs when needed, stopping it the moment the tank is full.
By optimizing the pump's run time, you are maximizing the use of every watt of solar power generated.
This is especially critical in systems with limited solar panel capacity or during days with less-than-ideal sunlight.
Efficient energy use can improve the system's overall daily water output by up to 30%.
Enhanced System Longevity
Every time a pump starts, its motor experiences a brief period of high mechanical and electrical stress.
Frequent on/off cycling accelerates wear and tear on motor bearings, seals, and electrical components.
By allowing you to set a wide pumping range, a float switch ensures the pump runs for longer, more efficient periods, but with fewer starts per day.
Reducing the number of start/stop cycles can dramatically increase the operational lifespan of a pump.
A well-managed pump can see its service life extend from 5-7 years to well over 10 years, a testament to the value of smart, simple control.
Choosing the Right Solar Pump for Your Float Switch System
A float switch is a great controller, but what is it controlling?
The pump itself is the heart of your system.
Choosing the right one is vital for performance and longevity.
The ideal solar pump depends on your specific needs for water depth (head), volume (flow), and water quality. Options range from low-flow screw pumps for deep wells, to high-flow centrifugal pumps for irrigation, all of which should be powered by a high-efficiency brushless DC motor for optimal performance.
A float switch works with virtually any type of solar pump.
However, pairing it with the correct pump for your application creates a truly optimized system.
Different pump designs excel in different scenarios.
Understanding this allows distributors to build a flexible product portfolio and helps end-users get the most value.
The pump's motor is just as important as the pump end itself.
A high-efficiency motor is the core technology that makes the entire system viable and cost-effective.
For Deep Wells and Domestic Use: The Screw Pump
When your water source is a deep borehole, you need a pump that can generate high pressure (head).
This is where a solar screw pump, also known as a progressive cavity pump, excels.
It uses a single helical stainless steel rotor rotating inside a rubber stator.
This design creates sealed cavities that move water upwards with very high force.
While the flow rate is typically lower (e.g., 1-5 cubic meters per hour), it can push water from depths exceeding 150 meters.
They are also highly resistant to sand and silt, with a tolerance up to 5 times greater than centrifugal pumps.
This makes them ideal for domestic water supply and livestock watering in regions like Africa and Latin America, where well depths are significant and water may not be perfectly clean.
For High-Volume Irrigation: The Centrifugal Pump
When the goal is to move a large volume of water for farm or pasture irrigation, a multi-stage centrifugal pump is the best choice.
These pumps use a series of impellers to accelerate water, generating high flow rates at a medium head.
A model with durable plastic impellers offers an excellent balance of performance and cost.
It can deliver high water output, is lightweight, and has good resistance to fine sand.
These pumps are perfect for applications like filling large surface tanks, running small-scale irrigation systems, or providing water for large herds of livestock.
They are a popular, economical choice for agricultural users in the Americas and Africa.
For Corrosive Water: The Stainless Steel Pump
In some regions, groundwater can be acidic or alkaline.
This corrosive water can quickly degrade standard pump components.
For these demanding environments, a pump constructed with high-grade stainless steel is necessary.
A solar pump with SS304 stainless steel impellers and a stainless steel pump body offers superior corrosion resistance.
It provides high flow and long-term durability in harsh water conditions.
These premium pumps are ideal for applications in coastal areas, regions with alkaline soil like parts of Australia, or for high-end residential and commercial properties where longevity and reliability are the top priorities.
The Core Power: High-Efficiency Brushless DC Motors
The true engine behind all these modern solar pumps is the Brushless DC (BLDC) permanent magnet motor.
This technology is a game-changer.
These motors achieve efficiencies of over 90%, compared to 60-70% for older brushed motors.
They use powerful rare-earth magnets (like Neodymium) and have no brushes to wear out, making them virtually maintenance-free.
This high efficiency is critical.
It means the pump can produce more water with the same number of solar panels, reducing the initial system cost by as much as 25%.
The motors are also significantly smaller and lighter (up to 47% smaller and 39% lighter) than traditional motors of the same power, simplifying installation.
This advanced motor technology is the key that unlocks the full potential of a solar-powered water system.
Conclusion
Connecting a float switch to your solar pump is a simple, high-impact upgrade.
It automates your system, protects your pump from damage, and conserves precious water and energy.
This makes your entire water solution more reliable and cost-effective.
Frequently Asked Questions
What happens if a float switch gets stuck?
If stuck in the "on" position, the pump will run continuously, risking overflow.
If stuck "off," the pump will not turn on, resulting in no water.
Regular inspection prevents this.
Can you manually override a float switch?
Yes, you can typically bypass the switch at the controller for testing.
Manually lifting or submerging the float also allows you to test the pump's function.
How long does a float switch last?
A quality float switch is very durable, often lasting over 10 years.
Its lifespan can exceed 100,000 switching cycles, making it a long-term, reliable component.
Does a float switch use a lot of power?
No, it uses a tiny, almost negligible amount of electricity.
It only sends a low-power signal to the main pump controller to tell it when to turn on or off.
What is the difference between "pump up" and "pump down" float switches?
"Pump down" switches turn the pump on when the float is down (to fill a tank).
"Pump up" switches turn it on when up (to empty a sump pit).
Most tank-filling applications use a pump-down configuration.
How far can a float switch be from the pump?
This is determined by the cable length.
Always adhere to the manufacturer's maximum recommended cable length to avoid signal loss and ensure reliable operation.
Can a float switch be repaired?
No, float switches are permanently sealed units for water protection.
If a float switch fails, it must be replaced.
Fortunately, they are inexpensive and reliable.
Do I need a separate float switch for my well and my tank?
Yes, for full automation and protection.
A switch in the well prevents dry-running, while a switch in the tank prevents overflow.
The controller manages signals from both.