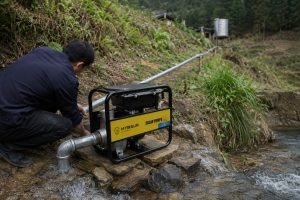
Struggling with unreliable grid power for your water pump?
This constant worry over power outages and rising electricity bills can be frustrating for providing essential water.
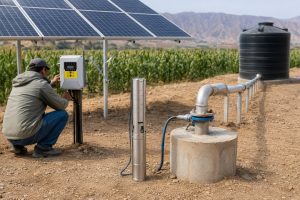
Connecting a solar panel to a water pump involves wiring the panels into an array, feeding the power through a solar pump controller, and then connecting the controller to the pump. This setup ensures the pump receives the correct voltage and current, maximizing efficiency and protecting the motor.
This guide will walk you through the entire process, from choosing the right components to the final electrical connections.
We will break down each step so you can build a reliable, off-grid water solution.
You will learn not just how to connect the system, but how to choose the best components for your specific needs, ensuring long-term value and performance.
Let's get started.
Understanding the Core Components of a Solar Pumping System
Are you unsure which parts you need for a complete solar water pump system?
Choosing the wrong components can lead to poor performance, system failure, and wasted investment.
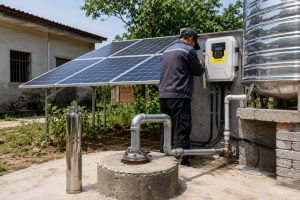
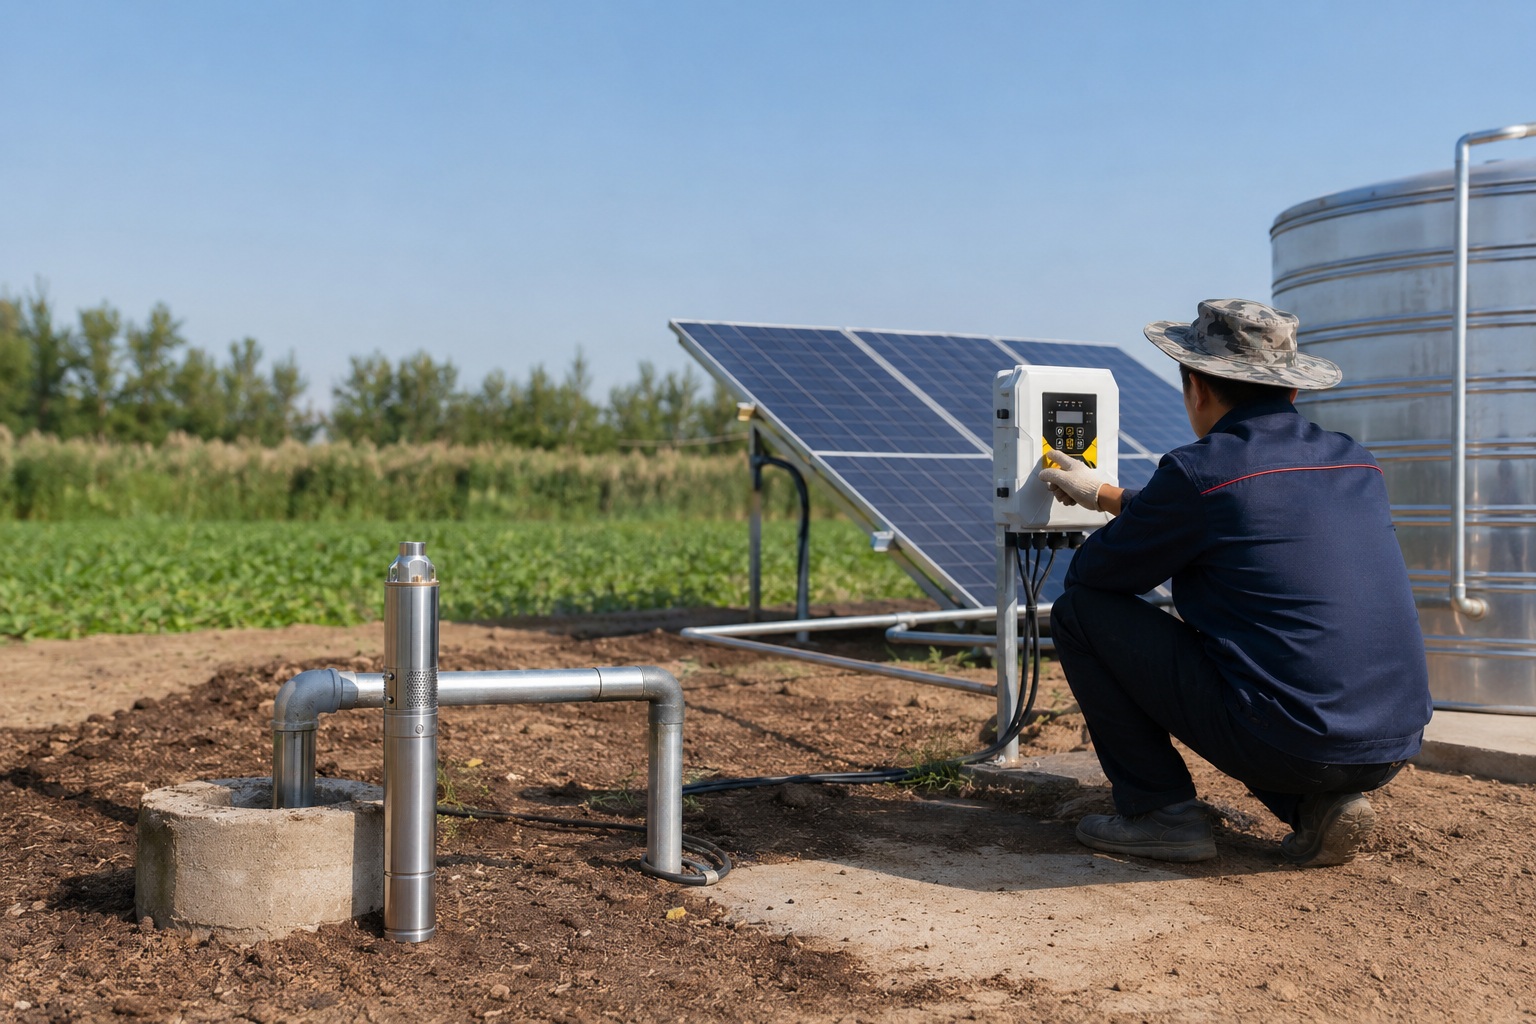
A complete system includes solar panels to generate electricity, a solar pump controller to manage power, and the water pump itself. These core components work together to create an efficient and reliable off-grid water solution for various applications.
To build a successful system, it's vital to understand the function of each part and how they interact.
This knowledge is especially critical for distributors who need to provide effective solutions for their customers.
A well-matched system not only performs better but also has a longer service life, providing greater value.
The Power Source: Solar Panels
Solar panels are the heart of the system, converting sunlight into DC electricity.
The number and size of panels you need depend on the pump's power requirements and the amount of daily sunlight at your location.
For example, a 1HP (750W) pump might require approximately 1000W of solar panels to operate effectively during peak sun hours.
Panel arrays are created by connecting multiple panels.
Connecting them in series (positive to negative) increases the total voltage.
Connecting them in parallel (positive to positive, negative to negative) increases the total current.
The goal is to match the array's output voltage and current to the optimal input range of your solar pump controller.
The Brains: The Solar Pump Controller
The controller, or inverter, is the most intelligent part of the system.
It does two critical things.
First, it converts the DC power from the panels into the appropriate format for the pump motor, which might be DC or 3-phase AC.
Second, it uses Maximum Power Point Tracking (MPPT) to maximize the energy harvested from the panels.
An efficient MPPT controller can boost power output by up to 30% compared to connecting a panel directly to a pump.
This means you get more water pumped for the same number of panels.
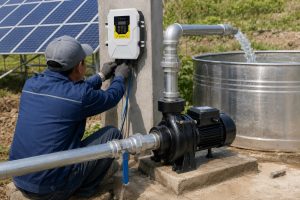
The Workhorse: The Water Pump and Motor
The pump is what moves the water.
The choice of pump depends entirely on the application's needs for flow rate (how much water) and head (how high the water needs to be lifted).
Different applications demand different pump types.
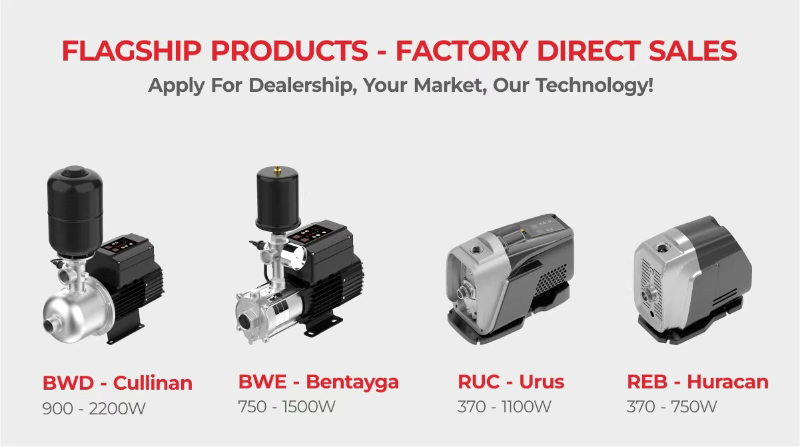
For distributors, offering a diverse portfolio is key to capturing a wider market.
| Pump Type | Best For | Flow Rate | Head | Key Advantage |
|---|---|---|---|---|
| Solar Screw Pump | Deep wells, domestic use | Low (e.g., 1-5 m³/hr) | Very High (up to 200m+) | Handles sandy water well. |
| Plastic Impeller Pump | Farm irrigation, high volume | High (e.g., 10-30 m³/hr) | Medium (up to 100m) | Economical and wear-resistant. |
| Stainless Steel Impeller | Corrosive water, high-end use | High (e.g., 10-30 m³/hr) | Medium-High (up to 150m) | Extreme durability and corrosion resistance. |
The motor driving these pumps is just as important.
Modern solar pumps use brushless DC (BLDC) permanent magnet motors.
These motors can achieve efficiencies over 90%, a significant improvement over traditional AC motors.
A high-efficiency motor means the system requires fewer solar panels, reducing the overall cost by as much as 20-25%.
This is a powerful selling point for end-users and a competitive advantage for distributors.
These motors are also smaller, lighter (up to 39% lighter), and require no maintenance, further enhancing their value.
Should You Convert Your Existing AC Pump or Buy a New Solar Pump?
Do you have an existing AC well pump and wonder if you can just switch it to solar?
This is a common question, but converting isn't always the most cost-effective or efficient solution.
You can run an existing AC pump on solar using a special DC-to-AC inverter. However, for pumps over 2 HP, buying a new, complete DC solar pump system is often more economical and efficient due to the lower power draw of native DC pumps.
Deciding whether to convert your old pump or invest in a new system is a critical financial and practical decision.
The right choice depends on your current pump's condition, its power rating, and your long-term goals for reliability and efficiency.
Let's explore the factors you should consider to make an informed choice.
Evaluating Your Existing AC Pump
First, check the specifications of your current pump.
Most conversion kits are designed for 3-wire submersible pumps, not 2-wire models.
The horsepower (HP) is the most critical factor.
Single-phase AC motors, common in residential pumps, are less efficient than their 3-phase or DC counterparts.
They have a very high starting current, sometimes 3-5 times the running current.
This surge requires a much larger, more expensive inverter and a larger solar array to handle the initial power draw.
For example, a 1 HP single-phase AC pump might need a 3kW inverter and over 1,500W of solar panels just to start reliably.
In contrast, a 1 HP native DC solar pump system might only require 1,000W of panels and comes with a perfectly matched controller.
The Pros and Cons of Conversion
Converting your pump can be a good option if your pump is relatively new, in good condition, and is 1 HP or less.
The main advantage is not having to pull the pump from the well, which can be a difficult and costly job.
You simply rewire the pump from your home's breaker box to the new solar inverter.
However, there are significant downsides.
| Feature | AC Pump Conversion | New DC Solar Pump System |
|---|---|---|
| Efficiency | Lower (due to AC motor and inverter loss) | Higher (motor efficiency >90%) |
| Solar Array Size | Larger (requires ~30-50% more panels) | Smaller, more cost-effective |
| System Cost | Can be higher for >2 HP pumps | Often cheaper for a complete system |
| Complexity | Wiring can be straightforward | Plug-and-play components |
| Reliability | Depends on matching an inverter to an old pump | Components are designed to work together |
As you can see, the initial convenience of conversion can be quickly outweighed by higher costs for panels and lower overall efficiency.
For larger applications, especially 2 HP, 3 HP, and 5 HP pumps, the cost of the large inverter and extra solar panels almost always exceeds the cost of a brand new, fully integrated DC solar pump kit.
A new DC system is designed from the ground up for solar, ensuring every component is optimized for performance and longevity.
A Step-by-Step Guide to Connecting Solar Panels
Ready to get hands-on with the wiring?
Connecting solar panels can seem intimidating, but a methodical approach makes it safe and straightforward.
First, securely mount your panels at the correct angle. Next, wire the panels into strings to achieve the required voltage. Finally, connect these strings through a circuit breaker box to the solar pump controller, ensuring correct polarity.
Following a clear, step-by-step process is the key to a successful installation.
This section will guide you through the physical and electrical connections needed to power your pump.
Safety is paramount, so always ensure the system is de-energized by covering the panels or working in low light.
Step 1: Mounting the Panels
Before any wiring, your panels need a secure home.
They should be mounted on a sturdy, corrosion-resistant frame.
The frame must be angled to capture the maximum amount of sunlight.
This optimal angle depends on your latitude.
You can use online calculators to find the best year-round angle for your specific location.
For example, a location at 34° latitude has an optimal angle of around 34 degrees, adjusted slightly for summer or winter optimization if desired.
The structure must also be strong enough to withstand high winds.
Step 2: Wiring the Panels in Series and Parallel
This is where you build your power source.
Your goal is to create a solar array that matches the input voltage (V) and current (A) requirements of your pump controller.
You'll find the panel's specifications, like its Voltage at Pmax (Vmp) and Current at Pmax (Imp), on a sticker on the back.
- Series Connection: To increase voltage, you connect the positive (+) terminal of one panel to the negative (-) terminal of the next. The total voltage is the sum of the individual panel voltages, while the current stays the same.
- Parallel Connection: To increase current, you connect all positive terminals together and all negative terminals together. The total current is the sum of the individual panel currents, while the voltage stays the same.
Let's say your controller needs an input of around 245V, and you are using panels with a Vmp of 35V.
By connecting 7 of these panels in series (7 panels x 35V/panel), you create a "string" with a total voltage of 245V.
If you need more power, you can build multiple strings and then connect them in parallel to increase the total current delivered to the controller.
For a larger system, you might have 3 strings of 7 panels each, for a total of 21 panels.
Step 3: Connecting to the Controller
Never connect panels directly to the controller.
Safety and control are essential.
You must install a junction box with circuit breakers between the panel array and the controller.
This allows you to safely disconnect the power for maintenance.
Here is the connection flow:
- Run a positive and negative wire from each panel string to the junction box.
- Connect the positive wire from each string to its own separate circuit breaker.
- Connect the negative wire from each string to its own separate circuit breaker.
- Combine the outputs of all the positive breakers together.
- Combine the outputs of all the negative breakers together.
- Run a single, larger gauge positive and negative cable from the combined outputs in the junction box to the "PV+" and "PV-" input terminals on your solar pump controller.
Always use a multimeter to double-check the final voltage and polarity before making the final connection to the controller.
Connecting with reverse polarity can permanently damage the controller.
The Brains of the Operation: The Solar Pump Controller
Ever wondered what makes a solar pump "smart"?
It's not just about converting power; it's about optimizing every drop of sunlight.
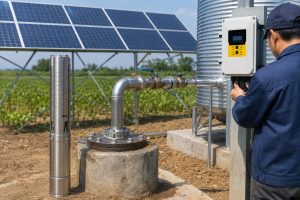
The solar pump controller is the system's brain, regulating power from the panels to the pump. It uses Maximum Power Point Tracking (MPPT) to maximize water output and provides crucial protection for the motor against under-voltage or overload conditions.
Understanding the controller is key to understanding the performance and reliability of the entire system.
This device is responsible for efficiency, protection, and advanced features that make modern solar pumping so effective.
For distributors, promoting the capabilities of the controller is a powerful way to highlight a system's value.
Maximizing Every Sunbeam with MPPT
The core function of a quality controller is Maximum Power Point Tracking (MPPT).
The power output of a solar panel changes constantly with the intensity of the sun.
MPPT technology continuously scans the panel's output and adjusts the electrical load to find the "maximum power point"—the perfect balance of voltage and current that yields the most possible watts at any given moment.
A controller with a high-efficiency MPPT algorithm (often >99% tracking efficiency) can increase the amount of water pumped per day by up to 30% compared to a system without it.
This means a smaller, less expensive solar array can do the same job, a significant cost saving for the end-user.
Advanced Control and Protection
Beyond MPPT, the controller is a sophisticated protection device.
It constantly monitors the system and protects the pump motor from damaging conditions.
Key protective features include:
- Dry-Run Protection: It can detect when the well water level is too low and will stop the pump to prevent it from burning out. It then periodically checks if the water level has recovered before restarting.
- Over-Voltage/Under-Voltage Protection: If the voltage from the panels is too high or too low, the controller will shut down to protect the electronics.
- Over-Current/Overload Protection: If the pump is jammed or working too hard, the controller senses the increased current draw and stops the motor to prevent damage.
- Soft Start: It gradually ramps up the motor speed, which reduces mechanical stress on the pump and electrical stress on the motor, extending its life.
Hybrid Power for 24/7 Operation
A major innovation in solar pump controllers is the AC/DC hybrid capability.
Standard solar pumps only work when the sun is shining.
A hybrid controller adds an input for AC power from the grid or a generator.
The controller's logic is designed to prioritize solar power.
It will use 100% solar energy when it's sufficient.
When sunlight is weak (like on a cloudy day), it will automatically blend AC power with the available solar power to keep the pump running.
When there is no sunlight at all (at night), it will switch seamlessly to 100% AC power.
This ensures a reliable, 24-hour water supply without needing a large, expensive battery bank.
This feature is a game-changer for critical applications like domestic water supply and livestock watering, providing peace of mind and ultimate flexibility.
Plumbing Your System for Optimal Performance and Longevity
Think the job is done after the wiring is complete?
The plumbing is just as crucial for a system's efficiency and lifespan.
Proper plumbing involves using the correct pipe size to minimize friction loss, installing a check valve to prevent backflow, and adding a vacuum breaker to protect your equipment. These components ensure water flows smoothly and the system drains properly when shut off.
Incorrect plumbing can seriously hinder your pump's performance and even cause damage.
A pump might be rated for 20 gallons per minute, but if the pipes are too small, you may only get 10 gallons per minute at the tap due to friction.
Let's look at the essential plumbing components that protect your investment and ensure you get every drop of water you're paying for.
Pipe Sizing and Friction Loss
The diameter of your delivery pipe has a massive impact on performance.
As water flows through a pipe, it creates friction against the pipe walls, which is known as friction loss.
This loss effectively adds to the total "head" or pressure the pump must work against.
A smaller pipe creates significantly more friction than a larger one.
For example, pumping 10 gallons per minute (GPM) through 100 feet of 1-inch pipe results in about 6.3 feet of head loss.
Pumping the same 10 GPM through 100 feet of 1.5-inch pipe results in only 1.3 feet of head loss.
This is a 79% reduction in pressure loss.
Using a pipe that is too small forces the pump to work harder, reducing its flow rate and consuming more power.
Always consult a friction loss chart and choose a pipe size that keeps head loss to a minimum for your desired flow rate and pipe length.
The Importance of a Check Valve
A check valve is a one-way valve that is absolutely essential for any submersible pump system.
It is typically installed in the pipe directly above the pump.
Its job is to prevent the column of water in the pipe from flowing back down into the well when the pump shuts off.
Without a check valve, every time the pump stops, all the water in the pipe would drain out.
When the pump restarts, it would have to re-lift all that water and refill the pipe before any water comes out of the tap.
This wastes significant energy and causes a delay in water delivery.
It also causes "water hammer" and back-spinning of the pump, which can severely damage the pump's internal components over time.
Protecting Your System with a Vacuum Breaker
This simple valve is crucial for systems with long vertical pipes, especially if the panels are located on a roof or high ground.
A vacuum breaker is installed at the highest point of the plumbing.
When the pump shuts off and the check valve closes, the weight of the water in the return pipe can create a powerful vacuum.
This negative pressure can be strong enough to collapse flexible pipes or even damage pump components.
The vacuum breaker allows air to enter the pipe when it senses negative pressure, "breaking" the vacuum and allowing the pipe to drain properly and safely.
This prevents equipment damage and ensures the system is ready for the next cycle.
Conclusion
Connecting a solar water pump involves choosing optimized components, correct wiring, and smart plumbing.
This ensures a reliable, efficient, and long-lasting off-grid water solution for any application.
Frequently Asked Questions
Can I connect a solar panel directly to a pump?
No, it's not recommended.
Doing so can damage the pump motor due to fluctuating voltage and provides no performance optimization or dry-run protection, drastically reducing efficiency.
How many solar panels do I need to run a well pump?
This depends on the pump's wattage.
A general rule is to have 1.3 to 1.5 times the pump's wattage in solar panels (e.g., a 750W pump needs about 1000W of panels).
Can an inverter run a well pump?
Yes, a properly sized DC-to-AC inverter can run a standard AC well pump.
However, the inverter must be able to handle the pump's high starting current.
How deep can a solar pump work?
Solar pumps can work at great depths.
High-head models, like solar screw pumps, are specifically designed for deep wells and can lift water from over 200 meters (650 feet).
Are solar well pumps reliable?
Yes, modern solar well pumps are extremely reliable.
With brushless motors and advanced controllers, they are designed for over 10 years of maintenance-free operation in harsh, off-grid environments.
What is the lifespan of a solar water pump?
A high-quality solar water pump system can last for many years.
The solar panels are typically warrantied for 20-25 years, while the brushless motor and controller are designed for a lifespan of over a decade.