Struggling with off-grid water access?
Installing a well pump seems complex and costly, leaving you without a reliable water source.
Installing a well pump involves selecting the right pump for your well's depth, assembling the necessary tools and materials, connecting the plumbing and wiring, carefully lowering the unit, and testing the system.
Always prioritize safety and follow manufacturer instructions.
This guide breaks down the entire process into clear, manageable steps.
We will cover everything from choosing the perfect pump for your needs to the final electrical connections and system testing.
By following this comprehensive overview, you can approach your installation with confidence, whether you are a seasoned DIYer or a distributor looking to better understand the products you sell.
Let's ensure your project is a success from the very beginning.
Choose the right type for your particular well.
Choosing the wrong pump leads to poor performance, high energy costs, and premature failure.
How do you navigate the options to ensure you make the right long-term investment for your water needs?
Select your pump based on well depth, water demand, and water quality.
Shallow wells under 25 feet (7.6 meters) can use jet pumps.
Deeper wells require submersible pumps.
For modern, efficient solutions, consider solar-powered screw, plastic, or stainless steel impeller pumps.
Understanding Your Well's Characteristics
The first step is always to understand the source.
The depth of your water table is the single most important factor.
This measurement dictates the fundamental type of pump you will need.
-
High Water Tables: This refers to a stable water source located 25 feet (7.6 meters) or less below the ground.
For these applications, a surface-mounted pump like a shallow well jet pump is typically sufficient.
-
Low Water Tables: This is a stable water source found more than 25 feet below the ground.
This scenario requires a submersible pump that is lowered down into the well itself.
To measure your well's depth, you can attach a weight to a long string or rope.
Lower the weight until you feel it touch the bottom.
Mark the string at ground level, then pull it up and measure the length.
This gives you the total depth of the well.
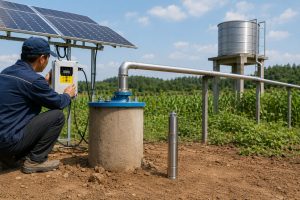
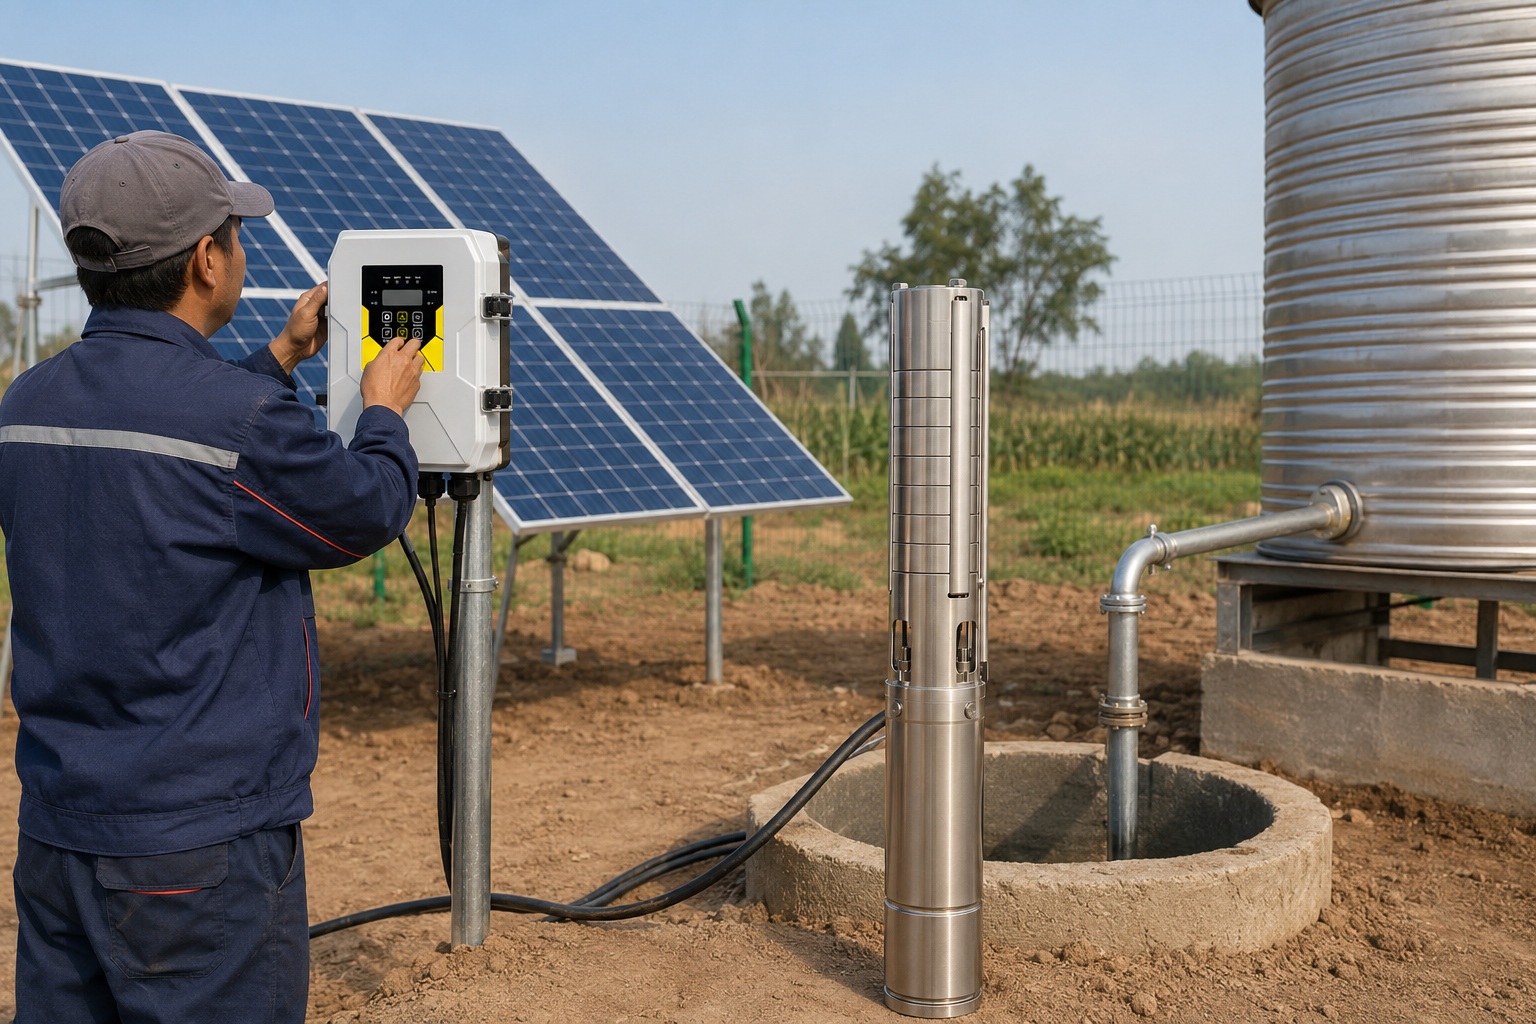
A Modern Approach: Solar-Powered Pumps
For off-grid and rural properties, solar-powered pumps offer unmatched independence and cost-effectiveness.
They operate without reliance on the grid, have minimal running costs, and are environmentally friendly.
The core of these systems is a high-efficiency motor that drives one of several pump end designs, each suited for specific conditions.
This creates a competitive and versatile product portfolio for distributors.
| Pump Type | Best For | Flow Rate | Head (Pressure) | Key Advantage |
|---|---|---|---|---|
| Solar Screw Pump | Deep wells, domestic use, livestock | Low | Very High | Excellent sand resistance, handles harsh water |
| Solar Plastic Impeller | Farm irrigation, high volume needs | High | Medium | High water output, lightweight, economical |
| Solar SS Impeller | Corrosive water, high-end homes | High | Medium-High | Superior corrosion resistance, long service life |
The Core of Efficiency: The BLDC Motor
All three of these advanced solar pumps are powered by a Brushless DC (BLDC) permanent magnet motor.
This is the heart of the system.
Its performance dictates the overall efficiency and reliability of the pump.
With an operational efficiency exceeding 90%, these motors are a significant leap forward from older technologies.
The rotor is constructed from high-strength 40SH neodymium iron boron magnets, ensuring powerful and consistent torque.
This advanced design provides immense market value.
It directly reduces the number of solar panels required to run the pump, lowering the initial system cost by up to 25%.
The compact design also simplifies installation and reduces shipping costs.
BLDC Motor Advantages vs. Traditional AC Motors
- Efficiency: Over 90% efficiency, compared to 60-70% for typical AC motors.
- Size & Weight: Approximately 47% more compact and 39% lighter.
- Lifespan: No brushes to wear out, leading to a maintenance-free design and a longer service life.
- Performance: High starting torque, ideal for lifting water from deep wells.
For distributors, offering products with this core technology establishes a strong market position based on efficiency, durability, and environmental friendliness.
Tools and Materials
Are you prepared for installation day?
Arriving at the well site only to discover you are missing a single tool or fitting can bring your entire project to a frustrating and costly halt.
Gathering everything beforehand is critical.
A successful well pump installation requires a specific set of tools and materials.
Key tools include pliers, wire strippers/crimpers, wrenches, and a PVC cutter or hacksaw.
Essential materials include the pump, piping, fittings, Teflon tape, waterproof connectors, and a strong safety rope.
Essential Tools Checklist
Before you begin, lay out all your tools to ensure everything is accounted for.
This simple step can save you hours of frustration.
While the exact list can vary slightly based on the pump model, the following items are almost always required.
- Pliers: For general gripping and tightening.
- Adjustable Wrenches (x2): For tightening threaded pipe fittings. Using two prevents the pipe from twisting.
- Wire Strippers/Crimpers: Essential for making secure electrical connections.
- Screwdrivers (Flat & Phillips): Needed for accessing control box terminals and other components.
- PVC Cutter or Hacksaw: For cutting plastic or metal pipe to the correct length.
- Utility Knife: For cleaning pipe ends and other general tasks.
- Measuring Tape: Crucial for verifying well depth and cutting pipe.
- Heat Gun or Torch: For shrinking waterproof heat-shrink tubing over wire splices. A lighter can be used with extreme care.
Core Materials & Equipment
The materials you choose will directly impact the longevity and reliability of your water system.
Choosing high-quality components is a wise investment.
- The Well Pump: Selected based on the criteria in the previous section.
- Drop Pipe: The pipe that carries water from the pump to the surface.
- Submersible Pump Wire: A special waterproof cable to power the pump.
- Safety Rope: A non-decaying rope (like polypropylene) that acts as a backup to support the pump's weight.
- Fittings & Connectors: Barbed fittings for poly pipe, check valves, and waterproof wire splice kits.
- Teflon Tape: To ensure watertight seals on all threaded connections.
- Well Seal or Pitless Adapter: To seal the top of the well casing and provide a connection point for your service line. A pitless adapter is essential in freezing climates.
- Pressure Tank: Highly recommended to maintain constant water pressure and reduce pump cycling.
Choosing the Right Pipe
The drop pipe is a critical component.
It must be strong enough to support the weight of the water column and the pump itself, while also resisting corrosion.
| Pipe Material | PSI Rating | Max Depth (Recommended) | Pros | Cons |
|---|---|---|---|---|
| Poly Pipe | 160 PSI | ~300 ft (91 m) | Flexible, easy to install, inexpensive, corrosion-proof | Can be punctured, not suitable for extreme depths |
| PVC Pipe | Schedule 80 | ~500 ft (152 m) | Rigid, strong, relatively inexpensive, corrosion-proof | Brittle in cold, harder to install than poly pipe |
| Galvanized Steel | N/A | >500 ft (152 m) | Extremely strong and rigid | Heavy, expensive, prone to rust and corrosion over time |
For most DIY and many professional installations up to 300 feet, 160-PSI rated poly pipe is the easiest and most cost-effective solution.
How to install A Well Pump: Step-By-Step Guide
The installation process itself can be daunting.
One wrong move could damage your new pump, contaminate your well, or create a safety hazard.
A methodical approach is essential for a smooth and successful outcome.
The general process involves preparing the well, assembling the pump's plumbing and wiring, carefully lowering the entire unit into the well casing, securing it at the surface, and making the final connections to your water system.
Step 1: Preparation and Safety
Safety must be the top priority.
Before any work begins, disconnect all electrical power to the existing pump or the work area by turning off the appropriate circuit breaker.
Place a clear sign on the breaker box to prevent someone from turning it back on.
Next, cover the well opening with a board or tarp.
This simple action prevents tools, parts, or foreign objects from falling into the well, which could damage the system or contaminate your water.
Measure the well depth and water level one last time to confirm your pump selection and pipe length are correct.
Step 2: Pump Assembly and Plumbing Connections
This is where your water system starts to take shape.
Work on a clean, flat surface.
- Attach Check Valve: The first component to attach to the pump's outlet is a check valve. This one-way valve prevents water from flowing back down into the well when the pump turns off, which keeps the system pressurized and reduces wear on the pump. Use Teflon tape on all threaded connections.
- Connect Pipe Adapter: Attach the appropriate adapter for your drop pipe (e.g., a barbed insert adapter for poly pipe) to the outlet of the check valve.
- Attach Drop Pipe: Securely fasten your drop pipe to the adapter. For poly pipe, this involves pushing the pipe over the barbed fitting and securing it with two stainless steel clamps tightened in opposite directions.
- Attach Safety Rope: Tie your polypropylene safety rope securely to the designated eyelet on the pump body. Do not attach it to the electrical wires or the pipe.
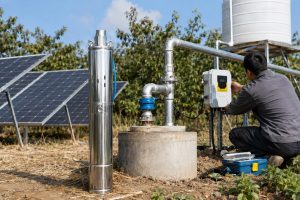
Step 3: Lowering the Pump Assembly
This step often requires two people.
The combined weight of the pump, pipe full of water, and wire can be significant.
As you begin to lower the pump into the well casing, have a helper feed the drop pipe, electrical wire, and safety rope into the well.
To keep things neat and prevent tangling, use electrical tape or specialized clips to secure the electrical wire and safety rope to the drop pipe every 10-20 feet (3-6 meters).
Do not tape them too tightly; allow for some movement.
If you are using them, ensure torque arrestors are positioned on the pipe to center the pump and absorb startup torque.
Lower the assembly slowly and carefully to avoid scraping the sides of the well casing.
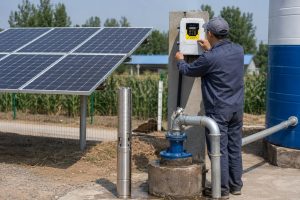
Step 4: Final Connections and System Setup
Once the pump is at the desired depth, it is time to make the surface connections.
If using a pitless adapter (in freezing climates), you will use a special tool to connect the adapter inside the well casing.
If using a well seal, thread the drop pipe, wire, and rope through the designated holes in the seal.
Connect the drop pipe to the service line running to your house or pressure tank.
Secure the well seal to the top of the casing.
The safety rope should be tied off securely to a point at the wellhead, with slight slack, so the pipe supports the primary weight.
Step 5: Testing and Activation
Before using the water, you must prime and test the system.
For shallow well jet pumps, you must fill the pump and suction line with water before starting.
For submersible pumps, the system primes itself.
Install a pressure gauge near the pressure tank to monitor the system.
Turn the power back on and listen for the pump to start.
Watch the pressure gauge; it should build pressure steadily and then shut off once it reaches the preset limit on the pressure switch (typically 40-60 PSI).
Open a faucet and let the water run for at least 30 minutes to an hour.
Check several water samples.
The water should run clean and be free of silt, sand, or other debris before you use it for drinking or in your home's plumbing.
Wiring a well pump
Electrical work is the most hazardous part of the job.
A mistake here is not just inefficient; it is incredibly dangerous for you, your property, and the equipment.
Always consult a licensed professional if you are unsure.
Wiring involves connecting the pump's submersible cable to a power source, often through a dedicated control box.
Two-wire pumps have internal starting components, while three-wire pumps require an external control box.
All wiring must adhere strictly to local and national electrical codes.
Two-Wire vs. Three-Wire Pumps
The terms "two-wire" and "three-wire" can be confusing.
They refer to the number of conductors running from the control box to the pump motor, not including the ground wire.
- Two-Wire Pumps: These have their starting components (like the start capacitor) built directly into the motor housing. This results in a simpler surface installation, requiring only a direct power feed. They are common in shallower or lower-cost applications.
- Three-Wire Pumps: These pumps have their starting components housed in a separate control box at the surface. While this means more equipment to install, it makes troubleshooting and repair much easier, as the critical components are accessible without pulling the pump. They are generally considered more robust and efficient.
| Feature | Two-Wire Pump | Three-Wire Pump |
|---|---|---|
| Installation | Simpler, no control box | More complex, requires control box |
| Components | Starting parts in the motor | Starting parts in the surface box |
| Troubleshooting | Difficult, requires pulling pump | Easier, components are accessible |
| Cost | Lower initial pump cost | Higher initial system cost |
| Best Use | Shallower wells, simpler setups | Deeper wells, performance-critical apps |
Splicing Wires for Deep Wells
Submersible pumps typically come with a short "pigtail" of wire.
You must splice this to the main submersible cable that runs to the surface.
This connection is the most common point of electrical failure and must be made perfectly.
Use a high-quality, waterproof splice kit.
This usually involves crimping the wires together with connectors and then sealing the entire splice with adhesive-lined, heat-shrink tubing.
A failed splice underwater can be difficult and expensive to fix.
Ensure all connections are clean, tight, and completely waterproof.
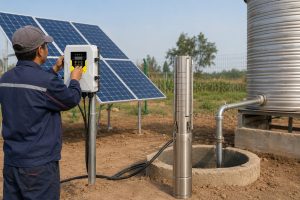
Advanced Power Management: AC/DC Hybrid Controllers
For the ultimate in reliability and flexibility, especially with solar pump systems, an AC/DC hybrid controller is a game-changer.
This technology ensures you have water 24/7, regardless of weather conditions.
The controller is designed with two simultaneous power inputs.
You can connect both your solar PV array and an AC power source (grid power or a generator) at the same time.
- Automatic Switching: The controller intelligently prioritizes solar power. When sunlight is sufficient, it runs the pump entirely off the free energy from your panels.
- Hybrid Function: When solar input is low (e.g., on a cloudy day), the controller will blend AC power with the available solar power, maximizing the use of renewable energy and minimizing your electricity bill.
- AC Backup: When there is no solar input at all (e.g., at night), the controller automatically switches to the AC source to ensure your water supply is never interrupted.
This provides true, worry-free water access and is a powerful selling point for any modern water pump system.
Replacing an existing unit
Your old well pump has finally failed.
Replacing it seems like a straightforward swap, but this moment presents both new challenges and valuable opportunities to upgrade your water system for better performance and efficiency.
To replace a pump, you must first disconnect all power and safely drain the entire system.
Carefully remove the old pump and pipe assembly, making sure to inspect the old pipe, wire, and fittings for signs of rust, scale, or damage.
Install the new pump following the manufacturer's guide, considering an upgrade in horsepower or efficiency if your water needs have increased.
When to Replace vs. Repair
A common question is whether to repair a faulty pump or replace it entirely.
If the pump is relatively new and the issue is with an accessible surface component like a control box or pressure switch, a repair is often economical.
However, if the pump motor itself has failed, it almost always makes more sense to replace the entire unit.
The cost of pulling the pump, repairing the motor, and reinstalling it often approaches or exceeds the cost of a brand new, more efficient pump with a full warranty.
Consider replacement if:
- The pump is over 8-10 years old.
- Your electricity bills have been rising, indicating lower efficiency.
- Your water needs have increased (new family members, new appliances).
- The pump requires frequent repairs.
The Replacement Process: A Checklist
The process for replacement is similar to a new installation but with the added step of removal.
- POWER OFF: This cannot be stressed enough. Disconnect the power and verify it is off with a multimeter.
- Drain System: Open a faucet to relieve pressure in the pressure tank, then drain all water from the tank and nearby plumbing.
- Disconnect: Disconnect the plumbing and wiring at the wellhead.
- Cover Well: Place a temporary cover over the well opening, leaving just enough space to pull the pipe.
- Pull Pump: Carefully pull the old pump, pipe, and wire out of the well. This is heavy work and may require a pump puller or other assistance.
- Inspect: As the pipe comes out, inspect it for cracks, rust, or mineral buildup. It is often wise to replace the drop pipe and wire at the same time as the pump.
- Install New Pump: Follow the step-by-step guide for a new installation, using your new pump and any new components.
The Opportunity to Upgrade
Replacing a failed pump is the perfect time to evaluate your system.
Don't just automatically buy the same model.
Consider upgrading your horsepower if you've added a bathroom, an irrigation system, or if you've noticed a drop in water pressure over the years.
More importantly, this is an opportunity to switch to a more efficient model, such as a modern solar pump with a BLDC motor.
The long-term savings on electricity can be substantial, often paying for the higher initial cost of the pump within a few years.
This upgrade adds significant value to the property and provides a more reliable, cost-effective water source.
Conclusion
Successful well pump installation combines careful planning, the right components, and a focus on safety.
This approach ensures a reliable, efficient water supply for years to come.
FAQs
Can I install a well pump myself?
Yes, if you have advanced DIY skills and the right tools.
However, wiring and deep well installations can be complex and dangerous, so consulting a professional is often recommended.
How long does it take to install a well pump?
Installation time varies greatly.
A shallow well pump replacement might take a few hours, while a new deep well installation could take a full day or more.
What size well pump do I need?
Pump size depends on your well's depth, the water level, and your household's peak water demand.
Using an online sizing calculator or consulting a pro is the best approach.
How deep should a well pump be in a well?
A submersible pump should be at least 10-20 feet below the lowest anticipated water level, but at least 5-10 feet off the bottom of the well to avoid sucking up sediment.
Do you need a check valve for a well pump?
Yes, a check valve is essential.
It prevents water from flowing back into the well, keeps the system pressurized, and reduces strain on the pump motor.
How much does a well pump cost?
Costs range from a few hundred dollars for a basic shallow well pump to several thousand for a high-capacity deep well or specialized solar pump system.
How do I know if my well pump is bad?
Signs of a failing pump include no water, low water pressure, the pump cycling on and off frequently, or a sudden increase in your electric bill.