Frustrated with weak showers and trickling faucets?
Low water pressure disrupts daily life.
A booster pump is the solution, but its placement is critical for success.
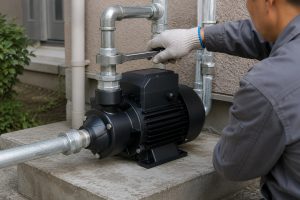
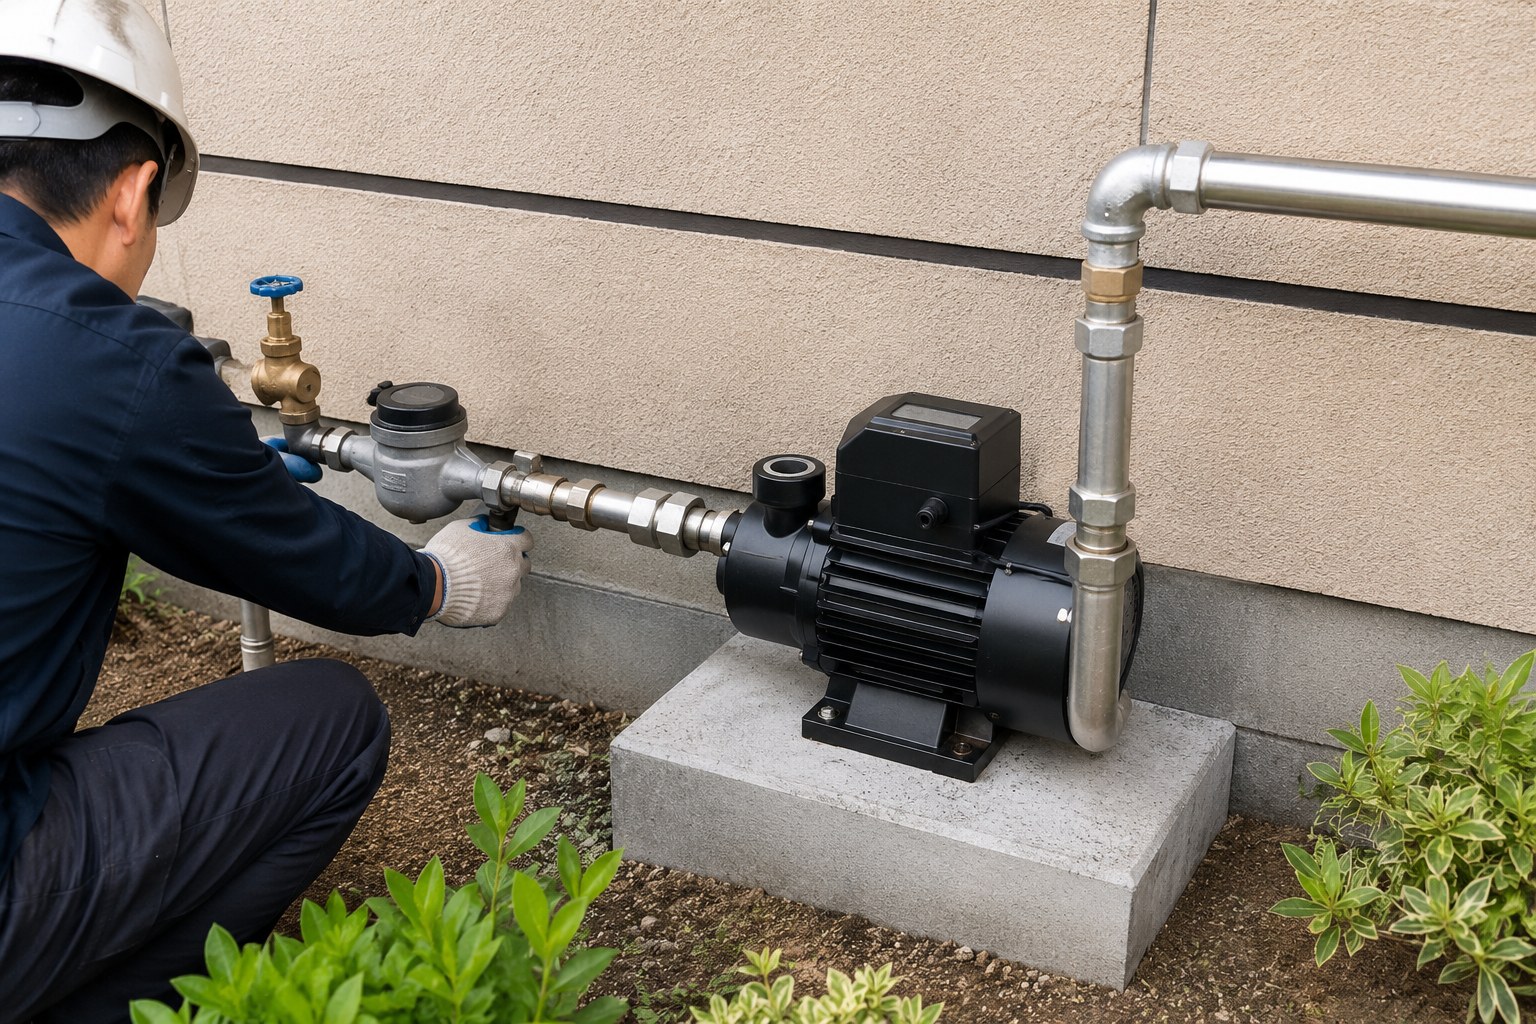
For optimal performance, a water booster pump should be installed on the main water line, right after the water meter and the main shutoff valve. This ensures the entire building benefits from increased pressure. Placing it near the water source in an accessible, protected location is also crucial.
Installing a booster pump might seem simple.
However, getting the location right is just the first step.
To truly maximize your water pressure and system efficiency, you need to understand the 'why' behind the 'where'.
Let's explore the critical factors that ensure your booster pump works perfectly from day one.
Step One: Locate the Position of Installation
Choosing the wrong spot for your pump can lead to poor performance and costly repairs.
Are you sure you know the best location for maximum efficiency and easy access?
The ideal location is in a basement or utility closet, immediately after the main water shutoff valve. This position should be easily accessible, require minimal extra piping, and be safe from environmental hazards like flooding or extreme temperatures.
Why Proximity to the Main Line Matters
Placing the pump at the entry point of the building's water supply is the most effective strategy.
When installed here, the pump pressurizes the entire plumbing system from a single point.
This means every faucet, showerhead, and appliance receives the benefit of increased pressure.
If you were to install it on a single branch line, only that specific line would see a pressure increase.
This would leave the rest of the building with the original low-pressure problem.
By pressurizing the whole system, you create a consistent and reliable water supply throughout the property, increasing functionality by up to 50% or more depending on the initial pressure deficit.
The Importance of Accessibility
Your booster pump is a mechanical device that will require maintenance.
Choosing a location that is difficult to access will create major problems in the future.
Imagine trying to service a pump crammed into a tight, dark crawlspace.
It makes simple tasks like checking for leaks, cleaning filters, or performing repairs incredibly difficult and expensive.
An accessible location, like a basement or a dedicated utility room, allows for easy visual inspection and physical access.
This ensures that routine maintenance is performed on schedule, extending the pump's lifespan by years and preventing unexpected failures.
Environmental and Safety Considerations
The environment where the pump is installed directly impacts its longevity and safety.
Pumps contain electrical components that must be protected from moisture.
Installing a pump in an area prone to dampness or flooding is a significant electrical hazard and will cause premature corrosion and failure.
The location should also be protected from freezing temperatures, as frozen water can expand and crack the pump housing, leading to catastrophic failure.
Furthermore, the pump's motor generates heat during operation.
Ensure the area has adequate ventilation to prevent overheating, which can reduce motor efficiency by over 15% and shorten its life.
| Installation Location | Accessibility | Protection from Elements | Piping Complexity |
|---|---|---|---|
| Basement | Excellent | Good (Indoors) | Low to Moderate |
| Utility Closet | Good | Excellent (Indoors) | Low |
| Crawlspace | Poor | Poor to Moderate | Moderate to High |
| Outdoors (Shed) | Good | Moderate (Requires Box) | High |
For systems that draw from a water storage tank, the rule changes slightly.
The booster pump should be installed as close to the tank's outlet as possible and preferably below the water level.
This creates a "flooded suction" condition, which helps the pump prime easily and operate efficiently without straining to lift the water.
How To Accurately Size a Booster Pump System
A pump that's too small won't solve your pressure problem.
One that's too big wastes energy and can damage your pipes.
How do you find the perfect fit?
To size a pump, first measure your current flow rate in gallons per minute (GPM) and pressure in pounds per square inch (PSI). Then, calculate the required pressure boost and the system's Total Dynamic Head (TDH). This data ensures you select a pump that meets your specific needs.
Measuring Your Current Water System Performance
Before you can improve your system, you must establish a baseline.
The two most important metrics are flow rate and static pressure.
To measure the flow rate, you only need a one-gallon container and a timer.
Go to the spigot closest to your water main, turn it on fully, and time how long it takes to fill the container.
If it takes 15 seconds, your flow rate is 4 GPM (60 seconds / 15 seconds = 4).
To measure pressure, you will need a simple pressure gauge that screws onto a faucet or hose bib.
Ensure all water fixtures in the house are off, then attach the gauge and turn on the faucet.
The reading is your static water pressure.
A typical municipal supply delivers water between 65 and 85 PSI.
If your reading is 40 PSI or below, a booster pump is an excellent solution.
Calculating Your Pressure Needs
Now, determine how much of a boost you need.
The goal is to reach a comfortable and functional pressure level, typically around 60-65 PSI.
The calculation is simple: Desired Pressure - Current Pressure = Required Boost.
For example, if your desired pressure is 65 PSI and your current static pressure is 40 PSI, you need a booster pump capable of adding at least 25 PSI to your system.
Keep this number in mind when shopping, as pumps are rated by the amount of pressure they can add.
Understanding Total Dynamic Head (TDH)
Total Dynamic Head (TDH) is a more comprehensive measure of the work a pump must do.
It is especially critical in multi-story buildings or properties where water must be moved uphill.
TDH is the sum of two factors: the vertical lift and the friction loss.
Vertical Lift: This is the vertical distance in feet from the pump to the highest water outlet.
For every foot of vertical rise, you lose 0.433 PSI of pressure.
Friction Loss: As water moves through pipes, it encounters resistance from the pipe walls and fittings.
This resistance, or friction loss, reduces pressure.
It is influenced by the pipe's diameter, length, material, and the water's flow rate.
You can use free online calculators to estimate this value.
The formula is: TDH = Vertical Lift (in feet) + Friction Loss (in feet).
Converting PSI to Feet of Head
Pump performance curves are often rated in "Feet of Head" instead of PSI.
You will need to convert your pressure requirements to compare them accurately.
The conversion formulas are straightforward:
- Pressure in PSI x 2.31 = Feet of Head
- Pressure in Feet of Head x 0.433 = PSI
For example, a required boost of 25 PSI is equivalent to 57.75 feet of head (25 x 2.31).
This means you need a pump that can deliver your desired flow rate (GPM) at a minimum of 57.75 feet of head.
| Pipe Diameter (Sch. 40 PVC) | Flow Rate (GPM) | Friction Loss (Feet per 100ft of pipe) |
|---|---|---|
| 3/4" | 5 | 9.1 |
| 3/4" | 10 | 32.1 |
| 1" | 10 | 9.3 |
| 1" | 15 | 19.6 |
| 1.25" | 15 | 6.6 |
| 1.25" | 20 | 11.2 |
Choosing the Right Type of Booster Pump
You know the size, but the options are overwhelming.
Single-stage, multi-stage, manual, automated—which one is right for you?
Making the wrong choice can be an expensive mistake.
For most homes, an automated, single-stage pump is sufficient. Multi-stage pumps are better for high-rise buildings or agricultural use where a significant pressure increase is needed. Automated systems offer convenience by activating only when pressure drops, saving energy.
Single-Stage vs. Multi-Stage Pumps
The primary difference between these two types lies in their internal construction and pressure-boosting capability.
A single-stage pump uses one impeller to accelerate water and increase its pressure.
These are common in residential applications and are perfect for moderate pressure boosts, typically adding 20 to 40 PSI to the system.
They are simpler in design, more compact, and generally more affordable.
A multi-stage pump uses two or more impellers in a series.
Water passes from one impeller to the next, with its pressure increasing at each stage.
This design allows for much higher pressure outputs, making them ideal for applications with significant pressure requirements, such as high-rise buildings, industrial processes, or large-scale irrigation.
A multi-stage pump can easily achieve pressure boosts of 100 PSI or more.
| Pump Type | Typical Pressure Boost | Common Applications | Complexity |
|---|---|---|---|
| Single-Stage | 20-40 PSI | Single-family homes, small commercial buildings | Low |
| Multi-Stage | 40-100+ PSI | High-rise buildings, irrigation, industrial uses | High |
Manual vs. Automated Control
How the pump is activated is another key consideration.
A manual booster pump is the simplest type.
It is controlled by a physical switch and only runs when you turn it on.
This is suitable for specific, intermittent tasks like washing a car or watering a garden, but it is impractical for whole-house pressure boosting.
An automated booster pump is far more convenient and efficient for residential use.
It uses either a pressure switch or a flow sensor to detect when water is being used.
When a tap is opened, the sensor detects the drop in pressure or the flow of water and automatically turns the pump on.
When the tap is closed, the pump shuts off.
This "on-demand" operation prevents the pump from running continuously, saving a significant amount of energy and reducing wear.
Introducing Advanced Pumping Solutions
Modern pump technology offers even greater efficiency and versatility.
Variable Speed Drive (VSD) pumps are a type of automated pump that can adjust their motor speed in real-time to perfectly match the water demand.
Instead of running at full power every time, a VSD pump will run at a lower speed for a single faucet and ramp up only when multiple fixtures are in use.
This can reduce energy consumption by over 50% compared to a fixed-speed pump.
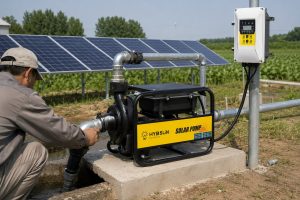
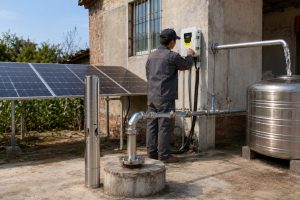
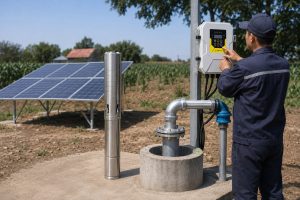
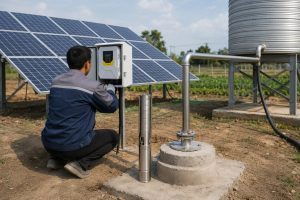
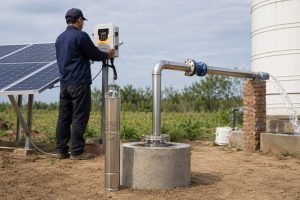
For off-grid or remote properties, solar booster pumps are a game-changing solution.
These pumps are powered directly by photovoltaic panels, eliminating reliance on the grid and offering a sustainable, cost-effective water supply.
They often utilize highly efficient BLDC (Brushless DC) permanent magnet motors, which can achieve efficiencies exceeding 90%, compared to the 60-75% efficiency of standard AC motors.
This high efficiency means fewer solar panels are needed, reducing the system's overall cost.
Furthermore, AC/DC hybrid systems provide the ultimate reliability.
These systems can run on solar power during the day and automatically switch to AC grid power or a generator at night or on cloudy days, ensuring a continuous, 24/7 water supply.
A Step-by-Step Guide to Installation
You have the right pump and the perfect spot.
Now for the installation.
A small mistake here could lead to leaks, damage, and a system that doesn't work at all.
Installation involves shutting off the main water supply, cutting a section of the main pipe, and fitting the pump. You must install unions for easy removal, a check valve to prevent backflow, and ideally, a bypass loop for maintenance.
Preparing for Installation
Proper preparation is 90% of the job.
Before you make a single cut, gather all the necessary tools and materials.
This typically includes a pipe cutter, two pipe wrenches, Teflon tape or pipe dope, and all the required fittings like unions, elbows, and valves.
The most critical first step is safety.
Locate the main shutoff valve for the building and close it completely.
Then, open the lowest faucet in the house to drain the remaining water from the pipes.
If the pump is electric, ensure the circuit breaker supplying power to the installation area is turned off.
The Core Installation Process
With the system drained and safe, you can begin the installation.
First, carefully measure the space the pump and its fittings will occupy on the main water line.
Double-check your measurements before using a pipe cutter to remove the designated section of pipe.
Clean any burrs from the cut ends to ensure a smooth, tight seal.
Next, install the threaded adapters and unions onto the cut pipe ends.
Unions are essential fittings that allow you to easily remove the pump for future maintenance or replacement without having to cut the pipes again.
Now, connect the pump to the unions, making sure the arrow indicating the direction of water flow on the pump housing is pointing away from the water source and toward the house.
Finally, install a check valve on the outlet side of the pump.
This one-way valve is crucial as it prevents the pressurized water from flowing backward through the pump when it shuts off.
Essential Add-ons for a Robust System
A basic installation will work, but adding a few key components will dramatically improve your system's longevity and serviceability.
Bypass Loop: This is a parallel pipe that runs around the booster pump with shutoff valves on either side of the pump and one in the middle of the bypass.
By closing the valves to the pump and opening the bypass valve, you can completely isolate the pump for service while still allowing water (at municipal pressure) to flow to the house.
This feature is invaluable during maintenance.
Pressure Relief Valve: A powerful booster pump can potentially create pressure spikes that exceed the safety limits of your plumbing system.
A pressure relief valve, installed on the outlet side, automatically opens to release excess pressure, protecting your pipes, fixtures, and appliances from damage.
Pressure Tank: A small pressure tank, or expansion tank, installed after the pump, stores a small amount of pressurized water.
When you open a faucet for a small amount of water, the tank supplies it without the pump needing to turn on.
This drastically reduces "pump cycling" (frequent on/off switching), which is a major cause of motor wear and energy waste.
It can extend the pump's life by 30% or more.
Final Checks and Commissioning
Once everything is installed and all connections are tightened, it's time to test your work.
Slowly open the main shutoff valve partway, allowing water to fill the system gradually.
Carefully inspect every new joint and fitting for any signs of leaks.
If you find a leak, shut the water off and tighten the connection.
Once the system is full and leak-free, fully open the main valve.
Prime the pump if the manufacturer's instructions require it.
Finally, turn the power back on.
The pump should activate.
Go to a faucet and enjoy your new, powerful water pressure.
Conclusion
Properly locating, sizing, and installing a booster pump transforms your water system.
Follow these steps to ensure consistent pressure, system longevity, and optimal performance for your property.
FAQs
Can I install a booster pump myself?
Yes, if you have solid plumbing and electrical skills.
If you are not confident, hiring a professional plumber is the safest and most reliable option.
Does a booster pump use a lot of electricity?
It depends on the pump's size and usage.
Modern automated and variable speed drive (VSD) pumps are highly energy-efficient, minimizing electricity consumption.
Where should a booster pump not be installed?
Avoid hard-to-reach places, areas prone to freezing or flooding, and unventilated closets where the motor could overheat.
Do I need a pressure tank with my booster pump?
It is not mandatory but highly recommended.
A pressure tank reduces pump cycling, which saves energy and significantly extends the pump's lifespan.
Can a booster pump be too powerful?
Absolutely.
An oversized pump can create excessive pressure, leading to leaks, pipe strain, and damage to fixtures.
Accurate sizing is crucial.
How long do booster pumps last?
A quality booster pump typically lasts 8 to 15 years.
Longevity depends on the model, usage frequency, water quality, and proper maintenance.
What is the best location for a booster pump?
The best spot is on the main water line, right after the shutoff valve, in a dry, accessible, and protected area like a basement or utility room.
Can a booster pump pull water from a well?
No, a booster pump is designed to increase pressure in an existing, pressurized water line.
A submersible or jet pump is needed to draw water out of a well.