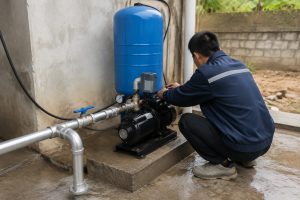
Is your well pump acting up?
You might have erratic water pressure or no water at all.
A faulty pressure switch is a common problem, but fixing it is an easy DIY project.
**To change a well pump pressure switch, you must first turn off all power to the pump at the breaker.
Then, drain the water from the pressure tank, disconnect the wiring, unscrew the old switch, and install the new one.
Finally, reconnect the wires and restore power.**
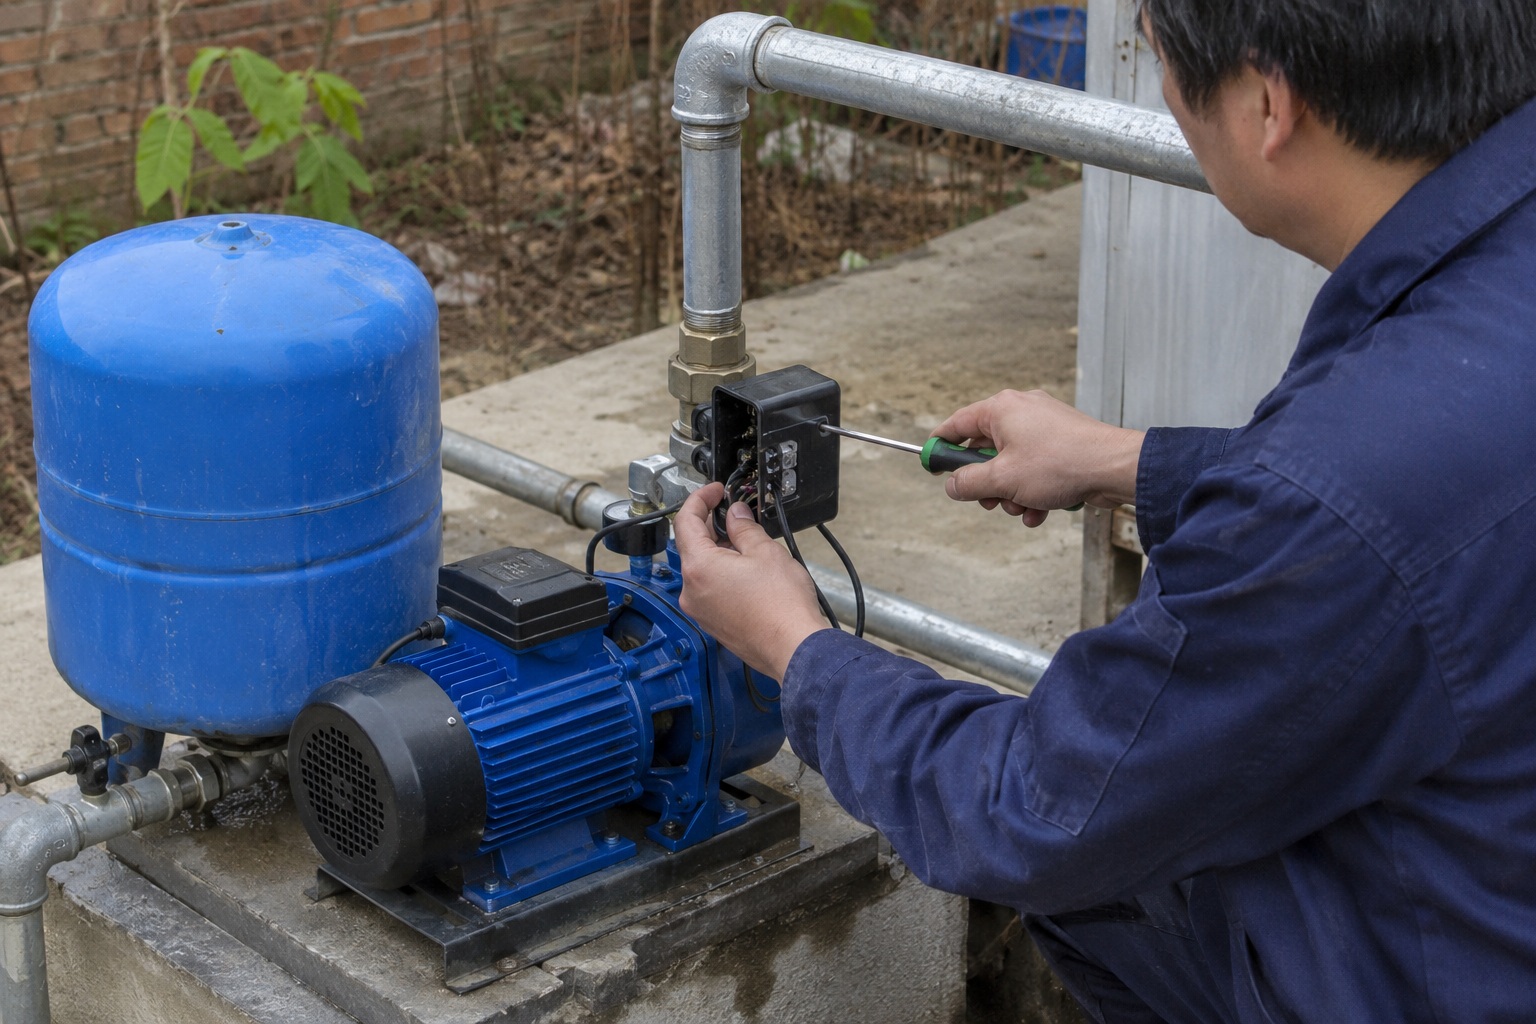
This small box is the brain of your entire well water system, telling the pump when to turn on and off.
When it fails, everything downstream suffers, but the good news is that a replacement is inexpensive and the job only takes about an hour.
Before you spend hundreds on a professional service call, let’s walk through the symptoms, the diagnosis, and the simple step-by-step process to get your water flowing reliably again.
This guide will empower you to tackle the job with confidence.
What are the signs of a failing pressure switch?
Is your pump clicking on and off for no reason?
Does it run continuously, or fail to start at all?
These confusing symptoms often point to a failing pressure switch, a problem that can damage your pump motor if ignored.
The most common signs of a failing pressure switch are rapid on-off cycling (short-cycling), the pump running continuously, the pump not turning on, a chattering or buzzing noise from the switch, and inconsistent pressure levels.
A pressure switch is an electromechanical device that wears out over time.
The internal contacts handle high voltage (usually 240V) every time the pump starts, leading to erosion and arcing.
The springs can weaken, and the diaphragm that senses pressure can fail.
Recognizing these telltale signs early helps you pinpoint the problem and avoid a more expensive pump replacement down the road.
Rapid Short-Cycling
This is the most common complaint from well owners.
The pump kicks on for a few seconds, shuts off, and then immediately turns back on again.
While a waterlogged pressure tank is the number one cause of short-cycling, a failing pressure switch is a close second.
After thousands of cycles, the electrical contact points inside the switch can become pitted and corroded.
This prevents them from making a clean, solid connection.
Instead, they "bounce" or stutter, causing the pump to cycle on and off rapidly.
This rapid cycling generates excessive heat and can burn out your pump's motor in a matter of hours or days, turning a $30 problem into a $1,000+ repair.
Pump Won't Shut Off
This is an emergency situation.
You notice the pump is running continuously, and the pressure gauge needle is pushed far beyond the normal cut-out pressure.
This usually means the electrical contacts inside the switch have become so hot from arcing that they have physically welded themselves together.
The switch can no longer open the circuit to turn the pump off.
A pump running against a closed system (a full tank) will overheat quickly.
This can damage the motor, melt the wiring, or even burst a pipe or fitting, causing major water damage.
If you notice this symptom, you must shut off the power to the pump at the circuit breaker immediately.
Pump Won't Turn On
You turn on a faucet and the pressure drops, but then you get nothing.
The water stops flowing, and you can't hear the pump running.
First, always check that the circuit breaker hasn't tripped.
If the breaker is on, the problem may be the pressure switch.
The contacts may be so corroded or misaligned that they can no longer close to complete the circuit and send power to the pump.
A simple diagnostic test is to rap firmly on the side of the switch cover with a screwdriver handle.
If the pump suddenly clicks and starts running, you have confirmed the contacts are failing.
This is a temporary fix; the switch needs to be replaced.
Interpreting Noises and Visual Clues
Sometimes the switch will give you audible or visible warnings.
A rapid clicking or buzzing sound near the cut-in or cut-out pressure points is a classic sign of "contact bounce."
The worn contacts are arcing rapidly, creating the noise and accelerating their own destruction.
If you remove the cover (with the power off!), you may see clear evidence of failure.
Look for blackened, pitted, or melted-looking contact surfaces.
Any signs of scorching or burning mean the switch is a safety hazard and must be replaced.
| Symptom | Primary Cause | Urgency Level |
|---|---|---|
| Rapid On-Off Cycling | Worn contacts or waterlogged tank | High (Can burn out pump) |
| Pump Runs Continuously | Contacts welded shut | Critical (Shut off power now) |
| Pump Won't Turn On | Severely corroded contacts | High (No water) |
| Chattering/Buzzing Noise | Arcing contacts ("contact bounce") | Medium (Failure is imminent) |
| Burned or Scorched Contacts | Overheating/Arcing | Critical (Fire hazard) |
How do I diagnose and prepare for the replacement?
Are you sure it's the switch?
A wrong diagnosis wastes time and money.
Performing a simple test and gathering the right parts beforehand ensures the job goes smoothly and you only have to do it once.
**To diagnose the switch, tap it with a screwdriver handle; if the pump's behavior changes, the switch is faulty.
Next, turn off the power, remove the cover, and find the pressure rating (e.g., 30/50 PSI) printed inside.
Buy a new switch with the exact same rating.**
Even if the "tap test" doesn't work, a pressure switch is an inexpensive part to replace as a preventative measure, especially if it's over 10 years old.
They have an average lifespan of 8 to 15 years.
When you buy the new switch, it's also a best practice to buy a new pressure gauge and the small pipe nipple that connects the switch to your plumbing.
These parts are cheap and replacing them all at once prevents leaks and future headaches.
The Screwdriver Tap Test
This is the quickest way to confirm a failing switch.
If your pump is refusing to start, or if it's running continuously, a firm rap on the side of the plastic switch cover with a screwdriver handle can jolt the sticky or welded contacts.
If the pump suddenly starts (or stops), you have 100% confirmed the switch is the problem.
The internal mechanism is worn and can no longer operate reliably on its own.
This trick might get your water running temporarily, but the switch should be replaced as soon as possible.
Identifying Your Switch's Pressure Range
Pressure switches are not one-size-fits-all.
They come in three standard factory-set pressure ranges, and you must replace yours with one of the same rating.
Using the wrong switch will cause performance issues and can damage your pump.
With the power off, remove the switch's plastic cover.
Inside, you will find a sticker or label with the pressure rating printed on it.
| Switch Rating | Cut-In (Pump ON) | Cut-Out (Pump OFF) | Common Use |
|---|---|---|---|
| 20/40 PSI | 20 PSI | 40 PSI | Older, low-demand homes |
| 30/50 PSI | 30 PSI | 50 PSI | Most common residential setting |
| 40/60 PSI | 40 PSI | 60 PSI | Modern homes, systems with water treatment |
The first number is the "cut-in" pressure, where the pump turns on.
The second is the "cut-out" pressure, where it turns off.
If your home has water treatment equipment like a softener or iron filter, it's often beneficial to upgrade from a 30/50 to a 40/60 switch to overcome the 5-10 PSI of pressure loss these systems create.
Required Tools and Materials
This is a simple job that doesn't require expensive, specialized tools.
You can complete the entire replacement with a few basic items from your toolbox.
Essential Tools:
- 4-in-1 Screwdriver: For the terminal screws and cover.
- Adjustable Wrench: For the new pressure gauge.
- Pipe Wrench: To remove the old switch and nipple.
- Pliers: For removing the cover and handling wires.
- Wire Strippers: If you need to trim wire ends.
- Non-Contact Voltage Tester: This is a non-negotiable safety tool. Use it to verify the power is off before you touch any wires.
Required Materials:
- Well Pump Pressure Switch: Must match the PSI rating of your old one.
- Teflon Tape: To seal the pipe threads and prevent leaks.
- New Pressure Gauge (Recommended): Gauges fail and are cheap to replace.
- 1/4-in. x 6-in. Galvanized Nipple (Recommended): The old one can be corroded and difficult to remove.
What is the step-by-step process for replacing the switch?
Are you feeling nervous about working with both water and electricity?
You should be cautious, but not intimidated.
By following these steps in the correct order, even a beginner can replace a pressure switch safely and effectively in about an hour.
**First, kill the power by flipping the well pump's breaker and use a voltage tester to confirm it's off.
Label and disconnect the wires.
Drain the tank, then use a pipe wrench to remove the old switch.
Install the new one with Teflon tape and reconnect the wiring.**
The single most important part of this entire process is electrical safety.
Well pumps run on 240 volts, which is lethal.
Never assume the power is off just because the pump isn't running.
Always test, and then test again, before touching a single wire.
Let's break down the installation into five simple, safe steps.
Step 1: Safety First - Shutting Off Power
Go to your home's main electrical panel.
Find the double-pole breaker labeled "Well Pump," "Pump," or similar.
Flip it to the full "OFF" position.
Now, go back to the pressure switch and remove the cover.
Take your non-contact voltage tester and hold its tip near each of the four main terminal screws where the thick wires connect.
The tester should not light up or make any noise.
Test the tester on a known live outlet to be sure it's working.
Do not proceed until you are 100% certain there is no power at the switch.
Step 2: Disconnecting the Old Switch
Before you disconnect any wires, take a photo with your phone or use masking tape to label them.
This simple action prevents confusion later.
You will have two wires coming from the breaker panel (Line) and two wires going to the pump motor (Load).
The wiring diagram is also usually printed on a sticker inside the switch cover.
Using a screwdriver, loosen the four terminal screws and pull the wires out.
Loosen the green ground screw and detach the bare copper ground wires.
Finally, unscrew the conduit locking ring or cable clamp where the wires enter the switch housing and pull the conduits free.
Step 3: Draining the System and Removal
To avoid a watery mess, you need to relieve the water pressure.
Close the main ball valve located between the pressure tank and the rest of your house.
Then, find a nearby drain or hose bib (usually attached to the tank tee assembly) and open it.
Let the water run until it stops completely, draining the pressure tank.
Now, place your pipe wrench around the metal base of the old pressure switch and turn it counter-clockwise to unscrew it from the pipe nipple below.
It may be on tight.
Remove the old pressure gauge and the nipple as well.
Step 4: Installing the New Switch and Gauge
Take your new pipe nipple and wrap the threads on both ends with Teflon tape.
Wrap it clockwise (the same direction you'll be tightening) about 3-4 times.
Screw one end into the tank tee assembly and tighten it with a wrench.
Now, wrap the threads on your new pressure switch and new pressure gauge with Teflon tape.
Screw the switch onto the top of the nipple and the gauge into its port on the tank tee.
Tighten them until they are snug and oriented correctly, but do not overtighten, as this can crack the housing.
Step 5: Wiring the New Switch
This step is simply the reverse of the disconnection process.
The terminals on a new switch are clearly marked.
- LINE (L1, L2): These are the two outer terminals. Connect the two hot wires from your breaker panel here. It does not matter which wire goes to which terminal.
- LOAD (T1, T2) or MOTOR: These are the two inner terminals. Connect the two wires that go to your well pump motor here. Again, it does not matter which wire goes to which terminal.
- Green Screw: Connect all bare copper or green-insulated ground wires to the green ground screw.
Ensure all connections are tight.
Tug gently on each wire to confirm it's secure.
A loose connection can overheat and cause the new switch to fail prematurely.
Re-install the switch cover, close the drain faucet you opened earlier, and re-open the main valve to the house.
You are now ready to restore power and test the system.
How do I adjust the new pressure switch?
Is your new switch installed, but the pressure still isn't quite right?
A simple adjustment can fine-tune your system.
But making the wrong adjustment can lead to dangerously high pressure or a pump that never shuts off.
**With the power OFF, remove the cover to access two adjustment nuts.
Turning the large nut changes both the cut-in and cut-out pressure.
Turning the small nut adjusts only the cut-out pressure, which widens or narrows the pressure gap (differential).**
Most pressure switches work perfectly right out of the box with their factory settings.
You should only attempt an adjustment if you have a specific reason, such as wanting higher overall pressure or needing to compensate for new water treatment equipment.
Crucially, any change to the cut-in pressure requires a corresponding change to your pressure tank's air pre-charge.
Failure to match them will cause rapid short-cycling and destroy your pump.
Understanding the Adjustment Nuts
Inside the switch, you will see two springs, each with a nut on top.
These control the switch's behavior.
- The Large Nut (Range Nut): This nut sits on the larger, central spring. It controls the overall pressure range. Tightening it (clockwise) raises both the cut-in and cut-out pressures together. Loosening it (counter-clockwise) lowers them both.
- The Small Nut (Differential Nut): This nut sits on the smaller, offset spring. It controls only the differential, or the gap between the cut-in and cut-out. Tightening it (clockwise) only raises the cut-out pressure, widening the gap. Loosening it narrows the gap.
For almost all residential adjustments, you will only need to turn the large nut.
The standard 20 PSI differential is ideal for most systems.
| Adjustment Action | Effect on Cut-In Pressure | Effect on Cut-Out Pressure |
|---|---|---|
| Tighten Large Nut | Increases | Increases |
| Loosen Large Nut | Decreases | Decreases |
| Tighten Small Nut | Stays the Same | Increases |
| Loosen Small Nut | Stays the Same | Decreases |
The Adjustment and Testing Process
Make adjustments in small increments.
One full turn of the large nut typically changes the pressure by about 2-3 PSI.
- Turn off the power at the breaker.
- Remove the switch cover.
- Turn the large nut no more than one or two full turns in the desired direction (clockwise to increase pressure, counter-clockwise to decrease).
- Replace the cover and turn the power back on.
- Watch the pressure gauge as the pump runs. Note the pressure at which it cuts out.
- Open a faucet and let water run. Note the pressure at which the pump cuts back in.
- Repeat the process until you achieve the desired settings. Do not exceed a 60 PSI cut-out for most residential systems, as higher pressures can stress plumbing and fixtures.
The 2 PSI Rule: Matching the Tank to the Switch
This is the most critical and most overlooked step.
Your pressure tank's air pre-charge must be set to 2 PSI below your new cut-in pressure.
If you adjust your switch to a 40/60 setting, the tank pre-charge must be 38 PSI.
To set it, you must turn off the pump and drain all water pressure from the system until a faucet stops flowing.
Then, use a tire pressure gauge on the air valve on top of the tank.
Add air with a compressor or release air until it reads 2 PSI below your cut-in.
If this is not done, the system will short-cycle, drastically shortening the life of your new switch and your pump.
Conclusion
Replacing a faulty well pump pressure switch is an inexpensive, beginner-friendly task.
It restores your home's water pressure and prevents catastrophic damage to your pump motor, saving you from a much costlier repair.
Frequently Asked Questions
What should a well pressure switch be set at?
Most homes use a 30/50 PSI or 40/60 PSI setting. The 40/60 setting provides stronger pressure, which is better for larger homes or those with water treatment systems.
Is 70 PSI too high for a well pump?
Yes, for most homes, 70 PSI is too high. It puts excessive stress on plumbing, fixtures, and appliances, increasing the risk of leaks. A 60 PSI cut-out is a safer maximum.
How long does a well pressure switch last?
A typical pressure switch lasts between 8 and 15 years. Its lifespan depends on how frequently your pump cycles. Hard water can also cause premature failure.
Why does my well pump keep turning on and off every few seconds?
This is called short-cycling. It's most often caused by a failed, waterlogged pressure tank, but a failing pressure switch with worn contacts can also be the culprit.
How much does it cost to replace a well pressure switch?
The switch itself costs between $20 and $60. If you do it yourself, that's the total cost. Hiring a professional can add $150 to $300 in labor.
Can a bad pressure switch damage my well pump?
Yes, absolutely. A switch that short-cycles or fails to shut off can overheat and destroy your well pump motor in a very short amount of time.
Can I adjust the well pressure switch with the power on?
No, never. The terminals inside carry 240 volts, which is lethal. Always turn off the power at the breaker before removing the cover or making any adjustments.