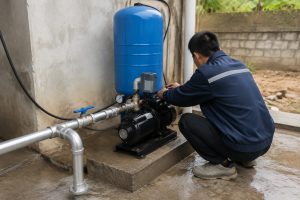
Your water pressure is suddenly gone, and the house is silent.
Your well pump pressure switch likely needs a reset, a common issue that often has a straightforward fix.
**To reset a pressure switch, first, you must turn off all power at the circuit breaker.
Next, remove the switch cover to access the adjustment nuts.
Carefully turn the large nut to set the overall pressure range and the smaller nut to adjust the differential.
Make small adjustments, then restore power and test the system.**

Before you begin turning nuts and adjusting springs, it is crucial to understand how this vital component operates.
Grasping the function of your pressure switch is the key to a successful reset and ensures a reliable, long-lasting water supply for your home.
Let’s dive into what makes your pressure switch tick and how to manage it safely and effectively.
How a Pressure Switch Works
Your pressure switch is the brain of your well system, but its inner workings can seem like a mystery.
Understanding this simple electromechanical device demystifies why your water pressure behaves the way it does.
**A pressure switch uses a rubber diaphragm to sense the water pressure in your system.
This pressure acts against a set of springs, which in turn open or close electrical contacts.
These contacts control the 240V power going to your well pump, turning it on and off at preset pressure points.**
The pressure switch is a simple yet brilliant device mounted on the plumbing near your pressure tank.
Its only job is to monitor water pressure and command the well pump accordingly.
Inside the small grey or black box, a few key parts work in harmony to control your entire water system.
The Core Components: Diaphragm and Contacts
At the base of the switch, a small port connects to your water line.
Water pressure pushes against a rubber diaphragm.
This diaphragm is the sensor of the system.
As pressure rises, it pushes the diaphragm up.
As pressure falls, it moves down.
This movement controls a lever that opens and closes a set of electrical contacts.
These contacts are essentially the on/off switch for your pump.
When they touch (close), power flows to the pump.
When they separate (open), the power is cut, and the pump stops.
Over thousands of cycles, these contacts can wear out, leading to 85% of switch failures.
Understanding the Springs: Range and Differential
Two springs work against the diaphragm's movement, and they are what you adjust to "reset" or change your pressure.
-
The Large Spring (Range Nut): This main spring, adjusted by the larger nut, sets the cut-in pressure. Tightening it by turning clockwise raises both the cut-in and cut-out pressures together. One full turn typically changes the pressure by about 2.5 PSI. It shifts the entire operational range up or down.
-
The Small Spring (Differential Nut): This smaller spring, adjusted by the smaller nut, only changes the cut-out pressure. Tightening it increases the gap (the differential) between the cut-in and cut-out. Most systems operate best with a 20 PSI differential, and this nut rarely needs adjustment unless you have a specific need.
| Adjustment Nut | Function | Effect of Turning Clockwise |
|---|---|---|
| Large Nut | Sets Cut-In & Cut-Out (Range) | Increases both pressures |
| Small Nut | Sets Cut-Out Only (Differential) | Increases cut-out pressure |
The Electrical Connection: 240V Power
This is the most critical part to understand for safety.
The pressure switch is not a low-voltage device.
It directly handles the 240-volt circuit that powers your well pump, often at up to 30 amps.
This is the same voltage as an electric stove or dryer, and it is lethal.
When you work on a pressure switch, you are working directly with line voltage.
This is why disconnecting power at the breaker is not a suggestion—it is an absolute requirement to prevent severe injury or death.
Standard Pressure Settings: 20/40, 30/50, and 40/60
Does your shower feel weak, or does the water pressure fluctuate wildly?
The pressure switch setting is a likely culprit, as not all settings are created equal.
**Pressure switches are typically pre-set from the factory to 20/40, 30/50, or 40/60 PSI.
The first number is the "cut-in" (pump ON) pressure, and the second is the "cut-out" (pump OFF).
Most modern homes use a 40/60 setting to deliver stronger, more consistent pressure.**
Choosing the right setting is a balance between performance, energy use, and the longevity of your pump system.
The ideal setting depends on your household size, plumbing, and any water treatment equipment you may have installed.
An incorrect setting can lead to poor performance or premature wear on your pump and tank.
What Do the Numbers Mean for Your Home?
These numbers directly translate to the water pressure you feel at the faucet.
A 20 PSI differential is standard, providing a good balance between pump cycling and consistent pressure.
-
20/40 PSI: This is an older standard, now considered low for most homes. At 20 PSI, shower pressure can feel noticeably weak. You'll experience more significant pressure drops, and it's generally only suitable for very small, low-demand cabins or older systems.
-
30/50 PSI: This is the most common factory setting and a solid choice for the average residential home with 2-3 bathrooms. It provides acceptable pressure at the low end (30 PSI) and good pressure at the high end (50 PSI), offering a good compromise for system longevity.
-
40/60 PSI: This is the modern standard, especially for larger homes or those with extensive water treatment systems. It provides a much stronger and more satisfying water pressure, feeling closer to city water. The higher pressure is better for modern appliances and multi-head showers.
| Setting | Cut-In (Pump ON) | Cut-Out (Pump OFF) | Tank Pre-Charge | Best For |
|---|---|---|---|---|
| 20/40 | 20 PSI | 40 PSI | 18 PSI | Older, low-demand homes; gravity-fed systems |
| 30/50 | 30 PSI | 50 PSI | 28 PSI | Standard residential use (most common) |
| 40/60 | 40 PSI | 60 PSI | 38 PSI | Higher-demand homes; homes with treatment systems |
The Impact of Water Treatment Equipment
If you have a water softener, iron filter, or acid neutralizer, you should strongly consider a 40/60 PSI setting.
These systems can create a pressure drop of 5 to 10 PSI as water passes through them.
If your system is set to 30/50, a 10 PSI loss means your usable pressure at the faucet could be as low as 20 PSI before the pump kicks on.
That's a 33% reduction in perceived pressure.
By starting with a higher 40/60 range, you ensure strong pressure at your fixtures even after accounting for the treatment system's pressure loss.
Can You Set It Higher Than 40/60 PSI?
Some people are tempted to push for 50/70 or even 60/80 PSI for maximum pressure.
While some switches can be adjusted this high, it is generally not recommended for residential applications.
Most home plumbing fixtures and supply lines are rated for a maximum of 80 PSI.
Operating continuously at higher pressures puts significant stress on every pipe joint, faucet valve, and appliance solenoid in your home.
This increases the risk of leaks by over 50% and can shorten the lifespan of your washing machine and dishwasher.
For 99% of homes, 40/60 PSI is the practical and safe maximum.
How to Adjust Your Pressure Switch
Are you tired of lackluster or inconsistent water pressure from your well?
You can adjust the switch yourself, but safety must be your number one priority.
One wrong move near 240 volts can be deadly.
**First, kill the power to the pump at the circuit breaker.
Use a wrench on the large nut inside the switch to adjust the entire pressure range.
Use the small nut to change the cut-out point.
Most importantly, you must adjust your tank's air pressure to 2 PSI below the new cut-in setting.**
Adjusting a pressure switch is a straightforward task if you are comfortable with basic electrical safety and plumbing principles.
If you have any doubt, call a professional.
There is no shame in prioritizing your safety.
Critical Safety Warning: Disconnect Power First
This cannot be overstated.
Before you even think about removing the switch cover, go to your breaker panel.
Find the breaker labeled "Well Pump" or "Pump"—it is usually a double-pole 30-amp breaker.
Flip it to the OFF position.
To be 100% certain, use a non-contact voltage tester to verify there is no power at the switch terminals.
Never trust that the switch is off just because the pump is not running.
Step-by-Step Adjustment Guide
- Turn Off the Breaker: Locate the well pump breaker in your electrical panel and switch it off.
- Remove the Switch Cover: A single screw or nut usually holds the plastic or metal cover on. Set it aside.
- Identify the Adjustment Nuts: You will see a large spring with a nut on top (the range) and a smaller spring with a nut (the differential).
- Adjust the Large Nut (Range): Turn this nut clockwise to increase both the cut-in and cut-out pressures. Turn it counter-clockwise to decrease them. A single full turn equals approximately 2.5 PSI.
- Adjust the Small Nut (Differential): Only adjust this if you need to change the gap. Turning it clockwise raises the cut-out pressure, widening the differential. Most systems do not require this to be changed from the factory 20 PSI differential.
- Adjust Tank Pre-Charge: This is a mandatory step. After adjusting the switch, turn off the pump and drain all water from the system by opening a faucet. Use a tire gauge on the tank's air valve and set the pressure to exactly 2 PSI below your new cut-in setting.
- Replace Cover and Test: Put the cover back on, turn the breaker on, and watch your pressure gauge as the pump runs a full cycle to confirm it hits your new cut-in and cut-out points.
Making Small, Incremental Adjustments
Patience is key.
Do not turn the nuts more than one or two full rotations at a time.
After each small adjustment, restore power and run a test cycle.
Making large adjustments can cause you to overshoot your target, potentially creating dangerously high pressure that could damage your plumbing or causing the pump to run continuously because it can't reach the new cut-out.
Slow and steady wins the race.
Signs of a Failing Pressure Switch
Is your well pump acting erratically, cycling on and off for no reason?
The pressure switch might be sending its final warning signals.
Ignoring these signs can lead to a dead pump or a total loss of water.
**A failing switch often causes rapid on-off cycling (short-cycling), a pump that runs continuously and won't shut off, or a pump that won't turn on at all.
You might also hear a chattering or buzzing noise from the switch.
These symptoms usually mean it's time for a replacement, not an adjustment.**
Pressure switches have an average lifespan of 8 to 15 years.
The electrical contacts erode from the arcing of thousands of cycles, the springs can weaken, and the diaphragm can fail.
Recognizing the symptoms early can save you from a much more expensive pump replacement down the road.
Electrical Failure Symptoms
Most failures are electrical, as the contacts bear the brunt of the work.
- Pump Won't Shut Off: This is an emergency. It usually means the contacts have become so hot from arcing that they have welded themselves together. The switch can no longer open the circuit. You must shut off the breaker immediately to prevent the pump from burning out.
- Pump Won't Turn On: If the pressure is zero but the pump is silent, the contacts may be too corroded or pitted to make a connection. A temporary test is to gently tap the switch housing with a screwdriver handle. If the pump starts, the contacts are bad and the switch needs replacement.
- Chattering or Buzzing: This sound is caused by the contacts "bouncing" instead of making a clean connection. The rapid clicking is actually electricity arcing across the damaged surfaces, which quickly destroys the switch.
Mechanical Failure Symptoms
Mechanical failures are less common but just as problematic.
- Inconsistent Pressure: If the pump cuts in at 30 PSI on one cycle and 25 PSI on the next, the internal springs have likely weakened and can no longer provide consistent tension. The switch is unreliable and must be replaced.
- Water Leaks: If you see water dripping from the switch housing itself, the internal diaphragm has ruptured. This is a non-repairable failure.
Visual Inspection: What to Look For
With the power off, remove the cover and look at the contact points.
They should be clean and silver-colored.
If you see black scorch marks, pitting, or surfaces that look melted, the switch is beyond repair.
Some people may suggest filing the contacts clean, but this is a dangerous and very temporary fix.
Filing removes surface material, making the contacts thinner and less able to handle the electrical load, increasing the risk of them welding together.
| Symptom | Common Cause | Recommended Action |
|---|---|---|
| Pump cycles on/off every few seconds | Worn contacts or waterlogged tank | Check tank first, then replace switch |
| Pump runs continuously | Contacts welded shut | EMERGENCY: Turn off breaker, replace switch |
| Pump won't start (with power) | Contacts corroded or pitted | Replace switch |
| Chattering/buzzing noise | Bouncing/arcing contacts | Replace switch |
When to Replace vs. Adjust
Your water pressure is off, but do you need to spend money on a new switch or just perform a simple tweak?
Knowing the difference will save you time, money, and a great deal of frustration.
**You should adjust the switch if the pressure is consistently incorrect or if you have installed new equipment that requires higher pressure.
You must replace it immediately if the pump won't shut off, won't turn on, makes a chattering sound, or has visibly burnt contacts inside.**
Making the right call between adjusting and replacing is crucial for both safety and system reliability.
An adjustment can't fix a physically failed component, and a replacement is unnecessary if the settings have simply drifted over time.
This guide will help you make an informed decision.
Scenarios for Adjustment
Adjustment is the right choice when the switch is mechanically and electrically sound but the settings are not optimized for your needs.
- Consistently Wrong Pressure: The pump works reliably, but it cuts in at 25 PSI instead of 30 PSI. This is a classic case where a small turn of the range nut can bring it back into spec.
- Pressure is Too Low Overall: Your showers feel weak, but the system is working. Moving from a 30/50 to a 40/60 setting (and adjusting the tank accordingly) can solve this. You can adjust your existing switch or buy a new factory-set 40/60 switch.
- New Equipment Installed: You just added a whole-house iron filter. To compensate for the 7-10 PSI pressure drop, you need to increase your switch's pressure range.
Scenarios for Immediate Replacement
For these symptoms, adjustment is not an option and can even be dangerous.
The switch has failed internally and must be replaced.
- Pump Won't Shut Off: The contacts are fused. This is a fire and equipment hazard.
- Pump Won't Turn On (with power confirmed): The contacts are too damaged to make a connection.
- Chattering or Buzzing: The contacts are arcing and destroying themselves. The failure is accelerating.
- Visible Burns or Melting: The switch is a fire hazard and has lost its electrical integrity.
- Age Over 10 Years: If the switch is old and you are already performing other work on the system, proactive replacement is a wise investment.
| Symptom | Adjust First? | Replace Instead? | Rationale |
|---|---|---|---|
| Pressure is consistent but wrong | Yes | No | The mechanism is working, settings just need a tweak. |
| Pump short-cycles (tank is OK) | No | Yes | Contacts are pitted and can't hold a connection. |
| Pump won't shut off | No | Yes (Immediately) | Contacts are welded; this is a safety hazard. |
| Switch is over 10 years old and you're replacing tank | No | Yes | Proactive maintenance saves on future labor costs. |
Proactive Replacement: A Smart Investment
Here is a pro tip from over 30 years in the field: if you are replacing your pressure tank, replace the pressure switch at the same time.
The switch itself costs between $25 and $60.
The labor to install it is minimal when the system is already drained for the tank replacement.
A new tank and a new switch give you a completely refreshed pressure system with a known baseline, preventing a cheap switch failure from causing problems a few months down the line.
Pressure Switch and Pressure Tank Relationship
Your pressure switch and pressure tank are an inseparable team.
If they do not work together in perfect harmony, your entire well system is destined for premature failure, costing you hundreds or even thousands of dollars in repairs.
**The pressure tank's air pre-charge must be set to exactly 2 PSI below the pressure switch's cut-in setting.
This is not optional.
For example, a 40/60 PSI switch requires a 38 PSI pre-charge in the tank.
A mismatch is the number one cause of rapid pump cycling and catastrophic pump failure.**
Understanding this critical relationship is the single most important piece of knowledge for any well owner.
Getting this setting right ensures your pump runs efficiently, your pressure is stable, and your equipment lasts for its full intended lifespan.
Getting it wrong guarantees problems.
The Crucial 2 PSI Rule Explained
The air in your pressure tank acts as a cushion.
When the pump runs, it pushes water into the tank, compressing the air.
When you open a faucet, this compressed air pushes the water out, providing pressure without the pump needing to run.
The 2 PSI gap ensures that there is still some water in the tank when the pump is triggered to turn on.
This prevents the system from "bottoming out" and provides a smoother transition as the pump starts.
It is the foundational principle of a properly functioning well system.
What Happens When Pre-Charge is Wrong?
A mismatch between the switch and the tank creates immediate and damaging problems.
-
Pre-Charge Too High (at or above cut-in): If your switch is 40/60 and your tank is at 40 PSI or higher, the air pressure is too strong. The pump turns on at 40 PSI, but it can't push much water into the tank. The pressure spikes to 60 PSI almost instantly, and the pump shuts off. You get a few seconds of water flow before the pressure plummets and the cycle repeats. This is called short-cycling, and it can cause a pump to run over 100 times per hour instead of a normal 6-8 times, burning out the pump and switch in months.
-
Pre-Charge Too Low (or a failed bladder): If the air charge is too low or has escaped entirely (a "waterlogged" tank), there is no air cushion. As soon as you open a faucet, the pressure drops instantly, triggering the pump. When you close the faucet, the pressure spikes instantly, shutting it off. This also causes damaging short-cycling.
| Tank Pre-Charge Status | Relative to Cut-In | Consequence | Result |
|---|---|---|---|
| Too High | At or Above | Tank stores almost no water | Extreme short-cycling, switch/pump failure |
| Too Low | >5 PSI Below | Bladder over-stretches and fails | Leads to a waterlogged tank, short-cycling |
| Waterlogged | Zero Air Charge | No air cushion, tank is solid water | Extreme short-cycling, imminent failure |
How to Check and Correct Your Tank's Pre-Charge
This is a vital maintenance task every well owner should perform annually.
- Turn off the power to your well pump at the breaker.
- Open a nearby faucet and let it run until water stops flowing completely. The system is now at zero pressure.
- Locate the air valve on your pressure tank (it looks like a tire valve, usually on top).
- Use a standard tire pressure gauge to check the pressure.
- The reading should be 2 PSI below your switch's cut-in setting (e.g., 38 PSI for a 40/60 switch).
- If the pressure is low, add air with a bicycle pump or air compressor. If it's high, press the pin in the valve to release air.
- If water sprays out of the air valve, the internal bladder has failed, and the entire tank must be replaced.
Conclusion
Resetting a pressure switch involves safe electrical practice and careful mechanical adjustment.
However, the switch's health is directly tied to the entire system, especially the pressure tank's pre-charge.
Frequently Asked Questions
What should a well pressure switch be set at?
Most modern homes use a 40/60 PSI setting for strong, consistent pressure. The common factory default is 30/50 PSI, which is suitable for average residential use.
Why does my well pump keep turning on and off?
This is called short-cycling. It's most often caused by a failed, waterlogged pressure tank or, secondarily, a faulty pressure switch with worn contacts.
How do you know if a pressure switch is bad?
Signs include the pump not turning on or off, chattering noises, or visible burn marks on the internal contacts. Inconsistent pressure points are also a sign of failure.
What happens if pressure tank pressure is too high?
If the tank's air pressure is set at or above the switch's cut-in pressure, it will cause the pump to short-cycle, leading to premature pump and switch failure.
Can I adjust the pressure switch with the power on?
Absolutely not. Pressure switches handle 240 volts, which is lethal. Always disconnect power at the circuit breaker before removing the cover or making any adjustments.
How much does it cost to replace a pressure switch?
The switch part itself costs $25 to $60. If you hire a professional, the total cost including the service call and labor is typically between $250 and $500.
What is the difference between the two screws on a pressure switch?
The large screw (or nut) adjusts the entire pressure range up and down. The smaller screw adjusts only the cut-out pressure, changing the differential between on and off.