Weak water flow is frustrating.
It makes daily tasks like showering and washing dishes inefficient.
You can solve this by learning to adjust your water pump pressure.
Adjusting pump pressure is a straightforward process. First, turn off the power to the pump. Then, identify whether you have an automatic controller or a mechanical switch. You will then use a screwdriver or wrench to make small adjustments to the settings, while monitoring the changes on a pressure gauge.
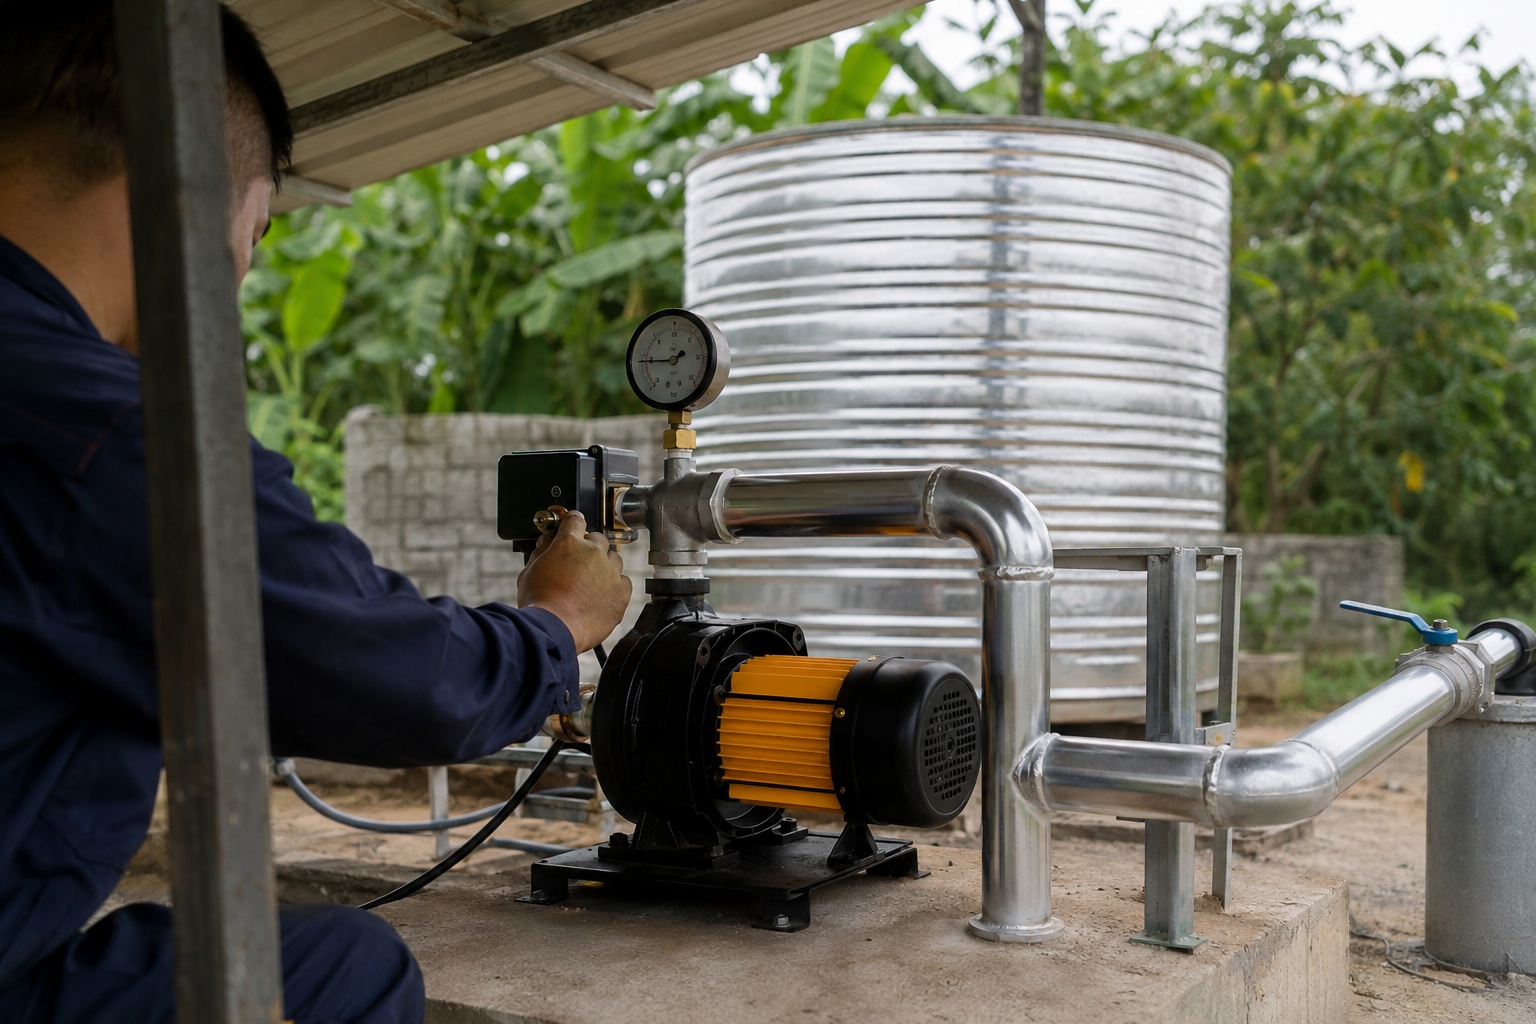
Understanding your pump's pressure system is the first step toward achieving a strong, consistent water supply.
Whether you have a simple well pump or a sophisticated solar-powered system, the principles of pressure adjustment are similar.
This guide will walk you through the process for different types of pumps, ensuring you can perform the task safely and effectively.
Let's begin by understanding what normal pressure looks like.
What Normal Well Pump Pressure Looks Like
Is your water pressure feeling weak?
Low pressure can make showers unsatisfying and cause appliances to fill slowly.
These are common signs that your pump's pressure settings may need attention.
Most residential well systems operate within a pressure range of 30 to 50 PSI or 40 to 60 PSI. This range dictates when the pump turns on (cut-in) and off (cut-out). For safety, pressure should not exceed 80 PSI, as it can damage your plumbing.
Understanding Cut-In and Cut-Out Pressure
Your pump's pressure switch controls two key thresholds.
The lower number is the "cut-in" pressure.
When the system's pressure drops to this level, the switch activates the pump.
The higher number is the "cut-out" pressure.
When the pump fills the pressure tank to this level, the switch deactivates the pump.
A well-performing system typically maintains a 20 PSI difference between these two points.
This is known as the pressure differential.
For example, a 40/60 PSI setting means the pump turns on at 40 PSI and off at 60 PSI.
This 20 PSI differential prevents the pump from starting and stopping too frequently, a condition called short-cycling.
The Dangers of Incorrect Pressure Settings
Setting the pressure too high can be dangerous.
The International Residential Code (IRC) and Uniform Plumbing Code (UPC) state that residential water pressure should not exceed 80 PSI.
Pressure above this limit puts significant stress on your entire plumbing system.
It can lead to burst pipes, damaged appliance seals, and leaking faucets.
If you need to operate above 80 PSI for a specific reason, you must install a pressure-reducing valve (PRV) to protect your home's plumbing.
Conversely, setting the pressure too low results in a weak and unsatisfactory water flow.
How Pressure Affects Pump Lifespan and Efficiency
Proper pressure settings are crucial for the health of your water pump.
If the differential is too narrow (e.g., 50/55 PSI), the pump will cycle on and off rapidly.
Each time a pump starts, it draws a large amount of electrical current and undergoes mechanical stress.
Short-cycling dramatically increases wear and tear on the motor and switch components, leading to premature failure and higher energy bills.
A standard pump motor is designed for a limited number of starts per hour.
Exceeding this number by 50% or more can significantly shorten its operational life.
Properly adjusted pressure ensures the pump runs for a reasonable duration each cycle, typically 30 seconds or more, which is much more efficient.
| Common Setting | Cut-In PSI | Cut-Out PSI | Differential | Typical Application |
|---|---|---|---|---|
| Standard | 30 | 50 | 20 PSI | Older or smaller homes |
| Common | 40 | 60 | 20 PSI | Most modern homes |
| High-Demand | 50 | 70 | 20 PSI | Larger homes with more fixtures |
How to Adjust an Automatic Water Pump Pressure Controller
Your pump has a modern electronic controller, but the water flow is weak.
Adjusting it might seem intimidating, but the process is quite simple.
It involves a single adjustment without opening the unit.
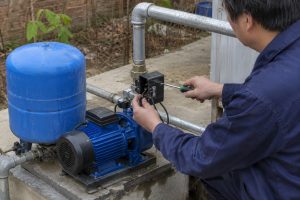
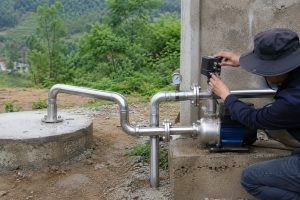
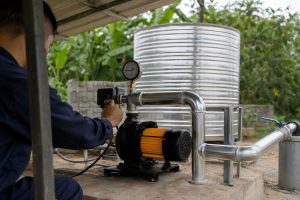
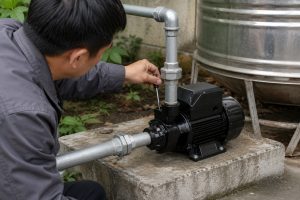
To adjust an automatic controller, first cut the power. Locate the single adjustment screw on the unit. Turn it clockwise to increase the start pressure or counter-clockwise to decrease it. Monitor the built-in pressure gauge to see the new setting and then test the system.
Step-by-Step Guide for Automatic Controllers
Automatic pressure controllers are electronic units that simplify pressure management.
They operate without direct mechanical interaction, using a sensor to monitor pressure.
Here is a clear, step-by-step process for making adjustments.
- Turn Off the Power: Safety is always first. Go to your circuit breaker and turn off the power supply to the water pump.
- Check Current Settings: Before making changes, note the current start pressure shown on the controller's built-in gauge.
- Adjust the Tension: Locate the adjustment screw. It is usually marked with a "+" and "-" or arrows. Use a screwdriver to turn the screw. A clockwise turn typically increases the start pressure, while a counter-clockwise turn lowers it. Make small, quarter-turn adjustments at a time.
- Monitor the Results: After each small adjustment, you can temporarily restore power to see the new start pressure on the gauge. This allows for precise tuning.
- Restore and Test: Once you have set your desired pressure, restore the power permanently. Open a tap in your house and let the water run. Watch the pressure gauge to confirm the pump kicks in at your new setpoint and shuts off correctly when the tap is closed.
Coordinating with a Pressure Tank
Many systems with automatic controllers also include a pressure tank.
The tank stores a reserve of pressurized water to reduce pump cycling.
For the system to work efficiently, the air pre-charge in the tank must be correctly set relative to the pump's cut-in pressure.
The rule is simple: the tank's air pressure should be set to 2 PSI (or approximately 0.2 bar) below the new pump cut-in pressure.
For example, if you adjust the controller's cut-in pressure to 40 PSI, the pressure tank must be pre-charged to 38 PSI.
To do this, you must first drain all water from the tank.
Then, use a standard tire pressure gauge on the Schrader valve (usually at the top of the tank) to check and adjust the air pressure.
An incorrect tank pre-charge can cause waterlogging or rapid cycling, defeating the purpose of the tank.
Troubleshooting and Advanced Options
Sometimes, adjustments do not solve the problem.
If the pump fails to shut off after you close all taps, the issue may lie with a faulty check valve or the controller's internal flow sensor.
Inspect the check valve to ensure it is not stuck open, which would allow pressure to bleed back toward the well.
If consistent high pressure is needed across multiple zones, or if you are running a large-scale irrigation system, a standard controller may not be sufficient.
In these situations, consider upgrading to more advanced options.
Variable Speed Drive (VSD) pumps, for instance, can deliver constant pressure regardless of demand.
High-performance multistage pumps can also generate more effective pressure for demanding applications.
How to Adjust the Pressure Switch on a Water Pump
Your traditional well pump is equipped with a mechanical pressure switch.
You want to increase your water pressure, but you are not sure how to adjust the switch safely.
This task requires a bit more hands-on skill.
First, disconnect the power. Remove the switch's cover to access the adjustment nuts. Use a wrench on the large center nut to raise or lower both the cut-in and cut-out pressures together. The smaller nut adjusts only the cut-out, changing the pressure differential.
Identifying the Adjustment Nuts
Inside the pressure switch cover, you will find two spring-loaded nuts.
Understanding their distinct functions is key to a successful adjustment.
-
The Large Center Nut: This nut controls the overall pressure range. Tightening it (turning clockwise) increases both the cut-in and cut-out pressures simultaneously. Loosening it (turning counter-clockwise) decreases both pressures. A single full rotation of this nut typically changes the pressure by about 2-3 PSI.
-
The Smaller Offset Nut: This nut controls the differential between the cut-in and cut-out pressures. Tightening it (turning clockwise) increases the cut-out pressure only. This widens the gap between the on and off points. Loosening it reduces the cut-out pressure, narrowing the gap.
It is crucial to maintain at least a 20 PSI differential to prevent the pump from short-cycling.
| Nut | Adjustment Direction | Effect on Pressure | Recommended Use |
|---|---|---|---|
| Large Nut | Clockwise | Increases Cut-In & Cut-Out | To raise the entire operating range (e.g., from 30/50 to 40/60). |
| Large Nut | Counter-Clockwise | Decreases Cut-In & Cut-Out | To lower the entire operating range. |
| Small Nut | Clockwise | Increases Cut-Out Only | To widen the differential (e.g., from 40/60 to 40/65). |
| Small Nut | Counter-Clockwise | Decreases Cut-Out Only | To narrow the differential. |
A Detailed Adjustment and Inspection Process
Adjusting a mechanical switch requires care and attention to detail.
Follow these steps for a safe and effective adjustment.
- Turn Off the Power: This is the most critical step. Shut off the circuit breaker for the well pump to prevent electric shock.
- Drain System Pressure: Open a nearby faucet to drain water from the system until the pressure gauge reads zero and the pump would normally turn on.
- Adjust the Nuts: Remove the plastic or metal cover from the pressure switch. Use a socket wrench to adjust the nuts as needed. Start with the large nut to set your desired cut-in pressure. Then, use the small nut to set the cut-out pressure, ensuring a 20 PSI gap.
- Inspect the Switch: While the cover is off, inspect the internal components. Check for debris, insects, or spiders that can block the contact points. Ensure wire connections are tight. Look at the contact points themselves—they should be clean and shiny. If they are black, pitted, or rough, it is a sign of excessive arcing from short-cycling, and the switch may need replacement.
- Set Tank Pressure: Just like with an automatic controller, the pressure tank's air pre-charge must be 2 PSI below your new cut-in pressure.
- Test the System: Replace the switch cover. Turn the power back on. Let the pump run through a full cycle. Watch the pressure gauge to confirm it cuts in and cuts out at your new settings. Open a faucet to ensure the system operates smoothly.
Never set the cut-out pressure higher than the pump's maximum pressure rating.
If you do, the pump will run continuously without shutting off, leading to overheating and failure.
Constant Pressure with Variable Speed Systems
Are you tired of your water pressure dropping every time a second faucet is turned on?
Traditional pump systems struggle to handle fluctuating water demand.
This results in annoying pressure swings during daily use.
Variable speed drive (VFD) systems provide a superior solution. Using advanced sensors, they adjust the pump's motor speed in real-time. This maintains a perfectly consistent, user-set pressure, no matter how many taps are open, delivering a truly constant flow.
The Core of Modern Pumps: The BLDC Motor
The heart of a modern VFD system is often a high-efficiency motor.
Brushless DC (BLDC) permanent magnet motors are a prime example.
These motors achieve electrical efficiencies exceeding 90%, a significant improvement over traditional AC motors.
The rotor is constructed from powerful materials like 40SH neodymium iron boron magnets.
This advanced design provides several key advantages.
Technically, BLDC motors deliver higher torque and power in a much smaller package.
Compared to older motor designs, they can be up to 47% smaller and 39% lighter.
This compact design simplifies installation and reduces material costs.
From a market perspective, this high efficiency directly translates to lower operating costs for the end-user.
A more efficient motor requires fewer solar panels in an off-grid system or consumes less grid electricity, offering a return on investment of over 30% in energy savings alone.
How VFDs and MPPT Controllers Create Synergy
In solar-powered applications, VFDs are often paired with Maximum Power Point Tracking (MPPT) controllers.
This combination is a game-changer for off-grid water solutions.
An MPPT controller constantly analyzes the output from the solar panels and adjusts the electrical load to extract the maximum amount of power available.
It can boost efficiency by up to 30% compared to systems without MPPT.
When integrated, the MPPT controller ensures the BLDC motor receives optimal power, while the VFD adjusts the motor's speed to meet water demand.
This intelligent synergy ensures that every watt of solar energy is used effectively, providing reliable water flow even in variable sunlight conditions.
The Rise of Specialized Solar Pumping Solutions
The growing global demand for sustainable water solutions has spurred innovation in pump technology.
This is especially true in regions like Africa, Australia, and the Americas, where grid power is unreliable or unavailable.
Solar pumps offer an environmentally friendly and cost-effective alternative.
A competitive product portfolio includes specialized pumps for different needs, all powered by efficient BLDC motors.
| Pump Type | Key Feature | Best Application | Flow/Head Profile |
|---|---|---|---|
| Solar Screw Pump | Handles Sand & Deep Wells | Domestic use, livestock in arid regions | Low Flow, Very High Head |
| Solar Plastic Impeller Pump | High Flow & Economical | Farm irrigation, pasture water supply | High Flow, Medium Head |
| Solar Stainless Steel Impeller Pump | Corrosion Resistant & Durable | Acidic water, high-end residential | High Flow, Medium-High Head |
This diverse lineup allows distributors to meet a wide range of customer needs, from a single home in a deep well area to a large farm requiring extensive irrigation.
The common thread is the high-efficiency BLDC motor, which ensures every system is powerful, reliable, and cost-effective to operate.
Booster Pumps for Pressure Drops at the Far End
Is your main pump working fine, but the shower at the other end of the house is just a trickle?
Pressure can be lost over long pipe runs or after passing through water treatment systems.
This common problem can be frustrating.
An inline booster pump is the perfect solution for this scenario. Installed downstream from your main pump or filtration system, it adds pressure back into the line. This effectively compensates for pressure loss, restoring a strong flow to all fixtures in your home.
When is a Booster Pump Necessary?
A booster pump is not always the first solution, but it is highly effective in specific situations.
You should consider a booster pump if you have already checked for simpler issues like clogged filters or half-open valves.
Here are the most common scenarios where a booster pump excels:
- Long Pipe Runs: In large homes or properties, pressure naturally drops as water travels through long pipes. A 100-foot run of 1-inch pipe can cause a pressure drop of 5 PSI or more, depending on the flow rate.
- Multi-Story Buildings: Water has to fight gravity to reach upper floors. For every 10 feet of vertical elevation, you lose about 4.3 PSI of pressure.
- Water Treatment Systems: Water softeners, sediment filters, and iron filters are notorious for causing pressure drops. A single sediment filter can reduce pressure by 5-10 PSI, and a water softener can reduce it by another 8-15 PSI. If your treatment system causes a total drop of over 20 PSI, a booster pump is an excellent remedy.
How Modern Booster Pumps Work
Today's booster pumps are smart, all-in-one units.
They are not just simple pumps but integrated systems.
A modern booster typically includes the pump, motor, a small internal pressure tank, and a pressure sensor or flow switch.
This design allows them to operate automatically without interfering with the main well pump.
When you open a faucet, the sensor detects the drop in pressure or the flow of water and activates the pump.
It then adds a specific amount of pressure to the line.
Many units offer adjustable pressure boosts, often in 7 PSI increments, allowing you to fine-tune the output.
For example, a modern booster can add anywhere from 20 to 40 PSI to your line pressure, turning a weak 25 PSI flow into a powerful 55 PSI flow.
The AC/DC Hybrid Advantage for Uninterrupted Water
For properties in off-grid or remote locations, water supply reliability is paramount.
What happens on a cloudy day or at night when a solar-powered system is not generating power?
This is where hybrid technology provides a revolutionary solution.
Advanced pump controllers are now designed with dual AC and DC power inputs.
This allows the pump system to be connected to solar panels (DC) and the grid or a generator (AC) simultaneously.
The intelligent controller automatically prioritizes solar power when sunlight is available.
It can even blend AC and DC power, using a small amount of grid power to supplement the solar input during partly cloudy conditions, maximizing the use of free solar energy.
When no solar power is available, the controller seamlessly switches over to the AC power source.
This ensures a worry-free, 24-hour water supply, combining the cost savings of solar with the reliability of the grid.
It is the ultimate solution for ensuring water is always available, day or night, rain or shine.
Conclusion
Adjusting your pump pressure correctly improves daily convenience and protects your investment.
It ensures efficiency and extends the life of your equipment.
For complex pressure issues, modern solutions like VFD systems or specialized booster pumps offer superior performance and reliability for any application.
FAQs
What PSI should my water pump be set at?
Most homes use a 40-60 PSI setting.
The pressure tank's air charge should be set 2 PSI below the cut-in pressure (e.g., 38 PSI for a 40/60 switch).
Why is my water pump pressure switch clicking on and off?
This is "short-cycling."
It is often caused by a waterlogged pressure tank, a leak in your plumbing, or an incorrect pressure differential setting on the switch.
How do I increase water pressure from my well?
Start by adjusting the pressure switch.
Also, check for and replace clogged water filters.
For significant boosts, consider a booster pump or a constant pressure system.
Is 70 PSI too high for water pressure?
It can be.
While some systems are set to 50-70 PSI, sustained pressure above 80 PSI can stress plumbing, fixtures, and appliances, leading to leaks and damage.
What happens if the pressure tank has too much air?
Too much air pre-charge reduces the tank's water storage capacity.
This will cause the pump to cycle more frequently and can lead to sputtering water at faucets.
How do I know if my pressure switch is bad?
Signs include the pump not turning on or off, frequent and erratic cycling, or visible damage like burnt and pitted electrical contact points inside the switch.
What is the difference between cut-in and cut-out pressure?
Cut-in pressure is the low-pressure point (e.g., 40 PSI) that signals the pump to turn on.
Cut-out pressure is the high-pressure point (e.g., 60 PSI) that tells it to shut off.
Can I adjust the pressure on a solar water pump?
Yes.
Many solar pumps use automatic controllers or VFDs.
Pressure can be adjusted on the controller, often to set a constant output pressure for the system.