Running a pool pump adds significantly to your electricity bill.
This constant energy drain can be frustrating.
Switching to solar power offers a sustainable and cost-effective solution to keep your pool sparkling clean.
To run a typical 2-horsepower pool pump for about 6.5 hours a day, you will generally need between 6 to 8 solar panels, each rated at around 300 watts.
The exact number depends heavily on your geographic location, local sun exposure, and your specific pump's energy consumption.

Understanding the right number of solar panels is crucial for an efficient and reliable system.
A miscalculation can lead to an underperforming pump or unnecessary extra costs.
This guide will walk you through a clear, step-by-step process to determine precisely how many panels your pool pump requires.
We will break down everything from calculating your pump's energy needs to accounting for real-world efficiency factors, ensuring you make an informed decision for your home or for your customers' projects.
Let's dive into the specifics to get your pool running on clean, free energy from the sun.
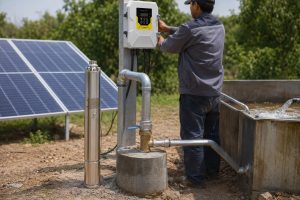
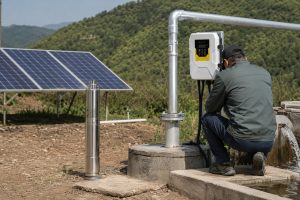
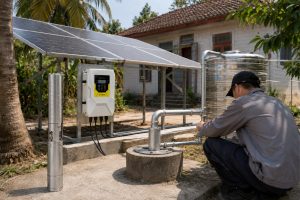
How Does a Solar Pool Pump Work?
A standard pool pump can be a major energy consumer in a household.
This high usage translates directly into expensive utility bills every_ _month.
Converting to a solar-powered system eliminates this recurring expense by harnessing free, abundant energy from the sun.
A solar-powered pool pump uses photovoltaic (PV) panels to convert sunlight into direct current (DC) electricity.
This electricity powers a highly efficient motor, often a Brushless DC (BLDC) motor, which then drives the pump to circulate and filter your pool water without drawing power from the grid.
At the core of a modern solar water pump system is the integration of several key technologies designed for maximum efficiency and durability.
This system isn't just about connecting a panel to a pump; it's a sophisticated setup that optimizes energy use throughout the day.
The Role of Photovoltaic (PV) Panels
The process begins with the solar panels.
These panels are composed of photovoltaic cells that create an electric field.
When sunlight strikes these cells, it energizes electrons, causing them to flow and generate DC electricity.
The amount of electricity produced is directly proportional to the intensity of the sunlight.
This is why the system's performance is highest around midday when the sun is at its peak.
The total power output, measured in watts, is determined by the number and efficiency of the panels installed.
For B2B distributors, offering panels with higher efficiency ratings (often above 21%) can be a significant competitive advantage, as it means fewer panels are needed to achieve the same power output, saving space and installation costs.
The Heart of the System: The Motor and Controller
The DC electricity generated by the panels flows to an intelligent controller, often an MPPT (Maximum Power Point Tracking) controller.
This device is the brain of the system.
Its primary job is to regulate the voltage and current from the panels to perfectly match the pump motor's requirements.
MPPT technology is crucial because it constantly adjusts the electrical operating point of the panels to extract the maximum possible power, even as sunlight conditions change due to clouds or the sun's angle.
This can boost the system's overall efficiency by up to 30%.
The controller then feeds this optimized power to the motor.
The most advanced systems use Brushless DC (BLDC) permanent magnet motors.
These motors are significantly more efficient (often over 90%) than their traditional AC counterparts.
They lack brushes, which are a common point of failure and energy loss in older motor designs.
This brushless design results in a longer lifespan, minimal maintenance, and quieter operation.
The motor converts the electrical energy into mechanical energy, spinning an impeller that draws water through the filter and circulates it back into the pool.
Hybrid Systems for 24/7 Operation
For applications requiring water circulation even on cloudy days or at night, AC/DC hybrid systems offer a versatile solution.
These systems feature a controller capable of accepting power from both solar panels (DC) and the electrical grid or a generator (AC).
The controller prioritizes solar power whenever it's available.
If sunlight fades, it can automatically blend in AC power or switch over completely to ensure the pump continues to operate without interruption.
This provides the best of both worlds: the cost savings and environmental benefits of solar, combined with the reliability of a grid connection.
Step 1: Calculate Your Pool Pump's Energy Consumption
Before you can size a solar array, you need a precise number for your pump's energy use.
Many pool owners only know their pump's horsepower, not its electricity consumption.
This lack of clarity makes it impossible to accurately plan a solar power system, leading to guesswork and potential system failure.
First, convert your pump's horsepower (HP) to watts by multiplying by 745.7.
Then, multiply that wattage by the number of hours the pump runs daily.
For example, a 2 HP pump (1,491.4 watts) running for 6.5 hours uses 9,694 watt-hours, or about 9.7 kWh per day.
Accurately calculating the pump's daily energy requirement is the foundational step upon which all other calculations are built.
A small error here can be magnified later, resulting in an improperly sized solar system that fails to meet your expectations.
Let's break down the process with more detail.
Converting Horsepower to Watts
The horsepower rating of a pump measures its mechanical output power, not its electrical input power.
To find the electrical power it consumes, we use a standard conversion factor.
- 1 Horsepower (HP) = 745.7 Watts
So, for a pump with a different rating, the calculation is straightforward.
A 1.5 HP pump, for instance, would consume:
- 1.5 HP × 745.7 = 1,118.55 Watts
This figure represents the power the pump draws every moment it is running.
Think of it as the speed of energy consumption.
It's important to use the pump's actual running wattage, which can sometimes be found on the manufacturer's label, as this will be more accurate than a general conversion.
However, the HP-to-watts conversion is a reliable starting point.
Determining Daily Operating Hours
Next, you need to establish how many hours per day your pump needs to run.
This is not a fixed number and varies based on several factors.
- Pool Size: Larger pools contain more water and require longer filtration times to "turn over" the entire volume.
A turnover is one complete cycle of all the water in the pool through the filter.
Most residential pools need at least one to two turnovers per day. - Usage: A heavily used pool accumulates more debris and contaminants, necessitating longer run times.
- Climate: In hotter climates, algae and bacteria grow faster, so pumps often need to run longer, typically 8-12 hours in the summer.
In cooler months, this can often be reduced to 4-6 hours.
For our initial example, we used 6.5 hours.
This is a reasonable average, but you should adjust it based on your specific needs.
To maintain water clarity, it's better to slightly overestimate run time.
Calculating Total Daily Energy (Watt-hours or kWh)
Once you have the wattage and the daily run time, the final calculation gives you the total energy consumption.
- Daily Energy (Watt-hours) = Pump Wattage (Watts) × Daily Run Hours (Hours)
Using our 2 HP pump example:
- 1,491.4 Watts × 6.5 Hours = 9,694.1 Watt-hours
Since electricity bills and solar system sizes are typically discussed in kilowatt-hours (kWh), we convert this number by dividing by 1,000.
- 9,694.1 Watt-hours / 1,000 = 9.69 kWh
This final figure, 9.7 kWh per day, is the target amount of energy your solar panel system must reliably generate each day just to power the pool pump.
| Pump Horsepower (HP) | Power in Watts (Approx.) | Run Time (Hours/Day) | Daily Energy (kWh) |
|---|---|---|---|
| 1.0 HP | 746 W | 6 Hours | 4.48 kWh |
| 1.5 HP | 1,119 W | 8 Hours | 8.95 kWh |
| 2.0 HP | 1,491 W | 6.5 Hours | 9.69 kWh |
| 3.0 HP | 2,237 W | 8 Hours | 17.90 kWh |
Step 2: Determine Your Location's Peak Sun Hours
You might assume that if the sun is up for 12 hours, you get 12 hours of usable solar power.
This is a common and costly mistake.
The intensity of sunlight varies greatly throughout the day, meaning your panels won't produce their maximum rated power all day long.
Ignoring this leads to undersized systems that can't run your pump as long as needed.
Peak sun hours are the equivalent number of hours per day when solar irradiance averages 1,000 watts per square meter.
This is the standard condition under which panels are rated.
A location with 5 peak sun hours provides the same total energy as 5 hours of full, direct, peak-intensity sunlight.
Understanding the concept of peak sun hours is crucial for accurately sizing any solar power system, whether it's for a small water feature or a large agricultural irrigation project.
It is the single most important environmental variable in your calculations.
What Are Peak Sun Hours, Really?
Solar panels have a power rating in watts (e.g., a 300-watt panel).
This rating is determined under strict laboratory conditions known as Standard Test Conditions (STC), which include a solar intensity (irradiance) of 1,000 W/m² and a cell temperature of 25°C.
In the real world, the sun's intensity is rarely at this exact level.
It is lower in the morning and evening, and higher at solar noon.
Clouds, haze, and pollution also reduce it.
A "peak sun hour" is not a measure of time in the conventional sense.
Instead, it's a measure of total solar energy received over a day.
It consolidates all the solar energy a location receives—the weak morning light, the intense midday sun, and the fading afternoon light—into a single, easy-to-use number.
For example, if your location gets 6 peak sun hours, it means the total solar energy you receive is equivalent to having the sun beat down at its peak intensity (1,000 W/m²) for exactly 6 hours.
This value makes calculating a solar system's potential daily output very simple.
How to Find Your Peak Sun Hours
Peak sun hours vary significantly based on your geographic location (latitude) and the time of year.
Locations closer to the equator receive more direct sunlight and have higher peak sun hour values.
Values are also higher in the summer and lower in the winter due to the tilt of the Earth's axis.
For planning purposes, it's best to use the value for the time of year with the least sunlight when your pump will be running, which is typically winter.
This ensures your system will perform adequately year-round.
Reliable data can be found from several sources:
- Government and Research Databases: Organizations like the National Renewable Energy Laboratory (NREL) in the United States provide detailed maps and data tables for specific locations.
- Online Solar Calculators: Many solar companies and informational websites offer free tools that provide peak sun hour data when you enter your address or zip code.
- Solar Installers: Professional installers have access to sophisticated software and specific local data to provide the most accurate figures.
Here is a summarized table showing approximate peak sun hours for different regions.
Note how much they can vary.
| Region/State | Average Daily Peak Sun Hours | Climate Note |
|---|---|---|
| Arizona, USA | 6.0 - 7.0 | High solar potential, ideal for solar |
| Germany | 2.5 - 3.5 | Lower solar potential, requires larger arrays |
| Central Australia | 5.5 - 6.5 | Excellent solar resources |
| United Kingdom | 2.0 - 3.0 | Often overcast, challenging for solar |
| South Africa | 5.0 - 6.0 | Very good solar potential year-round |
| Chile (Atacama) | 7.0 - 8.0 | Among the highest in the world |
Using the correct peak sun hour value for your specific location ensures your energy production estimate is realistic and that the solar system you design will meet the daily demands of your pool pump.
Step 3: Sizing the Solar System You Need
Once you know how much energy your pump uses and how much sun you get, you still need to connect the two figures.
Simply buying panels that add up to your pump's wattage isn't enough.
This approach fails to account for the limited hours of strong sunlight, guaranteeing your pump won't get enough power to run properly.
To determine the required size of your solar system in kilowatts (kW), divide your pool pump's daily energy consumption (in kWh) by your location's peak sun hours.
This calculation tells you the total power output the solar array must have to meet the daily energy demand.
This calculation is the bridge between your energy needs and the solar hardware required to meet them.
It converts the daily energy target (a quantity) into a system size (a capacity).
Let's continue with our running example to see how this works in practice and explore the nuances.
The Core Calculation for System Sizing
The formula is simple but powerful:
- Required Solar System Size (kW) = Daily Energy Consumption (kWh) / Peak Sun Hours (Hours)
Let's plug in the numbers from our 2 HP pool pump example, assuming the location is Los Angeles, California, which receives approximately 6 peak sun hours per day on average.
- Pump's Daily Energy Consumption: 9.7 kWh
- Local Peak Sun Hours: 6 hours
Now, we perform the calculation:
- Required Solar System Size = 9.7 kWh / 6 Hours = 1.62 kW
This result, 1.62 kilowatts (or 1,620 watts), is the minimum DC-rated power your solar panel array needs to generate under standard test conditions.
This means you need a combination of solar panels whose rated wattage adds up to at least 1,620 watts.
This system, in a location with 6 peak sun hours, should generate approximately 9.7 kWh of energy on an average day, perfectly matching the pump's requirement.
Why This Calculation Works
Think of it this way: a 1.62 kW system running at its full rated power for 6 "peak" hours will produce:
- 1.62 kW × 6 Hours = 9.72 kWh
This matches the 9.7 kWh our pump needs.
The formula essentially works backward from your total daily energy need, spreading it across the available hours of quality sunlight.
Considerations for Different Scenarios
The required system size will change dramatically based on the two key inputs: energy consumption and location.
-
Scenario 1: Same Pump, Different Location.
Let's move the same 2 HP pump to a location with less sun, like Seattle, Washington, which gets about 4 peak sun hours.- System Size = 9.7 kWh / 4 Hours = 2.43 kW
You would need a much larger solar array (2,430 watts) in Seattle to power the exact same pump.
- System Size = 9.7 kWh / 4 Hours = 2.43 kW
-
Scenario 2: Different Pump, Same Location.
Now, let's use a smaller, more efficient 1 HP pump (approx. 4.5 kWh/day) in Los Angeles (6 peak sun hours).- System Size = 4.5 kWh / 6 Hours = 0.75 kW
A smaller pump requires a significantly smaller and less expensive solar system (750 watts).
- System Size = 4.5 kWh / 6 Hours = 0.75 kW
This step highlights the importance of using high-efficiency pumps.
A pump equipped with a modern BLDC permanent magnet motor can reduce energy consumption by over 30% compared to a standard pump.
This directly translates into needing a smaller, more affordable solar array, a key selling point for distributors advising their clients on complete system solutions.
Reducing the load side (the pump) is often the most cost-effective way to reduce the generation side (the solar panels).
Step 4: Consider Solar System Losses
You've calculated the ideal system size, but the real world is not ideal.
Solar panels rarely operate at their full rated capacity due to numerous factors.
If you install a system based only on the ideal calculation, you'll find it consistently underperforms, especially on hot or slightly overcast days, leaving your pump without sufficient power.
To account for real-world inefficiencies, you must add a buffer to your calculated system size.
A standard industry practice is to increase the size by about 14% to compensate for losses from factors like panel temperature, wiring resistance, dirt accumulation, and inverter inefficiency.
This step is about moving from a theoretical calculation to a practical, real-world design.
Factoring in system losses ensures that your solar array will reliably deliver the required power day in and day out, not just under perfect laboratory conditions.
Let's delve into what these losses are and why they matter.
Breaking Down the Inefficiency Factors
The 14% buffer is not an arbitrary number; it's an industry-accepted average that accounts for several distinct types of energy loss.
This is often referred to as the "derate factor."
-
High Temperatures (4-6% loss): Solar panels are tested at a cell temperature of 25°C (77°F), but on a sunny day, a rooftop panel's surface can easily reach 65°C (150°F) or more.
Most photovoltaic panels lose efficiency as their temperature increases.
For every degree Celsius above 25°C, a typical panel's output drops by about 0.3-0.5%.
This is often the largest single source of performance loss. -
Soiling (2-3% loss): Dust, dirt, pollen, and bird droppings accumulate on the surface of the panels over time.
This layer of grime blocks a portion of the sunlight from reaching the photovoltaic cells, reducing output.
The loss depends on the local environment and cleaning frequency. -
Wiring and Connections (1-2% loss): As electricity travels through wires from the panels to the controller and motor, a small amount of energy is lost as heat due to electrical resistance.
Using properly sized wires can minimize this, but it cannot be eliminated entirely. -
Inverter/Controller Efficiency (3-5% loss): No electronic device is 100% efficient.
The MPPT controller or inverter that manages the power a solar pump system has its own small energy consumption and loses a fraction of the energy that passes through it as heat.
High-quality controllers have efficiencies of 95-98%, but this still represents a small loss. -
Panel Mismatch and Aging (1-2% loss): Not every panel in an array is identical; there are minor manufacturing variations.
Over time, panels also degrade slightly, losing a tiny fraction of their output capability each year (typically less than 0.5% per year).
Applying the Buffer
To apply this correction, you simply multiply your calculated system size by 1.14 (which is equivalent to adding 14%).
Let's return to our example of the 2 HP pump in Los Angeles.
In Step 3, we calculated a required system size of 1.62 kW.
- Adjusted Solar System Size = Initial System Size × 1.14
- Adjusted Solar System Size = 1.62 kW × 1.14 = 1.85 kW
After accounting for real-world losses, our required system size has increased from 1,620 watts to 1,850 watts.
This larger, more robust system is far more likely to meet the 9.7 kWh daily energy target consistently, providing a much better user experience and greater system reliability.
For professional installers and distributors, building this buffer into every quote is a mark of quality and ensures customer satisfaction.
Step 5: Calculate the Number of Solar Panels
You've determined the total wattage your solar array needs.
But how does that translate into a physical number of panels?
Telling a customer they need "1.85 kW of solar" is abstract; they need to know how many panels will be installed on their roof or property.
This final step turns the system size into a concrete, easy-to-understand quantity.
To find the number of panels required, divide the adjusted solar system size (in watts) by the wattage of a single solar panel.
Since you can't install a fraction of a panel, you must always round the result up to the next whole number to ensure you have enough power.
This final calculation is straightforward, but the choice of panel wattage can have significant implications for the cost, required space, and installation of the system.
Let's complete our example and explore these implications.
The Final Calculation
First, we need to convert our adjusted system size from kilowatts (kW) to watts (W) by multiplying by 1,000.
- Adjusted System Size in Watts = 1.85 kW × 1,000 = 1,850 Watts
Next, you need to choose the wattage of the solar panels you plan to use.
The power rating of residential and commercial solar panels typically ranges from 250 watts to over 400 watts.
Higher-wattage panels are generally more efficient and require less space, but they also tend to be more expensive per panel.
For this example, let's assume we are using common 300-watt panels.
The formula is:
- Number of Panels = Total Required Wattage / Wattage of a Single Panel
- Number of Panels = 1,850 W / 300 W = 6.17 Panels
Always Round Up
The result is 6.17 panels.
Since it is physically impossible to install 0.17 of a solar panel, you must round this number up to the next whole integer.
- Final Number of Panels = 7
Therefore, to reliably power your 2 HP pool pump in a location like Los Angeles, you will need 7 solar panels, each with a rated output of 300 watts.
Rounding up is a critical part of the process.
If you were to round down to 6 panels, your array would only have a total capacity of 1,800 watts (6 panels × 300 W), which is less than the 1,850 watts you calculated you need.
This 50-watt shortfall could mean the pump shuts off earlier in the afternoon than desired.
Impact of Panel Wattage
The choice of panel wattage affects the final count and the physical footprint of the array.
Let's see what happens if we use higher-wattage panels, for example, 370-watt panels, for the same 1,850-watt system.
- Number of Panels = 1,850 W / 370 W = 5 Panels
In this case, you only need 5 panels.
This has several advantages:
- Less Space: The total area required for the installation is smaller, which is crucial for homes with limited roof space.
- Fewer Components: You will need less racking and fewer electrical connections, which can slightly reduce installation time and labor costs.
- Aesthetics: A smaller array can be less visually intrusive.
As a B2B supplier, offering a range of panel wattages allows your clients (the installers and retailers) to design more flexible systems tailored to each customer's budget and property constraints.
Providing high-efficiency, high-wattage panels can be a key differentiator in a competitive market.
Two Main Options for Powering Your Pump
You know how many panels you need, but how should they be connected?
Pool owners face two distinct strategies for implementing a solar solution.
Making the wrong choice can lead to wasted energy or an unnecessarily complex installation.
It's vital to understand the pros and cons of each approach before committing to a system design.
You can either power your existing AC pool pump using a large, grid-tied solar system that also powers your home, or you can install a completely separate, off-grid DC solar pump system with its own dedicated panels.
Each option has unique benefits regarding efficiency, cost, and complexity.
The decision between an integrated grid-tied system and a dedicated off-grid system depends heavily on the customer's existing infrastructure, budget, and long-term energy goals.
A thorough understanding of both paths is essential for any professional providing solar solutions.
Option 1: Power Your Pump with a Grid-Connected Home Solar System
This is the most common approach for homeowners who are already considering or have installed a whole-home solar system.
- How it Works: A standard grid-tied solar system is installed on the roof to offset the entire home's electricity usage.
The pool pump, which is typically a standard AC pump, remains connected to the home's main electrical panel.
You simply set the pump's timer to run during the sunniest part of the day (e.g., 10 a.m. to 4 p.m.).
During these hours, the electricity generated by your solar panels will first power the appliances running in your home, including the pool pump.
Any excess power is sent back to the grid, often earning you a credit (feed-in tariff).
Pros:
- Maximum Energy Utilization: No solar energy is ever wasted.
If the pump isn't running, the solar power is used by other appliances or exported to the grid. - Simplicity: There's no need to replace your existing AC pump or run new, dedicated wiring from the panels to the pump.
- Reliability: On very overcast days, the pump can still draw power from the grid to ensure filtration cycles are completed.
Cons:
- Requires a Large System: To power both your home and the energy-intensive pump, you'll need a sizable and more expensive solar system (typically 6 kW or larger).
- Grid Dependency: You still need permission from your local utility company to connect the system to the grid, a process that can sometimes be slow.
Option 2: Install a Dedicated Off-Grid DC Solar Pump
This approach treats the pool pump as its own standalone system, completely separate from the house and the utility grid.
- How it Works: You replace your standard AC pump with a highly efficient DC solar pump.
A small solar array (like the 7-panel system we calculated) is installed, and the panels are wired directly to the DC pump's controller.
When the sun shines, the pump runs.
When there's no sun, the pump is off.
Pros:
- Energy Independence: You will never pay for grid electricity to run your pump again.
The system is immune to power outages. - No Utility Approval: Since the system is not connected to the grid, you generally don't need permission from the electric company to install it.
- High Efficiency: Dedicated DC solar pumps with BLDC motors are far more efficient than their AC counterparts, meaning you may need fewer panels compared to powering an AC pump.
Cons:
- Requires a New Pump: You must bear the upfront cost of replacing your existing pump with a specialized DC model.
- Wasted Potential Energy: If the sun is shining brightly but the pump has already completed its filtration cycle, any extra power the panels could be producing goes to waste.
- No Grid Backup: The pump cannot run on cloudy days or at night without adding a battery storage system, which significantly increases cost and complexity.
Conclusion
Determining the right number of solar panels involves a clear five-step process: calculate pump energy use, find your peak sun hours, size the system, add a buffer for losses, and divide by panel wattage.
FAQs
How do I calculate how many solar panels I need to run a pool pump?
Calculate your pump's daily kWh, divide by your local peak sun hours, add 14% for losses, then divide by the panel's wattage and round up.
What are peak sun hours and why do they matter for solar pool pumps?
Peak sun hours measure a day's total solar energy.
This value is crucial because it directly determines how much energy your panels can produce daily to power the pump.
Why do I need to add a 14% buffer for solar system losses?
This buffer accounts for real-world efficiency reductions from heat, dirt, and wiring resistance, ensuring your system performs reliably and meets the pump's power needs consistently.
Can I run my existing AC pool pump on solar panels?
Yes, you can power an existing AC pump with a larger, grid-tied home solar system.
However, a dedicated DC pump is often more efficient for an off-grid setup.
How much does it cost to convert a pool pump to solar?
Costs vary based on pump size and location, but expect to invest a few thousand dollars for a dedicated system including a DC pump and panels.
Will a solar pool pump work on cloudy days?
A standard solar pump's performance will be significantly reduced on cloudy days.
Hybrid AC/DC systems or systems with battery backup are needed for continuous operation.
Is a dedicated DC solar pump more efficient than an AC pump?
Yes, DC pumps with brushless motors are inherently more energy-efficient than traditional AC pumps, often allowing you to use a smaller and more affordable solar array.
Can I install solar panels for my pool pump myself?
While possible for those with strong electrical skills, professional installation is highly recommended to ensure safety, proper wiring, and optimal performance of the system.